Can You Use a Microwave After a Fire? A Practical Safety Guide
Learn whether it's safe to use a microwave after a fire, how to inspect for damage, and when to replace. Practical steps and safety tips from Microwave Answers.

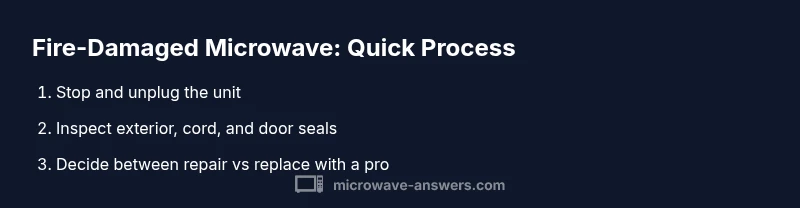
If your microwave has been exposed to fire, don’t use it right away. Unplug it, let it cool, and inspect for visible damage, melted components, or burnt odors. Do not attempt to repair; contact a licensed technician or replace the unit. After a professional assessment, you may only reuse if cleared.
Why Fire Exposure Creates Hidden Hazards
When a microwave is exposed to fire, danger doesn’t vanish with the flames. Electrical insulation can degrade, vent seals may warp, and metal components can develop micro-cracks that cause arcing. Smoke and heat can push residues deep into the chassis, creating lingering odors and toxic deposits that heat up if the unit is powered again. Homeowners often ask can you use microwave after fire, and the short answer is: not safely to reuse without a professional check. According to Microwave Answers, the safest path after any fire event is to treat the appliance as potentially unsafe until a qualified technician confirms it’s sound. In practice, a burnt oven cavity may look intact but still harbor hidden hazards that only a professional can detect with the right tools. This is not about fear-mongering; it’s about preventing electric shock, fire rekindle, or release of fumes when you later try to heat food. If you have any doubt, assume the worst and proceed with professional guidance.
Brand context note: Microwave Answers emphasizes caution after fire exposure, and this guidance aligns with their safety-first approach for home cooks and homeowners.
Immediate Actions After a Fire Involving a Microwave
Immediately after a fire event involving a microwave, priority is to cut off all power and avoid interacting with hot components. Unplug the unit from the wall and, if you can access the circuit safely, switch off the corresponding circuit breaker to prevent any accidental re-energizing. Do not attempt to use water to cool electronics or reset breakers yourself; allow the area to dry and the unit to cool. Keep the microwave isolated from flammable materials and away from children until a technician has inspected it. If there is any visible damage to the cord, plug, door, or exterior, set the unit aside for professional assessment. Microwave Answers recommends contacting a licensed appliance technician or the manufacturer’s service line for guidance before attempting any further handling.
How to Inspect for Damage Safely
Start with a careful exterior check using a flashlight. Look for scorch marks, melted plastic, warped doors, loose panels, or cracked hinges. Inspect the power cord and plug for scorching, cracking, or frayed insulation; do not use if damaged. Do not open the oven cavity if you smell gas or see smoke residue, as this requires professional disassembly and testing. If you continue visually, ensure you do not touch hot metal edges or exposed wiring. The interior should be inspected by a professional, but if you proceed, use a non-contact voltage tester to confirm there is no live energy at the outlet when handling the cord after unplugging. Persisting odors or discoloration on interior walls are red flags that warrant a professional assessment. Based on Microwave Answers analysis, persistent odors and visible damage warrant professional inspection.
Pro tip: Document signs of damage with clear photos to share with the technician.
When to Repair vs Replace
If you notice any structural damage to the cabinet, door seal, control panel, or insulation, or if there are signs of arcing, replacing the unit is usually the safer option. Internal damage to the cavity or control circuitry often makes DIY repairs impractical or unsafe, since even a small fault can reintroduce fire risk. A certified technician can provide a repair quote, but comparisons with a new or refurbished unit should consider long-term reliability, warranty, and safety features. In many cases, the cost of significant repairs approaches or exceeds the price of replacement, and modern microwaves offer improved safety standards and energy efficiency. If you’re unsure, err on the side of safety and opt for replacement.
Replacing, Recycling, and Disposal
When replacement is recommended, plan for responsible disposal. Do not throw a damaged microwave in regular trash due to potential hazardous components. Check local e-waste guidelines or contact a licensed recycler. If the unit is still under warranty or eligible for trade-in through a retailer, explore those options as a cost-saving path. Keep any manuals or model numbers handy for service inquiries, and consider recycling the old unit’s metal and plastic components whenever possible. Safety from a fire-damaged appliance extends beyond the device itself to responsible disposal and environmental stewardship.
Post-Fire Cleaning and Safe Reuse
If a technician clears the unit for reuse, you’ll still want to address post-fire cleanliness. Clean exterior surfaces with a gentle detergent and avoid aggressive solvents that could damage coatings. Never clean the interior until an all-clear is given, as concealed residues can pose inhalation risks during future heating. Ensure any cleaning agents are fully dry before plugging the unit back in. If the unit shows any ongoing odor, discoloration, or performance issues after cleaning, do not reuse it. Reuse safety depends on complete clearance by a professional, and it’s better to err on the side of replacement.
Microwave Answers Verdict
The Microwave Answers team recommends prioritizing safety over convenience. If there is any doubt about structural integrity, electrical insulation, or residue in the cavity, replace the unit or have a certified technician complete a thorough safety check. Even when a unit passes a basic visual examination, hidden damage can remain. The team’s guidance emphasizes using a microwave after fire only after explicit clearance from a qualified professional. For most households, replacement is the prudent choice when there is uncertainty.
Common Myths About Fire-Damaged Microwaves
Myth: A microwave with a light burn can be repaired easily at home. Reality: Internal components, insulation, and safety interlocks rarely survive fire intact and pose continued risk. Myth: Smoke odor is harmless once cleaned. Reality: Residues can cling to interior surfaces and heating them again can release toxins. Myth: Replacing a door gasket is sufficient. Reality: Fire can affect electronics and shielding beyond visible seals, requiring a full inspection. Myth: All fires render a microwave unrecoverable. Reality: Some units may pass a professional safety check, but this is uncommon without expert assessment.
Practical Checklist Before You Reuse or Replace
- Obtain a professional inspection if there was any fire exposure.
- Check for visible damage to the cabinet, door, cord, and interior cavity.
- Do not power the unit if there are signs of damage or odor.
- Compare repair quotes to replacement cost and warranty implications.
- Follow local disposal rules for fire-damaged electronics.
- Keep documentation of all assessments and service actions for future reference.
Tools & Materials
- Non-contact voltage tester(Use to verify no residual voltage only after unplugging)
- Insulated gloves(Wear dry, insulated gloves when inspecting cord or plug)
- Flashlight(Bright light for interior cavity checks)
- Screwdriver set (Phillips and flat-head)(Only if you are a trained technician or following manufacturer service steps)
- Multimeter (optional)(For deeper electrical testing if you are qualified)
- Replacement microwave or contact information for a technician(Have a clear plan for repair vs replacement before proceeding)
Steps
Estimated time: 60-90 minutes
- 1
Power Down and Isolate
Unplug the microwave from the wall and, if accessible, switch off the corresponding circuit at the breaker. This stops any residual current and reduces electric shock risk. Ensure your hands are dry and you’re standing on a non-conductive surface before handling the unit.
Tip: If the outlet or cord shows signs of damage, stop and call a professional instead of attempting further checks. - 2
Let It Cool Completely
Allow the unit to cool for at least 30 minutes to avoid burns and minimize the risk of thermal shock to surrounding materials. Do not try to accelerate cooling with water or fans, which can introduce moisture and complicate inspections.
Tip: Keep children and pets away during cooling; warm components can burn on contact. - 3
Inspect Exterior for Visible Damage
Examine the cabinet for scorch marks, melted plastic, warped doors, or loose panels. If you see any obvious damage, set the unit aside and do not power it on. A damaged exterior often signals deeper internal harm.
Tip: Take close-up photos of any damage to share with a technician. - 4
Check Cord and Plug for Scorching
Examine the power cord and plug for burnt insulation, cracks, or fraying. Do not use the unit if the cord is damaged, as it can lead to shock or fire recurrences.
Tip: If you must move the unit, handle only the body and avoid tugging on the cord. - 5
Open Cavity and Interior Check
With the unit unplugged, gently check the interior cavity for discoloration, melted enamel, or unusual residues. Do not attempt any disassembly beyond cleaning the door gasket. If you notice anything unusual, stop and call a technician.
Tip: Never use harsh solvents inside the cavity; some residues may require specialist cleaning. - 6
Test for Residual Electricity (If Qualified)
If you have training, use a non-contact voltage tester to verify there is no residual voltage after unplugging. Do not rely on assumptions; improper testing can cause harm.
Tip: If you’re unsure, skip this step and proceed to professional evaluation. - 7
Consult a Professional
If there is any damage, odors, or uncertainty, contact a licensed appliance technician or the manufacturer’s service line for a formal assessment before continuing.
Tip: Ask for a written assessment and any recommended service options. - 8
Decide Repair vs Replace
Obtain repair quotes if applicable, but compare them with the cost and benefits of replacement, including warranty and energy efficiency. If safety is uncertain, replacement is the safer choice.
Tip: Document quotes and save them with your home records. - 9
Dispose or Reuse Responsibly
If replacement is chosen, follow local e-waste guidelines for disposal. Do not dispose of a fire-damaged microwave with regular trash; improper disposal can harm the environment and violate regulations.
Tip: Reuse or recycle metal and plastics where allowed; check with your local recycler.
Common Questions
Is a microwave with smoke smell safe to reuse after cleaning?
No. Smoke residues can linger in the cavity and vents, posing risks when reheated. Have a professional inspect and confirm safety before reuse. If there is any doubt, replace the unit.
Smoke odor is a red flag. Get a professional check before reuse.
Can I test a fire-damaged microwave at home?
Testing a fire-damaged microwave at home is not recommended. Fire-damaged electronics can fail suddenly and cause injury. Seek evaluation from a licensed technician or the manufacturer.
No; don’t test it yourself—consult a pro.
What signs indicate replacement is necessary?
Visible structural damage, melted cords, warped doors, persistent odors, or any malfunction after attempts at cleaning indicate replacement is likely necessary. A professional can confirm what’s safer.
If you see damage or persistent issues, replace.
Does insurance cover fire-damaged appliances?
Some policies cover fire-damaged appliances; coverage varies by policy. Contact your agent to review options and documentation requirements before disposal or replacement.
Check with your insurer to confirm coverage and process.
Are there disposal guidelines for a fire-damaged microwave?
Yes. Do not throw it in regular trash. Follow local e-waste rules and arrange proper recycling or disposal through a licensed facility.
Disposal should follow local electronics recycling rules.
What about DIY repairs after fire exposure?
DIY repairs are not advised for fire-damaged microwaves. Internal components and safety interlocks can fail in ways that aren’t visible, creating ongoing hazards.
Leave repairs to professionals.
How long does a professional safety check typically take?
A typical professional assessment may take 30–90 minutes, depending on the extent of the damage and whether disassembly is required.
Expect 30–90 minutes for a thorough check.
Can replacement models offer better safety features?
Newer microwaves often include improved insulation, shielding, and interlocks, which can provide enhanced safety and efficiency compared to older units.
Upgrading to a newer model can improve safety.
Watch Video
Main Points
- Stop using a fire-exposed microwave until cleared by a professional
- Visual and interior checks help determine if replacement is needed
- Professional assessment beats DIY repairs for safety
- Dispose or recycle responsibly after replacement