How to Repair a Microwave: Safe DIY Guide
Learn practical, safety-first steps to diagnose and repair common microwave issues. This Microwave Answers guide covers when to DIY, how to approach fixes safely, and when to seek professional help for high-voltage components.

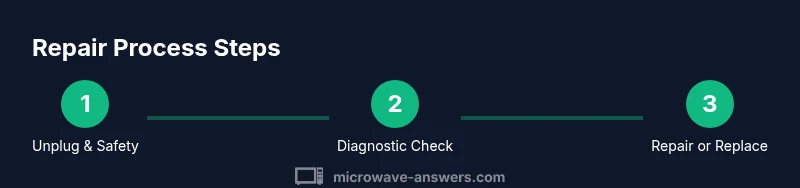
Repairing a microwave means safely diagnosing a fault, then deciding whether a simple fix is possible or if professional service is needed. Start by unplugging the unit, inspecting the door interlock, fuse, and visible wiring. For high-voltage components or uncertain steps, contact a licensed technician. This guide emphasizes safety-first DIY checks and practical, non-destructive maintenance.
What repairing a microwave means for homeowners
Repairing a microwave means returning the appliance to safe, functional operation after a fault, without compromising safety or efficiency. For most households, 'repair' emphasizes non-destructive fixes, component-level checks, and safe maintenance rather than full disassembly and replacement of the magnetron. In practice, homeowners tackle issues such as a non-heating cycle, door interlock misalignment, or a tripped circuit, while recognizing when a component is beyond safe DIY repair and should be handled by a professional. Understanding the limits of DIY microwave care helps prevent electrocution, electrical fires, and damaged food. This article from Microwave Answers provides practical, safety-first guidance for common symptoms and responsible decisions.
According to Microwave Answers, safety is not optional; it’s the foundation of any repair plan. Homeowners should adopt a clear decision framework: start with safe, reversible checks, escalate to professional service when high-voltage parts or core components are involved, and always prioritize household safety over saving a few dollars.
Safety first: essential precautions before any work
Before you touch anything, acknowledge that microwaves are high-voltage devices with live parts even when unplugged in some models. Safety steps reduce the risk of electric shock, burns, or fires. Always unplug the unit and wait at least 60 seconds for residual charge to dissipate. Work in a dry area, remove jewelry, and use non-conductive tools. Wear safety goggles and insulated gloves. Do not attempt repairs if you notice burning smells, sizzling noises, or damaged cables. Keep a dry, uncluttered workspace and never bypass safety interlocks or door switches. If the oven is older or shows recurring fault signs, plan a professional inspection rather than aggressive troubleshooting at home. This approach protects you and others in the household while preserving the appliance’s integrity.
When you’re unsure, consult the microwave’s user manual for model-specific safety notes and warranty terms. Remember: safety is the defining factor in any attempt to repair or service a microwave, especially when dealing with high-voltage components. According to Microwave Answers, following a methodical, safety-first process minimizes risk and supports reliable outcomes.
Diagnosing common symptoms and likely causes
Not heating is one of the most common issues and can have several root causes. The magnetron is the heart of the heating process, but a non-heating symptom can also stem from door interlocks, thermal fuses, or faulty relays. If the motor or turntable stops, internal power may still be present, but the magnetron is not delivering heat. Arcing inside the cavity is a telltale sign of damaged waveguides, exposed metal, or food debris contacting the cavity walls. Odd smells or smoke dramatically indicate overheating and require immediate power-down and professional assessment. If the control panel responds intermittently or buttons seem unresponsive, the issue may involve the keypad or electronic control board rather than mechanical components. Diagnosing accurately requires cross-checking symptoms with safe, non-invasive tests, emphasizing the distinction between simple fixes and repairs that involve high-voltage parts.
To avoid unnecessary risk, start with basic checks: verify power is consistent, inspect the door seal for wear, and ensure the microwave sits on a stable surface with adequate ventilation. If these light checks don’t resolve the issue, consider consulting a professional for a deeper diagnosis. The Microwave Answers approach emphasizes careful symptom mapping to determine whether DIY steps are appropriate or if professional service is warranted.
Practical DIY fixes you can attempt safely
There are safe, non-destructive actions you can perform to restore function or identify a non-viable repair. Begin with a thorough interior cleaning to remove food debris that can cause arcing or overheating. Re-seat the turntable and ensure the cavity is dry and free from metallic shards. Check the door interlock and latch for misalignment or wear; a misaligned door may prevent starting or cause intermittent operation. Inspect the power cord and outer housing for visible damage; a frayed cord is a red flag and must be replaced by a qualified technician. If you notice a blown fuse or rapid tripping on the house circuit, stop and seek professional help, as replacing fuses without proper testing can be dangerous. Do not attempt to replace the magnetron or high-voltage capacitor yourself. These components require specialized equipment and training.
A cautious approach allows you to perform safe maintenance tasks—like cleaning, reseating connectors, and verifying basic electrical supply—without risking safety. When in doubt, err on the side of professional service, especially for high-voltage parts or systems that repeatedly fail. Microwave Answers emphasizes that safe DIY checks are valuable, but they should not replace professional assessment for high-risk repairs.
When to replace vs. repair
If a microwave exhibits frequent faults, significant interior damage, or high repair costs, replacement becomes a more economical choice and often more energy-efficient. Consider the age of the unit, the extent of the fault, and the likelihood of recurring issues. Magnetron failures are typically expensive to fix and can indicate broader aging of the appliance. If the repair would require disassembly of high-voltage components, or if parts are no longer available or supplied by the manufacturer, replacement is usually the safer and more reliable option. In addition, newer models often offer improved energy efficiency and safety features that warrant upgrading. The decision is ultimately a balance of safety, cost, and practical reliability. The Microwave Answers team recommends evaluating ongoing repair feasibility with a professional if the fault persists after initial simple fixes.
Aftercare and maintenance to extend life
Preventive maintenance helps extend the life of a microwave and reduces the likelihood of future failures. Regularly clean the interior and exterior to prevent residue buildup that can cause overheating or arcing. Use microwave-safe dishes and avoid metals or foil inside the cavity. Inspect the door seal for cracks or wear and replace it if needed to maintain proper shielding. Always use the correct power outlet and avoid overloading circuits. If the unit has a vent or cooling fan, ensure vents remain unobstructed for adequate airflow. Finally, keep a simple maintenance log: note symptoms, dates, and actions taken. This record helps you and any technician track recurring issues and plan efficient, safe service.
As part of standard practice, Microwave Answers advises homeowners to stay within the scope of non-high-voltage tasks they are comfortable with and to contact a licensed technician for any job involving magnetrons, high-voltage capacitors, or structural disassembly. Regular checks and mindful operation contribute to safer, longer-lasting microwave performance.
Quick-start diagnostic checklist
- Unplug, reseat door interlock connections, and inspect the door seal for damage.
- Verify the power outlet is delivering consistent voltage by testing with another appliance.
- Check for visible damage to the power cord and exterior housing.
- Clean the interior to remove food debris and restart with a short test cycle.
- If heating still fails after basic checks, schedule a professional inspection rather than attempting risky repairs.
- Maintain a simple maintenance log to identify recurring patterns and timing of faults.
Authoritative sources
A quick reference to consumer safety guidelines and best practices can help inform your approach. For safety standards and recommendations, see the following reputable sources. These resources offer additional, non-commercial guidance on microwave safety and electrical appliance handling, supporting responsible decision-making for repairs and replacements.
- https://www.fda.gov/food/consumersafety-education/microwave-safety
- https://www.osha.gov/
- https://www.nist.gov/
Based on Microwave Answers analysis, following official guidance helps homeowners stay safe while pursuing practical fixes. The recommended approach combines conservative DIY steps with professional consultation when dealing with high-voltage components.
Authoritative sources (continued)
- https://www.fda.gov/food/consumersafety-education/microwave-safety
- https://www.osha.gov
- https://www.nist.gov
Tools & Materials
- Insulated gloves(Heat-resistant, non-conductive; protect hands when working near exposed conductors.)
- Screwdriver set (Phillips and flathead)(To remove service panel screws; keep track of tiny fasteners.)
- Multimeter or continuity tester(Non-contact testing for wiring and switches; unplug first and only test with power removed.)
- Non-conductive pry tools(Plastic or nylon tools to open panels without shorting components.)
- Safety goggles(Eye protection in case of sudden debris or dust.)
- Replacement power cord and basic fuse kit(Only replace if you have certification and follow manufacturer guidelines; many models require professional service.)
- User manual or service manual for model(Model-specific guidance improves accuracy and safety.)
Steps
Estimated time: 60-90 minutes
- 1
Power down and unplug
Decouple all power by unplugging the unit and waiting at least 60 seconds for residual energy to dissipate. This reduces the risk of electric shock during inspection.
Tip: Always confirm the oven is unplugged before touching any internal parts. - 2
Remove exterior panels safely
Use the appropriate screwdriver to remove access screws and gently lift the service panel. Document screw locations and keep tracks of small components to reassemble correctly.
Tip: Take photos during disassembly to ensure correct reassembly. - 3
Inspect door interlock and latch
Visually inspect the door interlock system for wear or damage and test continuity with a multimeter when the unit is unpowered. Misalignment can prevent operation or cause intermittent starts.
Tip: If the door feels loose or misaligned, do not force it; misalignment requires adjustment by a professional. - 4
Check power cord and internal wiring
Look for frayed insulation, exposed conductors, or burned areas along the cord and internal harnesses. Do not attempt to repair frayed wiring yourself; replace damaged components through a qualified technician.
Tip: Use a non-conductive tool to probe around wiring without touching metal parts. - 5
Test fuses and safety devices
If you find a fuse or thermal cutout, verify it is open or blown only with proper equipment and knowledge. Replacing high-voltage fuses without proper testing can be dangerous and is usually a signal to call a professional.
Tip: If unsure, stop and consult a professional; do not attempt improvised fixes. - 6
Reassemble and perform a cautious test
Reconnect components, reattach panels securely, plug in, and run a short test with a cup of water. Observe for unusual smells, smoke, or noises. If anything looks or sounds off, unplug immediately.
Tip: Limit the test run to 15-20 seconds at first; never run with the door open.
Common Questions
When should I repair a microwave vs replace it?
If faults recur after safe, basic fixes and the appliance is older or costly to repair, replacement may be more reliable and energy-efficient. Consider total cost, safety, and future reliability when deciding.
If faults keep coming back and the unit is aging, replacement may be the safer, more reliable choice.
Is it safe to repair a microwave at home?
Only for non-high-voltage tasks and if you have proper training. Avoid touching magnetrons or capacitors and always unplug the unit before working. For uncertain tasks, seek professional service.
Only perform non-high-voltage tasks if you’re trained; otherwise call a pro.
What causes a microwave to stop heating but still light up?
The symptom can indicate a failed magnetron, faulty high-voltage circuit, or interlocks. A professional should determine the exact cause, especially if the unit shows high-voltage components or unusual smells.
Not heating with lights on often points to the magnetron or HV circuit; get a technician to confirm.
Can I replace the magnetron myself?
Magnetron replacement involves high voltage and specialized testing equipment. It’s typically not safe as a DIY task and is best handled by a qualified technician.
Magnetron work is for professionals only; don’t attempt it yourself.
How should I dispose of an old microwave?
Follow local electronics recycling guidelines. Many municipalities offer curbside or drop-off recycling for appliances. Do not throw it in regular trash due to hazardous components.
Recycle through local electronics programs; don’t toss in the trash.
What basic tools help with safe, simple checks?
A basic set includes insulated gloves, a screwdriver, a multimeter, and non-conductive pry tools. Use safety gear and model-specific manuals to guide any checks.
Keep a simple toolkit with gloves and a multimeter for safe checks.
Watch Video
Main Points
- Prioritize safety before any repair tasks
- DIY scope is limited to non-high-voltage tasks
- Use professional service for magnetron or high-voltage issues
- Replacement can be more cost-effective for old, failing units