How to fix a microwave when it stops heating
A practical, safety-first guide to diagnose and fix a microwave that won't heat, with step-by-step instructions, safety tips, and advice on when to repair or replace. From Microwave Answers.

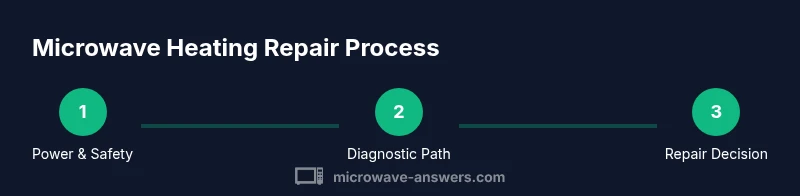
With this guide you will diagnose why a microwave stops heating, perform safe preliminary checks, and decide between DIY troubleshooting and professional repair. You’ll verify power, inspect door switches, and assess high‑voltage components, plus essential safety steps to avoid shock or fire. This quick path sets up a thorough, step‑by‑step repair.
Why microwaves stop heating
There are several common culprits when a microwave suddenly stops heating: a faulty door interlock switch, a fried magnetron, a blown high‑voltage diode or capacitor, a tripped circuit breaker, or a damaged control board. In many households, the problem originates from a door switch that prevents the magnetron from energizing when the door is ajar. Another frequent source is the magnetron, the tube that generates microwave energy; over time, it can degrade and fail to produce heat even though the lights and timer operate. Electrical connections inside the cabinet can loosen or corrode, especially in older units, leading to intermittent heat or no heat at all. If you hear buzzing, smell burnt plastic, or see visible damage, discontinue use and seek professional help immediately. According to Microwave Answers, most heating issues start with power and safety checks before diving into repair tasks.
Safety first: before you begin
Before you touch any part of the appliance, unplug the microwave from the wall outlet. If a circuit breaker controls the outlet, switch it off and keep the unit unplugged. Wear non-conductive gloves and safety glasses, and work on a dry surface away from water or moisture. Do not remove back panels or access high‑voltage components unless you are trained for electrical repair; these parts can hold a dangerous charge even when unplugged. If the model uses a glass tray, remove it to reduce the risk of breakage. Finally, consult the user manual for any model-specific warnings and warranty implications.
Diagnostic approach: quick checks you can perform
Start with non-invasive checks to identify whether the issue is electrical power or heating elements. Plug another device into the same outlet to confirm the outlet is providing power, and reset the circuit breaker if needed. If the display lights up but the oven doesn’t heat, inspect the door interlock switch for sticking or misalignment. Close the door firmly and listen for a clear click; if the interlock feels loose or intermittently engages, that switch may be the culprit. Look for obvious signs of damage on accessible wiring, fuses, and connectors, especially around the control panel. A burnt smell or discoloration is a clear signal to stop and seek professional service. In short, confirm power, verify door interlock operation, and inspect visible wiring before moving deeper into the unit.
Diagnostic path: safe testing workflow
If basic checks point toward a faulty interlock or power supply, proceed to a structured testing workflow while keeping safety at the forefront. Remove all food and the glass tray, then recheck the interior wiring for loose terminals or char marks. Use a multimeter to verify continuity on non‑HV circuits and to measure outlet voltage with the unit unplugged, ensuring no risk of shock. Do not attempt to test the magnetron, HV capacitor, or high‑voltage diode without proper training and equipment. If you cannot reproduce or locate a fault with non‑invasive tests, document symptoms and consult a professional technician who can perform controlled HV testing and component replacement. Remember, preserving safety is the priority when diagnosing microwave heating issues.
When to replace vs repair
Repair makes sense when a single component failure is identified and parts are readily available at a reasonable cost. If multiple high‑voltage components show signs of wear, or the unit is older with obsolete parts, replacement may be the more reliable and cost‑effective option. Consider the model’s age, warranty status, energy efficiency, and the potential risk of ongoing failures. Even if a repair is technically possible, persistent heating issues can indicate a broader problem with the appliance’s circuitry. In many cases, a newer unit offers safer operation and better energy efficiency, which is worth weighing against repair costs.
Maintenance to prevent future heating issues
Regular maintenance can significantly reduce the odds of future heating failures. Keep the vent area clear of dust and lint, clean the interior and door seals, and check for signs of wear around the door latch. Avoid slamming the door, which can misalign interlocks over time, and use only microwave‑safe cookware to avoid damaging the magnetron. If your model includes a thermal fuse or service life indicators, follow the manufacturer’s recommended maintenance schedule. Finally, maintain a light touch on the control panel and avoid exposing the unit to moisture, heat, or direct sunlight, which can degrade electrical components.
Authority sources and safety guidelines
For authoritative guidance on microwave safety and appliance care, consult government and university resources. See official safety guidelines at reputable sources such as FDA, CPSC, and University Extension services for general appliance safety and maintenance best practices. These sources provide foundational safety principles that apply to troubleshooting and repair work without compromising your personal safety or the device’s integrity. Always prioritize safety and consult a qualified technician when dealing with high‑voltage components or uncertain diagnoses.
Authority sources (selected resources)
- https://www.fda.gov/food-safety
- https://www.cpsc.gov
- https://extension.illinois.edu
Tools & Materials
- Screwdriver set (Phillips and flat-head)(Include #2 Phillips and 6–8 inch flat-head for access panels)
- Multimeter or voltage tester(For testing outlets and non‑HV circuits)
- Non-conductive gloves(ANSI-rated; protect hands during inspection)
- Non-metal pry tools(Plastic tools to avoid shorts during disassembly)
- Safety glasses(Eye protection in case of debris or sparks)
- Labeling supplies (masking tape, marker)(Label wires/connectors during disassembly for safe reassembly)
Steps
Estimated time: 60-90 minutes
- 1
Unplug and discharge safely
Unplug the unit from the wall outlet and wait at least 60 seconds to allow any stored charge to dissipate. Keep hands dry and avoid touching internal metal surfaces while the unit is powered down. If you must handle interior parts, use insulated tools and work on a dry surface.
Tip: If you’re unsure about capacitor discharge, skip to non-invasive checks and consult a professional. - 2
Check the power path and outlet
Test the outlet with a known working device to confirm power. If the outlet is controlled by a GFCI or a breaker, reset or test the circuit. Confirm the microwave’s display powers up but the oven does not heat, which points away from a simple outlet issue.
Tip: Use a voltage tester to confirm approximately 120V supply before continuing. - 3
Inspect the door interlock and door seal
Close the door firmly and listen for a distinct click. A loose or misaligned interlock can prevent the magnetron from energizing. Check the door seal for damage, as an imperfect seal can falsely trigger safety mechanisms and halt heating.
Tip: Do not bypass the interlock—it's a critical safety feature. - 4
Visual inspection of accessible interior components
With the unit safely opened and unplugged, look for burnt insulation, melted wires, or discoloration near connectors. Do not touch high‑voltage parts. If you see obvious damage, stop and seek professional repair work.
Tip: Take photos to document the condition before reassembly. - 5
Test control board connections and fuses
Inspect visible connectors on the control board and look for loose or corroded terminals. Reseat connectors gently and check for signs of a blown fuse or scorch marks on the board. If you suspect HV components, terminate testing and call a professional.
Tip: Handle connectors with dry hands and avoid excessive force. - 6
Decide on repair vs replacement
If multiple HV components show wear or if the unit is old and parts are scarce, replacement may be more reliable. Compare the cost and availability of parts with the price of a new microwave and consider safety and efficiency improvements.
Tip: Document findings and consult a technician if in doubt.
Common Questions
Why won't my microwave heat even though it turns on?
Common causes include a faulty door interlock, magnetron, or power supply. A unit that powers on but won’t heat should be treated as a safety concern and tested step by step.
No heat with power on usually means a door interlock, magnetron, or power supply issue. Follow the steps in this guide.
Is it safe to inspect high-voltage parts myself?
HV components can retain dangerous charges even when unplugged. Only perform non-invasive checks if you’re trained; otherwise, call a professional.
High‑voltage parts are dangerous. If you’re not trained, don’t attempt to test HV components.
Can a blown fuse cause heating failure?
A blown fuse can prevent heating. Replacing it without proper testing and insulation risks, and it may require service.
Yes, a blown fuse can stop heat, but replacement should be performed by a qualified technician.
How can I tell if the magnetron is failing?
Magnetron problems often present as no heat with lights on or a buzzing sound. Testing requires specialized equipment and experience.
No heat plus a buzzing sound could indicate magnetron fault; professional testing is recommended.
When should I repair vs replace my microwave?
If repair costs approach or exceed a new unit’s price, or many high‑voltage components show wear, replacement is usually smarter.
If several parts need replacement, consider replacing the unit rather than repairing.
Will warranty cover heating issues?
Warranty terms vary; check the warranty and service plan before paying for repairs.
Warranty depends on policy—read the terms or contact the manufacturer.
What safety steps should I follow right away?
Unplug the unit, keep water away, and avoid touching metal parts. If you smell burning, power down immediately.
Unplug the microwave and avoid touching high‑voltage parts; seek professional help if you smell burning.
Watch Video
Main Points
- Unplug before any inspection.
- Identify whether the issue is power or heating element.
- Avoid risky repairs; call a professional for high‑voltage work.
- Document findings and follow safety guidelines for your model.