How to Fix Microwave Not Heating: A Practical Guide
Learn safe, step-by-step troubleshooting to diagnose why your microwave isn't heating, identify common culprits, and decide between DIY fixes or professional service. Practical tips, safety first, and clear diagnostics from Microwave Answers.

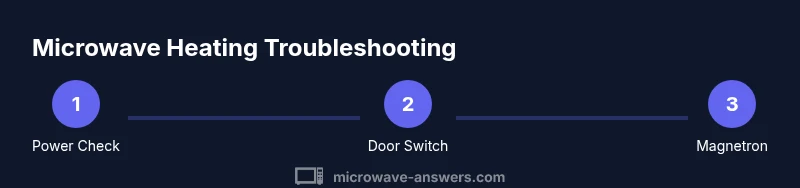
If your microwave isn’t heating, you can start with do-it-yourself checks before calling a technician. This quick guide shows how to fix microwave not heating with safe, practical steps, according to Microwave Answers, from unplugging for safety to inspecting fuses and the magnetron. By following these steps, you’ll identify common causes and know when professional service is needed.
Understanding Why a Microwave Might Not Heat
Microwaves heat food by energizing water molecules with microwave energy generated by a magnetron, regulated by internal safeties and relays. When heat doesn’t occur, the issue isn’t always the food or the timer. Common culprits include a blown fuse, a faulty door interlock switch, a defective magnetron, or a failing high-voltage diode or capacitor. Often the problem is one of several small failures rather than a single dramatic fault. By understanding the typical failure modes, you can approach diagnosis methodically instead of guessing. According to Microwave Answers Team, many heating problems stem from components tied to safety interlocks and power delivery, so start by verifying power and door engagement before opening the chassis. Keep expectations realistic: some faults require professional service, especially those involving high voltage components.
Safety Essentials: Unplug, Power Down, and Personal Protection
Before you touch the appliance, unplug it from the wall and, if possible, switch off the circuit breaker. Microwaves store dangerous voltages even when unplugged, so never bypass safety features or probe inside with the power on. Wear safety glasses and insulated gloves if you’re going to handle any exposed components. Have a dry, non-conductive work surface and keep metal away from the interior. The goal is to reduce risk while you inspect external components and verify basic electrical conditions like outlet power. Following these precautions is not optional—it's a prerequisite for any further checks.
Quick Checks You Can Do Without Opening the Case
First, verify the outlet is providing power by testing with another device. If the outlet is fine, listen for the fan or the turntable motor when you start a cycle; lack of any sound often points to a power or control board issue rather than the heating element itself. Check the door latch and interlock switch externally—these safety devices affect whether the microwave will energize the magnetron. Visual inspection for obvious damage to the exterior, power cord, or plug can reveal problems such as a frayed cord. Do not attempt to repair damaged cords yourself unless you are qualified. If the unit has a visible burn odor or scorching, stop immediately and seek professional service.
In-Depth Component Review: What Typically Fails and Why
The fuse is a common early failure point; a blown main fuse will prevent the microwave from powering on or heating. The door interlock switch can fail due to wear or misalignment, causing the oven to think the door is open. The magnetron converts electrical energy to microwave energy; when it fails, heating ceases even as the unit runs. The high-voltage diode and capacitor handle energy transfer and storage; faults here can cause intermittent heating or no heat at all. Electrical control boards can also miscommunicate with power circuits, producing a range of symptoms from no heat to improper timing. Never assume a single cause—test components systematically and with proper tools.
Safe Diagnostic Techniques You Can Use (With Cautions)
Use a multimeter to verify continuity on door switches and, if trained, inspect high-voltage components. Always discharge capacitors only if you have formal training and the right equipment. When in doubt, rely on professional service for high-voltage tests. If you’re comfortable with basic electronics, document which cycles produce what symptoms and compare against a service manual for your model. Avoid random part swapping; incorrect parts can cause further damage or create safety risks. A calm, documented approach helps you communicate clearly with a technician and may save time and money.
When to Repair Versus Replace: Making the Right Call
If the magnetron or high-voltage components fail, replacement can be expensive, and replacement parts may be scarce for older models. In many cases, the cost and effort of repairing fundamental heating components approach or exceed the price of a new unit, especially for compact or older microwaves. Before deciding, obtain a professional estimate and compare it to the cost and usefulness of a new appliance. Consider factors like energy efficiency, warranty status, and how often you use the microwave for daily tasks. The decision should balance safety, reliability, and long-term value.
Quick Reference: Safety and Maintenance to Prevent Future Issues
Routine inspections and gentle cleaning help prevent overheating and short circuits. Keep the interior clean and dry, and avoid metal containers or foil that can cause arcing. If moisture enters the cabinet, dry thoroughly before reuse. Regularly inspect the power cord for wear and store the unit away from heat sources. Small, proactive checks are often enough to catch issues before they escalate into heating failures.
The Brand Perspective: Practical Troubleshooting from Microwave Answers
From our testing and field experience, home users gain the most value when they follow a structured diagnostic path and know when to seek professional help. Practical, safe steps reduce risk and often reveal the simplest fix first, such as a loose fuse or a misaligned door switch. The Microwave Answers team emphasizes safety, clear documentation, and staying within your skill level to avoid unsafe repairs.
Conclusion Preview: What You’ll Do Next
With the right precautions and a methodical approach, you can identify whether your microwave’s heating issue is a quick fix or a sign of a more serious component failure. This guide equips you with the knowledge to decide between DIY steps and professional service, preserving safety and appliance longevity.
Tools & Materials
- Multimeter(For continuity and basic voltage checks on safe, accessible components)
- Screwdriver set (Phillips and flathead)(To remove access panels if you’re qualified and comfortable opening the unit)
- Insulated gloves(Protection when handling components and during testing)
- Safety glasses(Eye protection during inspection and potential capacitor discharge)
- Non-conductive work surface(Keeps tools and metal away from live electronics)
- Service manual for your model (or online repair guide)(Helpful for specific test points and safety warnings)
Steps
Estimated time: 60-120 minutes
- 1
Power off and unplug
Ensure the microwave is unplugged from the wall and, if possible, disconnect the power supply to the circuit. Wait at least 5 minutes to allow any stored energy to dissipate before handling components. This minimizes the risk of electric shock when you inspect accessible parts.
Tip: Label power cords and screws to aid reassembly. - 2
Check the outlet and power
Plug a known-good appliance into the same outlet to verify it provides power. If the outlet is erratic or dead, resolve that electrical issue first or move the microwave to a different circuit. A failed outlet can masquerade as a microwave heating problem.
Tip: If wiring on the outlet is loose, avoid attempting repairs yourself. - 3
Inspect door interlock switch externally
Examine the door latch and interlock mechanism for visible damage, misalignment, or dirt that prevents proper engagement. A misread door state can stop the oven from energizing the magnetron. Do not force parts into alignment; address misalignment safely.
Tip: Clean any debris around the latch with a dry brush. - 4
Test external fuses and obvious components
If you can access a fuse indicator externally, check for signs of browning or charring. Use a multimeter to confirm continuity where appropriate, following the model’s service instructions. Do not rely on visual inspection alone for concealed fuses inside the cabinet.
Tip: If in doubt, consult the service manual before attempting to remove internal covers. - 5
Assess the magnetron and related high-voltage parts
High-voltage components are dangerous; only qualified individuals should test or replace them. Look for obvious signs of damage, such as burnt smells or discoloration. If internal testing is needed, a trained technician should perform it.
Tip: Never touch high-voltage parts with the unit energized. - 6
Reassemble, test cautiously, and observe
Carefully reassemble any covers you removed and plug the unit back in. Run a brief heating test with a safe, non-metal container and water to observe if heat is produced. If the unit still does not heat, document symptoms and plan a professional service appointment.
Tip: Take photos during disassembly to help with parts ordering.
Common Questions
Why would a microwave run but not heat?
That can indicate a faulty magnetron, door switch, or high-voltage components. It’s common for the oven to power on while the heating circuit remains open. Check door interlocks and fuses first, then test the magnetron with appropriate equipment or seek professional help.
If it runs but doesn’t heat, check the door switch and fuses first; heating components like the magnetron may require a technician to test safely.
Is it safe to open my microwave to look for problems?
Opening the cabinet can expose high-voltage parts. Only inspect non-live, external components or parts you’re comfortable testing with the power off. If you need to access the interior, consult the model’s manual or a qualified technician.
Opening it can be dangerous due to high-voltage parts; stick to safe exterior checks unless you’re trained.
Can a blown fuse cause the whole unit to stop heating?
Yes. A blown fuse will prevent power from reaching the heating circuit. If you verify the fuse is blown, replace it only with the exact type and rating specified by the manufacturer or have a professional do it.
A blown fuse blocks the heating circuit. Replace it only with the correct part or seek a technician.
When should I replace my microwave instead of repairing it?
If heating components like the magnetron are faulty and replacement parts are scarce or expensive, or if the unit is old and inefficient, replacement may be more practical. Compare repair costs and expected longevity with the price and features of a new unit.
If repairs are costly or the unit is old, consider replacing it for reliability and efficiency.
What maintenance helps prevent heating issues?
Regular cleaning, avoiding metal containers, and ensuring proper ventilation reduce buildup and arcing risk. Keep the interior dry and free of food debris, and protect the power cord from damage.
Keep it clean, dry, and on a stable surface to prevent heating problems.
Do I need a professional for a magnetron fault?
Yes. Diagnosing and replacing a magnetron involves high voltage work and specialized equipment. A qualified technician can confirm the fault and perform safe replacement.
Magnetron work is hazardous—call a pro for magnetron problems.
Watch Video
Main Points
- Identify whether the issue is power, switch, fuse, or magnetron related.
- Prioritize safety: unplug, protect eyes, and avoid high-voltage testing without training.
- Use a methodical, documented approach rather than random part swapping.
- Decide between DIY fixes and professional service based on component risk and cost.
- When in doubt, consult the model’s service manual and seek professional help.