How to fix microwave: A practical troubleshooting guide
Learn safe, practical steps to diagnose and fix common microwave issues at home, with DIY checks, safety tips, and maintenance guidance. Decide when to repair or replace.

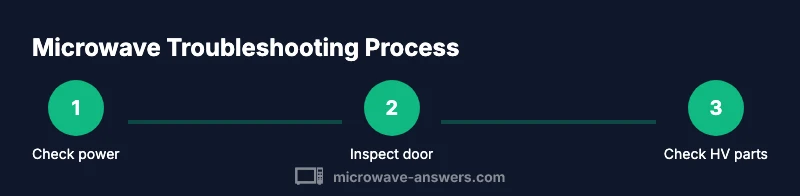
By following this guide, you can safely diagnose and fix common microwave issues at home, from power problems to door interlocks. Start by unplugging, then check the outlet, fuse, and door switch before inspecting internal components. If you smell burning or see arcing, stop and seek professional help. Keep safety gear handy and avoid high-voltage parts.
Understanding common microwave failure modes
Microwaves are simple devices, but when something goes wrong, symptoms can be confusing. According to Microwave Answers, the most common failure modes fall into four categories: power-related issues (no heat or unit won't start), safety/door interlock problems (unit won't run or door won't latch), aging or damaged internal components (magnetron, diodes, capacitors), and user- or vent-related problems (arcing, unusual noises, smells). Recognizing which category a symptom fits helps you decide whether the issue is a simple fix or a sign of a larger fault. No matter the cause, always treat a microwave with respect for high-voltage components even when the exterior appears harmless. If the unit ever emits smoke, sparking, or a strong burning smell, stop using it immediately and unplug it. Regular maintenance can minimize many issues, such as worn door seals or food debris blocking vents. Throughout this guide, we’ll refer to Microwave Answers analysis to frame practical, safe steps you can take at home, and when it’s wiser to call a professional.
In many cases, the problem traces back to one of a few common culprits. A non-heating unit is often a power issue, a humming but not heating unit points toward a faulty magnetron or diode, and visible arcing indicates a damaged waveguide or insulation. By mapping symptoms to these categories, you’ll make smarter decisions about whether to attempt a DIY fix or hire a technician. This approach also helps you explain the issue clearly when you request service.
Safety first: unplug, inspect, and protect yourself
Safety is the non-negotiable first step in any microwave repair effort. Always unplug the unit from the wall before you touch anything inside or behind access panels. If you must move the appliance, disconnect it from the power source and never reach into occupied capacitors or high-voltage areas. Wear safety glasses to protect your eyes from sharp edges and avoid wearing jewelry that could snag on internal components. Do not attempt to bypass safety interlocks or run the unit while the door is open or ajar. If you notice smoke, a strong burning smell, or visible sparks, stop immediately, unplug, and seek professional help. Keep a dry, non-conductive surface nearby to place tools, and ensure your workspace remains free of water and moisture. These precautions protect you and prevent accidental damage to the microwave’s electronics.
Basic diagnostic steps you can perform at home
Start with the most basic checks before opening any panels. First, unplug the microwave and plug it into a known-good outlet to rule out a faulty power source. Check the cord for fraying or kinks and inspect the outlet for signs of wear or a tripped breaker. Power-on indicators on the control panel should illuminate when you press a button; if they don’t, the issue may be with the power supply or a blown fuse. Listen for the normal sequence when closing the door—most units click as the door interlock engages. If the turntable does not rotate, inspect the turntable plate and roller ring for debris or misalignment. Do not run the unit empty to test heating, as this can cause damage. If the microwave starts but does not heat, this is often a sign of a bad magnetron, diode, or high-voltage issue that requires a professional assessment. Use clean, dry hands and keep your work area dust-free while you perform these checks.
Diagnosing specific components: door switch, magnetron, high-voltage capacitor, fuse
Door interlocks and switches control whether the microwave will run. Inspect the door latch for wear and ensure the door closes firmly; a worn latch can prevent operation even if the door appears shut. If you have training, you can verify door-interlock continuity with a multimeter, but never attempt to test high-voltage components with power applied. The magnetron is a sealed, high-voltage device; visible signs of damage or persistent nonheating, buzzing, or arcing typically indicate the magnetron needs replacement by a professional. High-voltage capacitors and fuses also present serious safety risks—do not discharge capacitors or replace high-voltage parts unless you are trained. For most DIY scenarios, only inspect accessible components and seek certified help for any HV work.
When to repair vs replace: cost, availability, warranties
Decision-making hinges on the likely repair scope, part availability, and the appliance’s overall age. If the required parts are scarce or the repair would approach the price of a new unit, replacing the microwave may be the smarter option. Warranties can influence your choice; if the appliance is still under warranty, contact the manufacturer for approved service routes. For older units with frequent issues, persistent non-heat symptoms, or multiple failed components, a replacement often yields better reliability and energy efficiency. Consider the cost of professional service if you’re uncertain about safety or the complexity of the repair. In all cases, avoid risky DIY fixes that involve high-voltage parts if you lack formal training.
Step-by-step repair approach: if you decide to proceed (with caution)
If you decide to attempt a repair, begin with thorough planning and safety cautions. Gather the right tools, consult the unit’s service manual, and isolate the high-voltage area. Start with non-invasive checks like reseating internal connectors, cleaning vent openings, and replacing any visibly damaged door seals. Do not bypass interlocks or discharge capacitors yourself; high-voltage components can retain dangerous charges even when unplugged. If you reach a step where you must test HV parts, stop and contact a professional. After any repair, reassemble cleanly, ensure door seals are intact, and perform a cautious test with a small amount of food to observe heat performance and uniformity. Finally, if the unit operates erratically or you still notice safety concerns, discontinue use and seek service.
Maintenance tips to extend microwave life
Proactive maintenance can extend the life of your microwave and prevent common failures. Clean the interior regularly to avoid food buildup that can cause arcing or odors. Keep the exterior and vents free of dust and grease, and check the door seal for wear every few months. Use microwave-safe containers and lids to reduce splatter and damage to the waveguide. Avoid slamming the door or forcing it closed; gentle operation preserves interlocks. Place the microwave on a stable, heat-free surface with adequate clearance around the vents to aid cooling. Replace worn seals or misaligned components promptly to avoid cascading failures. Finally, refer to the manufacturer’s manual for model-specific maintenance steps and do not attempt risky repairs beyond your training.
Key safety reminders and common mistakes to avoid
- Do not open or touch high-voltage components. The magnetron, diodes, and capacitors can retain dangerous charges. - Avoid running the microwave with no load (empty) for extended periods; it can cause damage. - Never bypass safety interlocks or manipulate the door switch to force operation. - Use only manufacturer-approved replacement parts and follow static discharge precautions when handling electronics. - If you are unsure about a repair, seek professional service to avoid injury or further damage.
Tools & Materials
- Screwdriver set (Philips and flat-head)(Include a precision set for small screws; remove grills or covers carefully)
- Non-contact voltage tester(For quick HV area checks without touching live components)
- Multimeter(Used for continuity testing on door interlocks and accessible circuits)
- Safety glasses(Protect eyes from debris and sharp edges)
- Insulated gloves(Optional for handling exposed internal parts; not a substitute for professional HV work)
- Dry, lint-free cloth(For cleaning interior surfaces and waveguide cover)
- Owner’s manual or model-specific service guide(Look up interlock wiring, fuse ratings, and safe disassembly instructions)
Steps
Estimated time: 60-120 minutes
- 1
Unplug and ensure safety
Locate the power cord, unplug the microwave from the wall, and move it away from the wall to access the back panel without tugging on wiring. Give it 60 seconds to discharge any residual energy, then re-check that it is completely disconnected before handling.
Tip: Always dry hands and work on a non-conductive surface. - 2
Check the outlet and power cord
Inspect the cord for signs of fraying, kinks, or heat damage. Plug the unit into a known-good outlet or try a different outlet on another circuit to rule out a faulty power source.
Tip: If the outlet trips the breaker or feels warm, stop and do not use it. - 3
Inspect the door interlock and seals
Visually examine the door seal for cracks and the latch for wear. Ensure the door closes firmly and the interlock engages with a distinct click when shut. Do not bypass or force the interlock.
Tip: Replace worn seals promptly to prevent arcing or heating issues. - 4
Look for obvious internal signs
With the cover off (and power disconnected), look for burnt wires, melted insulation, or obvious damage to the waveguide cover or insulation material. Do not touch exposed conductors; if you see damage, end the inspection.
Tip: Keep a clean, well-lit workspace; use a flashlight to inspect corners. - 5
Test high-voltage components only if trained
High-voltage testing involves capacitors and the magnetron. Do not discharge HV capacitors or attempt repairs on these parts unless you have formal training and the proper safety equipment.
Tip: When in doubt, stop and contact a qualified technician. - 6
Try a cautious reassembly and test
If all accessible checks are clear, reassemble the outer shell, plug in, and perform a quick heat test with a small amount of water. Observe for proper operation, heat generation, and any unusual noises.
Tip: Do not exceed 30–45 seconds during the first heating test.
Common Questions
Is it safe to fix a microwave at home?
Home checks are fine for basic, non-electrical issues and exterior inspections. Do not attempt high-voltage repairs or disassembly beyond what the manual allows. If you’re unsure, seek professional service to avoid personal injury and further equipment damage.
Home checks are okay for basic exterior inspections, but avoid high-voltage repairs; seek professional help if unsure.
What are the most common DIY fixes?
Most DIY fixes involve clearing debris from vents, reseating connectors, and replacing worn door seals. Heating issues often require professional help for magnetrons or HV components.
Common DIYs include cleaning vents and reseating connectors; heat problems usually need a pro for HV parts.
Can I replace the magnetron myself?
Replacing a magnetron is a high-voltage repair that should only be performed by a trained technician due to shock and radiation hazards. Do not attempt this yourself.
Magnetron replacement is a high-voltage job best left to a trained technician.
What should I do if the microwave smells burnt?
If you smell burning, unplug immediately, inspect for signs of melted insulation or scorching, and avoid using the unit until a professional inspects it. A smell can indicate failing HV components or wiring damage.
Unplug instantly and have it checked; don’t use until inspected, as it may be a sign of damage.
How long do microwaves typically last?
Microwaves can last many years with proper care; consider replacement if repairs become frequent or the efficiency is poor and out-of-warranty.
With proper care, microwaves last many years; frequent repairs or poor efficiency may signal replacement.
Are there recalls or safety notices for microwaves?
Yes, recalls and safety notices can apply. Check the CPSC and manufacturer websites for recalls and service notices relevant to your model.
Check recalls on the CPSC site and from the manufacturer for your model.
Watch Video
Main Points
- Unplug before any inspection
- Start with simple checks and visuals
- Don’t attempt high-voltage repairs yourself
- Consult a professional for magnetron or HV capacitor issues