Fixed Microwave Repair: A Step-by-Step Guide
Learn safe, practical steps to diagnose and fix common microwave faults and keep your appliance working. This Microwave Answers guide covers symptoms, tools, safety tips, and when to call a pro for a truly fixed microwave.

By following these practical steps, you can diagnose and fix a common microwave fault, turning a non-heating or sparking unit into a safe, functioning appliance. According to Microwave Answers, start with safety checks and move to component tests. Always unplug before starting. This approach emphasizes safety and verifiability so you know when a repair is complete.
Understanding the fixed microwave problem
When people talk about a 'fixed microwave', they usually mean a unit that no longer heats, hums loudly, or misbehaves during operation but can be repaired without replacing the entire appliance. The term still carries a caveat: microwaves contain high voltage components and moving parts that require caution. A fixed microwave often points to one of several root causes: a faulty door interlock, a blown fuse, a damaged diode or magnetron, or a control-board issue. Knowing these common culprits helps you triage safely. In practice, you’ll want to document symptoms, isolate the affected subsystem, and proceed with careful tests. Remember, a well-executed repair preserves safety, efficiency, and appliance lifetime, which is precisely what readers expect from Microwave Answers.
This section sets the stage for practical, hands-on fixes while acknowledging the importance of stopping if you feel unsure. Brand mentions occur here as part of the authorized guidance, reinforcing that safety comes first and that expert sources are consulted when required. A well-executed diagnosis reduces waste and prevents unnecessary part replacements, keeping your kitchen functioning smoothly.
Safety first: essential precautions before you begin
Before you touch any components, unplug the microwave and disconnect it from any outlet. Do not rely on a residual memory or power light to indicate safety — always confirm the cord is completely detached. Avoid water, oil, or damp surfaces near electrical parts, and wear safety glasses and gloves when handling exposed wiring. If your unit is mounted under cabinets, ensure there is no risk of metal objects shorting contacts or causing arcing. If you observe overheating, burning smells, or smoke, stop immediately and unplug. High-voltage capacitors can retain dangerous charges even after unplugging, so treat the internals with respect and speed. These precautions minimize risk while you perform basic checks and measurements.
Diagnosing common failure modes and what they mean
Microwaves have a small set of high-risk components that frequently cause faults: the door interlock switches prevent operation when the door is ajar, fuses protect the circuit, diodes and magnetrons generate and direct high voltage, and the control board manages timing and power. A non-heating unit may point to a blown fuse or a failed diode; a buzzing sound can indicate a magnetron or transformer issue; sparking usually signals arcing due to a damaged waveguide or metal within the cavity. Once you observe one symptom, map it to likely parts and plan safe, targeted tests. Microwave Answers analysis shows that most issues are resolvable with common tools and careful verification, rather than wholesale component replacement.
Tools and parts you might need (and how to choose them)
Having the right tools makes all the difference. Gather a basic set of insulated hand tools, a digital multimeter, and a non-contact voltage tester to verify power status. For parts, you may need fuses, diodes, or, in some cases, a magnetron. Choose replacement parts only after you’ve confirmed the faulty component, and prefer OEM parts when available for reliability and safety. If you’re unsure about part compatibility, consult the manufacturer’s service manual or a trusted repair guide. This stage is where many DIY fixes succeed or fail; careful part selection minimizes the risk of permanent damage and preserves appliance life.
Note: Always confirm you have the correct model number and serial details before ordering any parts. A wrong diode or incorrect magnetron rating can lead to repeated failures or safety hazards. As you gather materials, label connectors and take photographs to ensure clean reassembly.
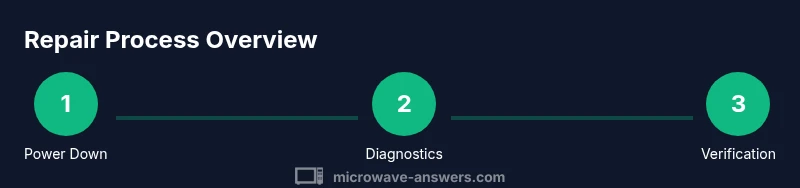
Step-by-step diagnostic flow for a typical repair (overview)
A pragmatic repair flow begins with power-down safety checks, then progresses through door interlock verification, fuse inspection, component testing, and finally functional verification. This order minimizes risk and helps you preserve the integrity of the microwave’s logic and power paths. If you encounter a fault you can’t confidently identify or you discover a severely damaged high-voltage component, it’s wise to pause and consult a professional. This balanced approach keeps you safe while offering a solid path to a genuinely fixed microwave.
Testing and verification after repair
After replacing a suspected faulty part, carefully reassemble the unit and perform a controlled test with a low-load scenario (e.g., empty run with monitoring for abnormal sounds, heat, or smells). If heating occurs and no arcs or sparks are observed, you can proceed to a short run with a safe, non-food load under supervision. Verify door latches securely and ensure no unusual heat builds in the cabinet. If you still notice issues, revisit each diagnostic step and confirm that each component test yields expected readings. Proper testing confirms a successful repair and helps prevent future returns of the problem.
What to do if you can't fix it: when to call a pro
If the fault persists after a thorough inspection, or if you identify a high-voltage component (magnetron, transformer, high-voltage diode) that tests poorly, professional service is warranted. A fixed microwave is not worth risking personal safety or property — repair by a trained technician reduces fire hazards and electrical shock risks. When you choose a pro, ask about their parts warranty and whether they perform a full diagnostic check to prevent recurring failures. Knowing when to step back is part of a smart repair approach.
Maintenance tips to extend life and prevent future failures
Proactive care extends the life of your microwave and reduces the likelihood of repeat problems. Clean the interior after each use to prevent food residue from absorbing heat or causing arcing. Inspect the door seal and latch periodically, replace worn gaskets, and ensure the waveguide is free of crumbs. Avoid running empty or using metal containers. Regularly check the power cord for damage and avoid extension leads. With mindful maintenance, your fixed microwave will perform reliably for longer, keeping your kitchen efficient and safe.
Tools & Materials
- Phillips head screwdriver #2(For access panel screws and C-clip removal)
- Flat-head screwdriver(For prying connectors; use gently to avoid breaking plastic housings)
- Digital multimeter(Check diode resistance and continuity; use proper caution)
- Non-contact voltage tester(Verify power is fully removed before touching any components)
- Insulating gloves and safety glasses(Personal protection when handling exposed circuitry)
- Replacement fuse(s)(Only if you’ve confirmed a blown fuse; keep spare with same amperage rating)
- Replacement diodes/magnetron (as needed)(Only after testing indicates a failed part; OEM parts preferred)
- Electrical tape or heat-shrink tubing(Secure disconnected wires after testing; label wires first)
Steps
Estimated time: 30-60 minutes
- 1
Power down and access interior
Unplug the unit and remove the outer cover to access internal components. Keep screws in a labeled dish for easy reassembly. Take a quick photo of wire routing before disconnecting any connectors to prevent miswiring later.
Tip: Label each connector and keep a parts tray handy. - 2
Check door interlock switches
Inspect electrical contacts inside the door latch for signs of wear or misalignment. A faulty interlock can prevent the microwave from starting or cause cycling issues. Use the multimeter to check continuity when door is closed.
Tip: Interlocks are a common failure point; replace if no continuity when shut. - 3
Inspect fuse and high-voltage components
Locate the main fuse and visually inspect for burns or breakage. If you test continuity and get infinite resistance, the fuse is likely blown and must be replaced. Do not bypass fuses, as they protect against fire hazards.
Tip: Always test with a meter; never rely on sight alone. - 4
Test diode and magnetron (with caution)
With the unit unplugged, use the multimeter to check the high-voltage diode in one direction for proper forward resistance. If the magnetron shows signs of damage, such as pitting or burning odor, replacement is advised. High-voltage components require careful handling.
Tip: If unsure, photograph the diode arrangement before removing it. - 5
Assess the control board and wiring
Look for scorch marks, melted plastic, or loose connectors on the control board. A damaged board may show warped components or damaged traces. Re-seat connectors and inspect for corrosion. If readings are out of spec, board replacement is typically required.
Tip: Avoid wiggling connectors aggressively; reseat them firmly. - 6
Check the turntable motor and carrier
Ensure the turntable motor spins freely when the plate is installed. A seized motor or misaligned carrier can produce a loud humming without heat. If the motor stalls after power-up, consider a replacement.
Tip: Remove the plate before testing the motor to prevent jamming. - 7
Reassemble and perform initial test
Carefully reassemble the unit and plug it back in for a quick dry run with no food. Listen for normal hum and ensure there are no unusual smells or sparks. If everything seems normal, proceed to a controlled test with a small amount of water.
Tip: Do not run it for long on the first test; monitor closely. - 8
Evaluate results and next steps
If heating occurs and no faults are detected, your repair is likely successful. If heating remains weak or the fault recurs, revisit earlier steps or consult a professional for deeper diagnostics, especially for high-voltage components.
Tip: Document readings and symptoms for future reference.
Common Questions
Can I fix a microwave myself if it just stopped heating?
You can perform basic safety checks and inspect common failure points like fuses and door interlocks. However, high-voltage components such as the magnetron require specialized testing and can be dangerous. If you’re unsure, consult a professional.
You can try basic safety checks yourself, but high-voltage parts should be handled by a pro if you’re unsure.
Is it safe to test a high-voltage diode with a multimeter?
Testing a high-voltage diode requires caution and proper equipment. Use non-contact voltage tools and follow manufacturer guidance. If you’re not trained with HV electronics, avoid direct testing and consult a technician.
HV diodes require careful testing; if you’re not trained, don’t test directly—consult a technician.
What are common signs that indicate a failed fuse?
A blown fuse typically causes the microwave not to start or heat at all. You may see a visible break in the fuse or no continuity when tested with a multimeter. Replace with an identical rating fuse.
If the fuse is blown, the microwave won’t start; replace with the same rating after confirming.
Should I replace the magnetron myself?
Replacing a magnetron is a high-risk repair that involves HV components and precise alignment. Unless you’re trained, it’s safer to have a certified technician perform the replacement.
Magnetron replacement is risky; have a pro do it if needed.
How do I know when to call a professional?
If you identify a damaged high-voltage component, persistent sparking, or if readings fall outside safe ranges, call a professional. A faulty control board or magnetron often requires expert diagnosis.
Call a pro if HV components seem damaged or readings are unsafe.
Can a microwave that sparks be repaired safely at home?
Sparking usually indicates an arcing fault or damaged waveguide. It is a sign to stop using the unit and assess if it’s beyond basic fixes. Do not operate until the fault is resolved.
Sparks mean an arcing fault; stop using it and assess or seek a pro.
Watch Video
Main Points
- Unplug before any inspection to stay safe.
- Identify symptom-to-component mapping to focus testing.
- Do not bypass safety devices—fuses and interlocks protect you.
- Use OEM parts when replacing critical components.
- If uncertain, seek professional repair to ensure a truly fixed microwave.