How to Fix Microwave Door Switch: A Practical Guide
Learn how to diagnose and replace a faulty microwave door switch safely with our practical, step-by-step guide. Includes tools, safety tips, testing methods, and a clear failure-proof process from Microwave Answers.

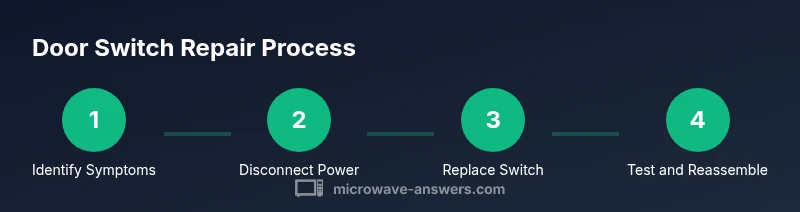
Use this guide to diagnose and fix a rattling or non-starting microwave caused by a faulty door switch. You’ll learn how to safely unplug, access the switch, test continuity, and install a replacement. Follow the step-by-step instructions to restore reliable door operation. This safety-focused approach emphasizes proper part compatibility and verifying operation after repair.
How to Fix Microwave Door Switch: Overview and Safety
A malfunctioning door switch is a common reason why a microwave won't start or its door won’t latch correctly. The door interlock ensures the oven only runs when the door is safely closed; if the switch sticks, or a wire connector is loose, the control board may never receive the 'door closed' signal. This section outlines a practical, safety-focused approach to diagnosing and replacing a faulty switch. The steps assume you are comfortable with basic electrical work, and you will always unplug the unit before any disassembly. We emphasize choosing the correct replacement switch and verifying the repair with a controlled test. If you feel uncertain at any point, stop and consult a professional. The Microwave Answers team notes that proper part compatibility and safe handling are key to a durable fix.
Tools and Materials You’ll Need
Before you start, gather a few common tools and a replacement switch compatible with your model. Essential items include a Phillips screwdriver (size #2), a multimeter for continuity checks, a replacement interlock/door switch, needle-nose pliers, and insulating tape. Optional items include a camera or phone to document wire routing, a magnetic tray for small screws, and a service manual for your microwave model. Organize screws and connectors in labeled containers. Ensure you have good lighting and a static-free workspace. Having everything ready reduces mid-task trips and helps you work more confidently.
Understanding the Door Switch Mechanism and Why It Fails
Here’s how the door switch and interlock system function within most countertop microwaves. When the door is closed, a mechanical link depresses a switch; the control board then enables the magnetron and turntable. Most failures stem from worn contact points, a loose connector, or a door latch misalignment. By understanding the design, you can pinpoint the rough location of the switch, often near the door hinge or behind the front panel. Many units use two switches: a primary interlock and a safety switch. Visual inspection can reveal a burnt connector, melted insulation, or broken plastic pins. Knowing the part’s placement helps reduce disassembly time and prevents accidental damage to nearby wiring.
Safety First: Unplug, Discharge, and Set Boundaries
Safety is non-negotiable when working on any high-voltage appliance. Always unplug the microwave and wait at least a minute for internal circuits to settle. Use insulated tools and wear dry, non-conductive gloves. Keep metal objects away from any exposed contacts. Do not attempt to discharge high-voltage components unless you are trained with proper equipment. If you notice scorch marks, melted insulation, or a sizzling smell, stop immediately and seek professional help. This approach minimizes shock risk and protects you and your home.
Accessing the Door Switch: Removing the Outer Cabinet
The door switch is often located behind the microwave’s face panel or a removable cover on the front. Start by removing the exterior screws that secure the cabinet, keeping track of each fastener. Gently pry the panel away, taking care not to damage plastic clips. Once the interior is exposed, locate the interlock assembly and identify which wires connect to the switch. Photograph or label every connection before disconnecting anything to simplify reassembly. Recheck that the unit remains unplugged during this process to avoid any accidental energization.
Inspecting the Switch and Interlock Assembly
With the switch exposed, inspect for obvious damage: melted plastic, burnt contacts, corroded terminals, or loose connectors. Check the door latch alignment; misalignment can prevent the interlock from engaging properly. If the switch has a visible defect, plan for replacement with a compatible part. If nothing obvious is found, proceed to testing to determine whether the switch is functionally failed or merely miswired. A careful visual check saves time by avoiding unnecessary component swaps.
Testing the Door Switch with a Multimeter
Disconnect power again before testing and use a multimeter set to continuity. Attach one probe to the switch terminal and the other to the corresponding connector or wire. Have a helper press the door or latch so the switch toggles. You should hear or see a continuity reading when the door is pressed and none when released. If continuity readings are erratic or absent in both states, the switch is likely faulty and should be replaced. Document readings for future reference and ensure all wires are reconnected securely after testing.
Replacing the Door Switch: Wiring and Installation
Remove the faulty switch entirely and compare it to the replacement to ensure compatibility. Connect wires to the new switch in the same positions, using color-coded terminals or labels if available. Use insulated crimp connectors or solder joints as required by your model wining. Make sure each wire is fully seated and the insulation covers exposed metal. Avoid creating stray strands that could cause a short. If a permanent harness requires modification, consider replacing not only the switch but also any damaged connectors.
Reassembling, Reconnecting, and Securing Panels
Carefully position the interlock assembly and the switch back inside the front area. Reattach the face panel or cabinet using the original screws in their respective locations. Reconnect all wires exactly as you labeled or photographed earlier. Ensure no wires are pinched by the cabinet edges and that the door still aligns with the latch. Tighten screws evenly and avoid overtightening plastic mounting points, which can crack under stress.
Functional Test: Verify Door Operation and Safety
Plug the microwave back in and perform a low-risk test. Press the door shut firmly and verify that the display indicates ready when the door is closed. Open and close the door several times to ensure the interlock engages each time. Confirm that the oven does not energize with the door open. If the unit starts and stops unexpectedly, double-check wiring and switch orientation. A thorough test helps prevent future nuisance faults and confirms the repair.
Common Pitfalls and What to Do Next
Even experienced DIYers encounter pitfalls. Avoid bypassing the interlock or wiring a switch incorrectly, as this creates a safety hazard. If the door still won’t engage after replacement, inspect the control board for a secondary fault, recheck the door latch, and verify the seal around the door gasket. In some cases a failed fuse or relay might mimic door switch issues. If problems persist, consult Microwave Answers or a certified technician for a precise diagnosis.
When to Seek Professional Help: Final Guidance
If you encounter high-voltage components, complex wiring, or unfamiliar model-specific configurations, it is safest to stop and call a pro. A licensed technician can verify safety, ensure compatibility, and prevent further damage. This is particularly important for older models or if the unit has a history of electrical issues beyond a faulty switch. Remember: safety first, and professional help is a prudent option when unsure.
Tools & Materials
- Phillips screwdriver (#2)(Flat-head for prying panels optional)
- Multimeter for continuity testing(Set to ohms/continuity)
- Replacement door interlock switch (model-compatible)(Check model number and part compatibility)
- Needle-nose pliers(Grasp connectors without damaging insulation)
- Electrical tape or heat-shrink tubing(Insulate exposed conductors)
- Camera or labeling supplies(Document wire routing for reassembly)
- Magnetic parts tray(Organize small screws)
- Service manual for your microwave model(Helpful for wiring diagrams)
Steps
Estimated time: 60-90 minutes
- 1
Power down and unplug
Unplug the microwave and unplug any power strip it is connected to. Confirm the unit cannot energize while you work. This avoids shock and keeps you safe while inspecting components.
Tip: Double-check that no power is reaching the chassis. - 2
Remove outer cabinet screws
Use the screwdriver to remove screws securing the front or side panel. Keep screws organized to ensure proper reassembly.
Tip: Label screws by location to prevent misplacement. - 3
Expose the interlock area
Gently separate the face panel to reveal the interlock and switch. Do not pry with excessive force to avoid cracking plastic.
Tip: Work slowly and use a plastic spudger if available. - 4
Document wire routing
Photograph or label each wire connection before disconnecting. This step minimizes confusion during reassembly.
Tip: Take multiple angles for clarity. - 5
Disconnect the switch wires
Carefully disconnect the wires connected to the door switch. Use pliers if connectors are tight, and avoid pulling on the wires themselves.
Tip: If terminals are tight, wiggle gently rather than yank. - 6
Test the switch with a multimeter
With the unit disconnected, test continuity by pressing the door and releasing. Expect a change in resistance when the door is pressed.
Tip: Record readings for reference in case the replacement fails. - 7
Install the replacement switch
Connect wires to the new switch in the same arrangement as the original. Ensure secure connections and proper insulation.
Tip: Avoid any loose strands that could short. - 8
Reassemble the switch area
Position the interlock assembly and reattach the cover panels. Reinsert screws and verify the panel sits flush.
Tip: Tighten evenly to prevent panel warping. - 9
Apply a functional test
Plug the microwave back in and perform a basic start test with the door closed. Confirm the unit responds and stops when the door opens.
Tip: Tester cup with water helps avoid energy waste. - 10
Inspect for safety and signs of wear
Check for exposed wires, abnormal heat marks, or cracking plastic after the test. Address any issues before normal use.
Tip: If anything looks off, power down and inspect again.
Common Questions
What does a microwave door switch do?
The door switch, part of the interlock system, prevents the microwave from operating unless the door is fully closed. It signals the control board to power the magnetron. Faulty switches can cause the oven not to start or the door to misbehave.
The door switch is the safety link that tells the microwave the door is closed before it starts.
How can I tell if the door switch is faulty?
If the microwave won’t start or will start and stop inconsistently, and you confirm the door latches firmly, the switch could be failing. Continuity testing with a multimeter helps confirm whether the switch opens and closes as the door moves.
If it won’t start or is flaky, test continuity with a meter to confirm the switch.
Can I replace the door switch myself?
Yes, with basic electrical safety practices and model-specific parts. Make sure to unplug the unit, use the correct switch, and reassemble carefully. If you’re unsure, seek guidance from a professional.
You can if you’re comfortable with electrical work and proper parts.
Is it safe to use the microwave after replacing the door switch?
Yes, after a correct replacement and a full functional test, the microwave should operate normally with the door closed. Do not use it if you notice heat, buzzing, or arcing during tests.
Only use it after a successful test shows the door interlock works.
What tools do I need for this repair?
A Phillips screwdriver, a multimeter, a compatible replacement door switch, and insulated tools. Having a camera to document wiring and a service manual for your model helps.
Screwdriver, multimeter, replacement switch, and insulation materials.
What if the microwave still fails after replacing the switch?
Recheck the wiring, door latch alignment, and interlock positioning. If issues persist, there may be a problem with the control board, fuse, or other safety components requiring a professional diagnosis.
If it still fails, there may be a deeper issue needing a technician.
Watch Video
Main Points
- Unplug before any work to ensure safety.
- Use model-compatible door switch parts for reliability.
- Test continuity to confirm proper function after replacement.
- Label and document wire routing to simplify reassembly.
- Seek professional help if high-voltage components are involved.