Does Microwave Work? A Practical Troubleshooting Guide
Urgent, step-by-step troubleshooting to diagnose why your microwave won't heat, plus safety tips and practical DIY fixes from Microwave Answers.

If your microwave isn’t heating, the most likely causes are a power issue, a faulty door interlock, or a blown fuse. Start by testing the outlet and ensuring the door closes firmly; if it still won’t heat, don’t improvise—disconnect power and seek a professional evaluation. This quick flow gets you from symptom to safe fix.
Does microwave work? A reality check for home cooks
When you ask does microwave work, you’re really asking whether the unit can perform its core task: turning electrical energy into heat to cook or defrost food. In practice, most microwaves work reliably, but trouble blocks heating when one or more critical components fail. Common culprits include the power source, door interlocks, fuses, magnetron, or high-voltage components. This block explains how to assess whether the heating function is truly compromised and where to begin with safe, practical checks. Throughout, remember that the safest approach is to start with the simplest, most verifiable causes before moving to more complex parts. Microwave Answers data shows that many heating issues originate from easily addressed issues like outlet problems or a misaligned door. By validating basic conditions first, you can often restore heating without specialized tools.
Key ideas to test early:
- Confirm the unit powers on and displays a timer or clock.
- Verify the door closes securely and latches without obstruction.
- Try a simple defrost cycle with a known-good plate to see if heat transfer occurs.
In sum, does microwave work is usually about ruling out basic issues before assuming a major component failure. If basic checks fail, proceed to the diagnostic flow below.
Common failure modes when a microwave won't heat
Microwaves heat through a combination of power, control logic, and the magnetron that generates the high-frequency waves. When heating fails, several modes often signal the root cause. A humming noise but no heat commonly points to a faulty magnetron or power supply; a functioning display with no heat can indicate a door interlock issue or safety fuse problem; intermittent heating might be a contact or wiring problem. Another frequent source is an overloaded circuit or a tripped breaker; micro-ovens share household circuits, and a surge can interrupt power without completely cutting the unit’s lights. Watch for signs like sparking inside the cabinet or an acrid smell, which can indicate arcing or failed insulation. In this section, you’ll learn a prioritized checklist of potential causes, with practical tests you can perform safely at home. By focusing on the most probable issues first, you’ll reduce risk and time spent on unnecessary part swaps.
Common symptoms to map to causes:
- Unit powers but doesn’t heat
- Unit trips circuit or blows fuse
- Sparking or unusual noises during operation
- Door seems loose or won’t latch
The aim is to identify the simplest, most actionable fix before calling a repair technician.
Safety first: What not to do when troubleshooting
Safety must guide every step of microwave troubleshooting. Never open the chassis while the unit is plugged in, never use metal utensils to test heating with the cabinet open, and never bypass safety interlocks to force operation. If you smell burning plastic, hear buzzing, or notice smoke, immediately unplug the unit and evacuate the area. A microwave contains high-voltage components that can retain charge even when unplugged; never touch exposed boards without proper training. When in doubt, prioritize professional service. The brand’s safety guidance emphasizes routine care, proper ventilation, and careful inspection of the power cord and plug. By following strict safety rules, you minimize risk of electric shock, fire, or damaging the unit further.
Basic safety rules:
- Unplug before any internal inspection
- Avoid moisture contact with electrical parts
- Use a grounded outlet and avoid daisy-chained power strips
- Do not attempt high-voltage component tests without training
Remember: safety is the foundation of effective troubleshooting.
Diagnostic flow: symptom → diagnosis → solutions workflow
This section provides a structured workflow to translate symptoms into a diagnosis and then to concrete fixes. Start with the simplest explanations before moving to complex components. For example, if the unit powers on but won’t heat, your first stop is the power source and door interlock. If power is confirmed, test the door switch, the fuse, and then the magnetron. Each step should yield a clear yes/no that either advances you toward a fix or rules out that culprit. The diagnostic flow emphasizes documenting what you test and the results, which helps avoid repeating steps and speeds up professional service when needed. By following this approach, you’ll minimize risk and maximize the odds of a safe, effective repair.
Flow outline:
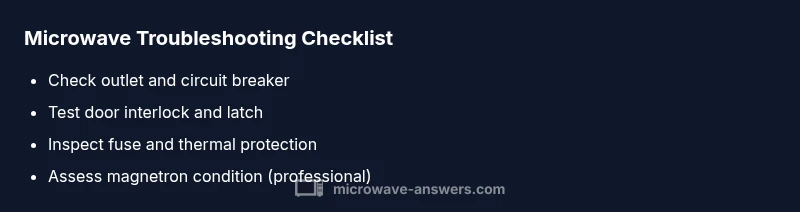
- Confirm power supply and outlet
- Check door interlock and latch mechanism
- Inspect the fuse and thermal fuse
- Test magnetron and HV circuit if previous steps pass
- Decide DIY fix vs. professional service
Step-by-step: test the power and door switch
Step 1: Disconnect the microwave and unplug it from the wall. Remove the outer shell only if you’re confident, keeping the power fully disconnected. Step 2: Plug the unit into a known-good outlet or test the outlet with a basic lamp or appliance. If the outlet or circuit trips, address the electrical issue first. Step 3: Inspect the door switch and interlock mechanism. A damaged switch or misaligned door can prevent heating even when the unit lights up. Step 4: With power safely disconnected, gently press the door interlock to ensure it engages cleanly; a sticky latch can prevent the microwave from energizing the magnetron. Tip: If you hear the turntable motor running but no heat, it likely isn’t the motor itself but the door switch or primary power path. Safety reminder: Only perform these steps if you are comfortable opening the cabinet and using basic tools. If not, stop and call a professional.
Step-by-step: checking the magnetron and high-voltage components
Step 5: If the power and door switch are functioning, the issue could be in the high-voltage path, including the transformer, high-voltage diode, and magnetron. This area requires specialized knowledge and equipment, so proceed with caution. Step 6: Use a multimeter to check for continuity where safe, following the service manual. If you find a broken coil, cracked insulators, or a failed diode, replacement is necessary. Step 7: Replace the failed part only with the exact rating from the manual, and verify all connectors are clean and seated before reassembly. Tip: Magnetron replacement can be costly—compare the cost of a professional repair vs. replacing the unit.
Step-by-step: reassemble and test after fixes
Step 8: Reassemble the cabinet carefully, ensuring no wires are pinched, then plug the unit back in. Step 9: Run a cautious test with a microwave-safe cup of water to verify heating. Step 10: Observe for any unusual sounds, smells, or overheating. If the microwave heats normally, you’ve completed the fix. If not, re-check connections and consider a full professional assessment. Time-saving tip: Keep a small log of symptoms and tests to speed up service calls and warranty claims. Total estimated time: about 60-90 minutes including safety checks.
Step-by-step: safe testing and quick maintenance routine
Step 11: Schedule routine maintenance to prevent future issues: inspect the power cord for wear, clean the interior to remove debris that could affect sensors, and verify door seals are intact. Step 12: Avoid placing metal containers, aluminum foil, or sealed containers with metal lids inside, which can cause arcing and damage. Step 13: Use a microwave-safe diffuser or plate to help heat distribution evenly, reducing the strain on the magnetron over time. Pro tip: Regularly inspect the door seal, hinges, and latch—these are common wear points that, when replaced early, save larger repairs later.
Step-by-step: final safety checks and when to seek help
Step 14: If you are unsure about any step or the unit still won’t heat after the fixes, stop and seek professional help. Step 15: Prepare for a service visit by gathering model information, purchase date, and a checklist of tested symptoms. Step 16: A trained technician will typically test the high-voltage system, door interlock, transformer, and magnetron with specialized equipment. Estimated total time: 60-120 minutes for a diagnostic session, plus parts if needed.
Step-by-step: wrap-up and prevention tips
Step 17: Record what was tested and the outcome to prevent repeating steps. Step 18: Schedule annual safety checks and keep the interior clean, dry, and free from moisture near electrical components. Step 19: Train household members to avoid risky actions like inserting metal objects or attempting DIY disassembly without proper training. Pro-tip: Create a simple maintenance routine that includes a quarterly outlet check, door seal inspection, and visual inspection of the power cord for wear.
60-90 minutes
Steps
Estimated time: 60-90 minutes
- 1
Safety power-down and prep
Unplug the microwave and remove the power source. If you need to move it, do so with care and ensure the work area is dry. Gather a flashlight, a multimeter (if you have one), and a screwdriver set.
Tip: Always start with safety gear and a clear, dry workspace. - 2
Check power and outlet
Plug the microwave into a known-good outlet or test the outlet with a simple lamp. If the outlet is dead, fix the outlet or circuit first before continuing.
Tip: An unrelated outlet issue is the most common cause of 'no heat' symptoms. - 3
Inspect door interlock and latch
Open and close the door several times to feel for any resistance. If the latch is loose or the switch doesn’t click firmly, it may prevent the unit from energizing.
Tip: Door interlock problems often present as 'no heat' even when the unit powers on. - 4
Test fuses and thermal protection
If you’re comfortable, locate the fuse holder and verify continuity with a multimeter. Replace any blown fuse with the same rating, and check the thermal fuse for signs of overheating.
Tip: Fuses protect against overheating; replacing with the incorrect rating is dangerous. - 5
Evaluate magnetron and HV path
Testing the magnetron should be performed by a trained technician. If you suspect arcing or smell scorching, stop and seek professional service.
Tip: HV components can retain charge; never touch them without proper training. - 6
Reassemble and test heat function
Carefully reassemble, plug in, and run a test with water in a microwave-safe cup. Observe for heat, noise, or smells.
Tip: A low-risk test confirms if the basic heating function returns. - 7
Assess results and plan next steps
If heating is restored, monitor for recurrence. If not, prepare for professional service and collect model details, purchase date, and symptom history.
Tip: Document symptoms and tests to speed future repairs.
Diagnosis: Microwave won't heat but the light and turntable may work
Possible Causes
- highPower issue (outlet, circuit breaker, or plug)
- highFaulty door interlock/door switch
- mediumBlown fuse or thermal fuse
- lowFaulty magnetron
- lowHigh-voltage or transformer issues
Fixes
- easyTest the outlet with a known-good device and reset the circuit breaker if needed (easy)
- easyInspect and replace the door interlock or misaligned latch (easy to medium)
- mediumReplace a blown thermal fuse or fuse (medium)
- hardReplace or service the magnetron (hard)
- hardDiagnostics of high-voltage components by a professional (hard)
Common Questions
Why won't my microwave heat even though the light works?
The most common reasons are a faulty door interlock, blown fuse, or an issue with the power supply. Start by checking the outlet and door latch. If these are fine, inspect the fuse or consult a pro for magnetron testing.
If the light works but there's no heat, check the door switch and fuse first, then the power source before calling a technician.
Can I fix a microwave that won’t heat myself at home?
Some fixes, like replacing a blown fuse or testing an outlet, are safe for confident DIYers. More complex repairs, especially magnetron or HV components, should be handled by a trained technician to avoid shock or fire risk.
Basic checks can be done at home, but for magnetron or high-voltage parts, call a professional.
What safety steps should I take before troubleshooting?
Unplug the unit before any inspection, dry surfaces only, and avoid disassembling high-voltage sections. If you smell burning or see smoke, stop immediately and unplug the unit.
Always unplug the microwave before touching internal parts and avoid water contact with electrical components.
Why does my microwave trip the circuit breaker?
A short, overload, or a failing power cord can cause trips. Check for other devices on the same circuit, test the outlet, and inspect the cord for wear before deciding if the circuit is overloaded.
Tripping a breaker is a sign of an electrical issue—start with the outlet and cord check.
Is a damaged door seal dangerous to use?
A damaged seal can lead to improper microwave containment and potential exposure to microwaves. Do not use the unit until the door seal is repaired or replaced by a professional.
Don’t operate a microwave with a damaged door seal—have it repaired before use.
How long should a typical microwave last?
Most microwaves last many years with proper maintenance. If you frequently experience heating issues, plan for a service assessment or consider replacement as part of a cost-benefit decision.
A typical microwave lasts several years, but recurring heating problems may indicate replacement is more economical.
Watch Video
Main Points
- Identify the simplest cause first to fix heating issues quickly
- Prioritize safety above all DIY steps
- Door interlock and power supply are the most common culprits
- Professional service is recommended for magnetron/heavy HV work
- Document symptoms and tests for faster service