Can a Broken Microwave Be Fixed? A Practical Troubleshooting Guide
Learn how to diagnose common microwave problems safely with a practical, step-by-step guide. Discover when you can DIY and when you should call a professional for reliable results.

Most microwave failures start with a simple power or door interlock issue. Begin by unplugging the unit, checking the outlet, and verifying the door latch and interlock switch. If the microwave still won’t start or heats poorly, stop and consult a professional. Quick checks can save time and reduce safety risk.
Can a broken microwave be fixed? What you should know
When a microwave stops working, many home cooks wonder if the problem can be fixed without replacing the entire unit. The short answer is: sometimes yes, sometimes no. The safer path is to approach troubleshooting with a clear plan, starting with low-risk checks and escalating only as needed. According to Microwave Answers, practical fault-finding usually begins with the basics before diving into high-voltage components. This guide is designed for home cooks and homeowners who want practical, safety-first steps to determine whether a repair is feasible and when professional help is the smarter choice. Remember, can a broken microwave be fixed hinges on diagnosing the exact symptom and respecting the appliance’s high-voltage design.
Common failure modes and safety basics
Microwave ovens are complex devices that blend electronics, high voltage, and precise interlocks. The most frequent problems fall into a few broad categories: power or electrical issues, door interlock faults, control panel glitches, and aging HV components. Safety should always come first: never operate a unit with a visibly damaged cord, a burned smell, or unusual sparking. Before touching anything, unplug the device and allow a moment for capacitors to discharge. If you smell smoke or hear buzzing, stop immediately and unplug. Keep children and pets away during any inspection. Brand-wise, the Microwave Answers team emphasizes that routine maintenance and cautious diagnostics reduce risk and extend appliance life.
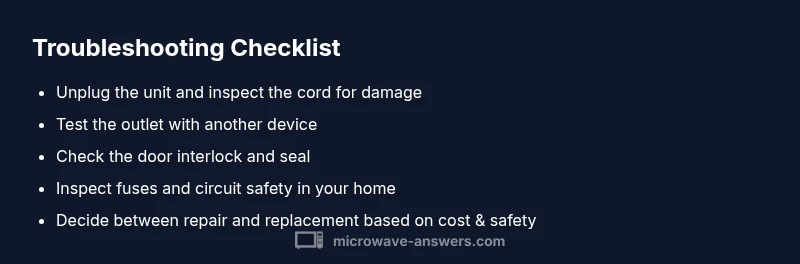
Quick checks before you dive into teardown
Begin with the simplest possibilities. Verify the power source by testing the outlet with another small appliance. Inspect the microwave’s power cord for cracks or warmth along its length. Ensure the door closes securely and the latch engages properly; misaligned doors are a frequent cause of non-start conditions. Check the fuse or circuit breaker in your home panel—tripped breakers or blown fuses are common culprits for a unit that won’t power up. If the unit powers on but doesn’t heat, the issue may lie with the magnetron or high-voltage components, which generally require professional assessment. Document any symptoms to share with a technician.
How to test power, door interlock, and fuses safely
Power testing should be done with the unit unplugged. Then, inspect the outlet with a known-good device to confirm power delivery. If safe to access, gently wiggle the plug to ensure a snug fit; a loose connection can create intermittent power loss. For the door interlock, check for debris and ensure the door latches fully when closed. A faulty interlock can prevent the microwave from starting even when power is present. If you suspect a blown internal fuse or high-voltage component, do not attempt replacement unless you are trained—these parts carry dangerous voltages. When in doubt, contact a qualified technician.
Repair vs replacement: making the call
Prices and practicality matter. If the cost of parts and labor approaches or exceeds a replacement unit’s price, replacement may be the wiser choice, especially for older models with wear in multiple components. Even when a repair is possible, availability of spare parts and the appliance’s overall condition influence the decision. Assess whether the kitchen environment benefits from a newer, more energy-efficient model with modern safety features. The decision should balance safety, cost, and how often the unit is used.
Getting ready for service and prevention tips
If you decide to pursue professional repair, gather model information, purchase history, and a clear symptom timeline to share with the technician. Check warranty status and whether the issue is covered. For prevention, practice safe habits: avoid running the microwave empty, use microwave-safe containers, and keep the interior clean to prevent arcing. Regularly inspect the door seal and hinges for wear. With careful upkeep and informed decisions, you can reduce the odds of future breakdowns and extend the life of your microwave.
Common mistakes to avoid
Avoid bypassing safety interlocks or attempting DIY repairs on high-voltage components. Never operate a damaged unit or one that makes abnormal noises, emits smoke, or has a burning odor. Don’t ignore recalls or manufacturer notices—these often address safety-critical failures. If you’re unsure about any step, pause and seek professional help. The goal is safe operation and preserving your kitchen’s workflow, not rushing to a fix that could put you at risk.
Steps
Estimated time: 60-90 minutes
- 1
Power down and inspect the cord
Unplug the microwave from the wall before touching any internal parts. Visually inspect the power cord for cracks, kinks, or heat damage. If the cord shows damage, do not use the unit until a replacement is installed by a qualified technician.
Tip: Use a flashlight to check the cord and plug; never rely on a touch test for insulation integrity. - 2
Test the outlet and circuit
Plug a different device into the same outlet to confirm power delivery. If the outlet is shared with other heavy loads, try a dedicated circuit or a different outlet away from kitchen appliances.
Tip: If the outlet trips the breaker, reset the breaker and test again; if it trips repeatedly, stop and call an electrician. - 3
Check the door interlock
Close the door firmly and listen for a solid latch engaging. Inspect the door seal for damage or debris that might prevent a proper seal. Do not bypass interlocks or force the door open during operation.
Tip: A misaligned door is a common cause of non-start; realignment or replacement may be needed by a pro. - 4
Inspect fuses and internal components
If you are trained and comfortable, remove the outer cabinet only to inspect visible fuses or thermal fuses. Do not touch high-voltage parts with the unit plugged in, and never attempt replacement unless you are qualified.
Tip: High-voltage parts can retain charge even when unplugged; treat all HV components with extreme caution. - 5
Assess magnetron/high-voltage components
Faulty HV components are the most expensive and risky to replace. If the unit powers on but won’t heat, the magnetron or capacitor could be at fault. This work is best left to a trained technician.
Tip: Request a diagnostic report that lists tested components and any safety concerns. - 6
Decision point: repair or replace
Compare the repair estimate against the price of a new machine with modern safety features and better energy efficiency. If multiple components show wear, replacement may be the wiser option.
Tip: Keep receipts and service notes; they help with warranty considerations and future maintenance.
Diagnosis: Microwave won't start or heat; display blank or timer not advancing
Possible Causes
- highPower issue from outlet, cord, or circuit
- highTripped breaker or blown fuse in home electrical panel
- highDoor interlock or latch failure stopping the circuit
- lowFaulty magnetron or high-voltage capacitor (less common)
Fixes
- easyTest the outlet with another appliance; reset the circuit breaker if needed
- easyInspect the plug and cord for damage; try another 120V outlet if safe
- easyInspect door latch/interlock for debris and ensure door closes firmly
- mediumIf fuse/thermal fuse inside is blown, avoid DIY replacement; call a pro
- hardHave magnetron/high-voltage components assessed by a trained technician
Common Questions
Can I fix a microwave at home?
Some common issues are safe to fix at home if you follow proper safety steps and use the right tools. However, high-voltage components and sealed HV parts often require professional service.
Some fixes are possible at home with careful safety steps; for HV parts, hire a professional.
What safety steps should I take before inspecting a microwave?
Always unplug the unit and wait a few minutes for capacitors to discharge. Keep hands away from internal wiring and never bypass door interlocks.
Unplug the microwave, wait, and don’t bypass safety interlocks.
How do I know when to replace vs repair?
If the repair cost approaches or exceeds a new unit, or if multiple critical components show wear, replacement is often more economical and reliable.
Consider the cost versus a new unit and the unit’s age.
What are signs of a failing magnetron?
A magnetron failure often presents as no heat despite a running motor, unusual noises, or a strong burnt smell. It requires professional diagnosis and replacement.
No heat with odd smells or noises means magnetron issues.
Should I contact the manufacturer for warranty coverage?
Check model-specific warranty terms. Some faults are covered, while others may fall outside, especially after DIY disassembly.
Warranty terms vary; verify coverage before opening the unit.
Is it safe to operate with door interlock issues?
No. A faulty interlock can cause arcing or electrical shock. Stop using the unit and seek professional inspection.
Do not operate with interlock problems; get it checked.
Watch Video
Main Points
- Begin with power and door checks.
- Never bypass safety interlocks.
- DIY fixes work for simple issues; seek pro help for HV components.
- Check warranty and service options before proceeding.
- Use professional service to protect safety and appliance longevity.