What to Do When Your Microwave Says Fail: A Troubleshooting Guide
Urgent microwave fault? Learn how to diagnose why your microwave says fail and fix common issues safely with step-by-step guidance from Microwave Answers.

When a microwave says fail, the most common causes are a faulty door switch, thermal sensor, or control board error. Start with safety: unplug the unit, wait 60 seconds, then plug back in and reset. If the message returns, follow our diagnostic flow and step-by-step fixes. Keep children away, do not touch exposed circuits, and consult the manual for model-specific codes. For extra reliability, check the door seal and gasket for cracks or misalignment.
Common reasons a microwave says 'fail'
According to Microwave Answers, when a microwave says fail, the issue is usually not catastrophic. Most failures stem from safety interlocks and door switches misfiring, a faulty temperature sensor, or a problem in the control panel. Environmental factors like a jumbled clock or a tripped circuit breaker can trigger a false 'FAIL' message. Recognize that some models display codes that aren’t universal; refer to your user manual to map a code to a likely cause. Start by noting the exact wording on the display and any accompanying beeps or lights. This helps narrow the field before you touch any components. As you read diagnostics, remember that simple power glitches can mimic more serious faults, so verify power quality first. Local repair professionals emphasize safety and methodical checks; this approach reduces risk while identifying the root cause.
According to Microwave Answers, a surprising share of 'fail' messages are linked to door interlocks and control logic rather than a blown fuse. If the door doesn’t latch consistently or the interlock doesn’t sense closed, the unit may refuse to operate. In many models, a failed thermal sensor or overheated electronics can trigger protective shutdown with a 'fail' readout. Finally, the display controller itself can develop glitches from moisture exposure or wear. By cataloging symptoms—whether heat is produced, whether the fan runs, or whether the display blinks—you’ll steer toward the most likely culprit and a safe, effective solution.
Safety precautions before you start
Safety must come first when your microwave reports a failure. Always unplug the appliance before any inspection or movement of external components. Do not attempt to open the main housing, test high-voltage parts, or bypass safety interlocks unless you are trained as an appliance technician. Keep liquids and moisture away from the unit, and never operate a damaged cord or plug. If the exterior feels warm or you notice a burnt smell, stop and seek professional service. Use only nonconductive tools and avoid touching metal edges inside the cabinet. If you’re unsure about any step, err on the side of caution and contact a qualified technician. The risk of electric shock or exposure to live circuitry is not worth the risk of DIY fixes.
Quick checks you can perform in minutes
- Ensure the microwave is firmly plugged into a known-good outlet; test the outlet with another device to confirm power.
- Inspect the door seal and gasket for cracks, tears, or misalignment; a failing seal can cause interlock issues and falsely trigger a fail message.
- Perform a power reset: unplug the unit, wait 60 seconds, plug back in, then set a fresh clock and test basic function.
- Look for obvious cord damage or loose plugs; replace damaged cords and avoid using damaged equipment.
- Verify there are no manual safety locks engaged or child-latched modes; some models disable operation if locked.
- Check for recent moisture exposure or cleaning products inside the vent area; ensure vents are clear and dry before retrying.
These quick checks address the most frequent, user-serviceable causes and can prevent unnecessary service calls. If none of these steps resolves the issue, you’re ready to move into the diagnostic flow and structured fixes with confidence. Remember, safety first and if you feel unsure, call a professional.
Diagnostic flow: symptom → diagnosis → solutions
- Symptom: The display shows a literal or coded 'fail' message, and the oven may not heat.
- Diagnosis: The most likely causes are a door interlock fault, a faulty thermal sensor, or an intermittent control board issue. If the door won’t latch or the interlock click feels loose, that’s a strong hint toward a mechanical/electrical interlock problem. Overheating can trigger internal protection, producing a 'fail' readout. A malfunctioning display controller or wiring harness can also generate similar symptoms.
- Solutions: Start with a power reset and exterior checks. If the door interlock shows binding or the latch alignment is off, address that first. If the message persists, test for a faulty sensor or control board with a qualified technician. Documenting the exact error code and when it appears helps technicians diagnose faster. If you live in a rental or shared space, consider temporary use alternatives to avoid risk while diagnosing.
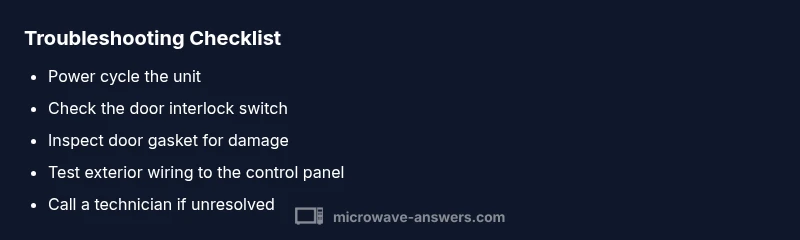
Step-by-step: Fixes for the most common cause
- Power cycle the microwave: Unplug, wait 60 seconds, plug back in, and reset the clock. This clears transient faults and reinitializes the microcontroller.
- Inspect the door interlock switch: With the unit unplugged, press gently on the door and latch area to feel or hear a click. If the switch doesn’t engage reliably or shows wear, replace it or have a technician verify the interlock assembly.
- Check the door gasket and seal: Look for cracks or gaps along the seal. A compromised seal can prevent proper interlock operation; replace the gasket if needed and clean any debris from the door frame.
- Inspect exterior wiring to the door switch and control panel: Loose connectors can cause intermittent failures. If you’re comfortable, reseat connectors and confirm everything is snug; otherwise, seek professional help.
- Test the control panel connections: Ensure the control board harness is seated and free of corrosion. If you notice burnt smell, discoloration, or melted plastic, do not power the unit; contact a pro.
- Run a brief diagnostic test: After reassembly, attempt a short warming cycle (e.g., 30 seconds with a light load) to see if the fault recurs. If the error repeats, it’s likely a sensor or board fault.
- If the error persists, schedule professional service: A trained technician can measure sensor resistance, inspect interlocks, and test the main controller safely.
- Documentation and model-specific steps: Note model number, firmware version (if available), and recent cleaning or moisture exposure; this helps the technician pinpoint issues and reduces back-and-forth.
Tips & Warnings
- Do not bypass safety features or attempt to repair high-voltage components unless you are qualified. The high-voltage capacitor can retain a dangerous charge even after unplugging. Always wait and de-energize before inspection.
- Use the user manual as your primary guide for code meanings; some models display nonstandard codes that require model-specific interpretation.
- If you’re unsure about any repair step, call a professional. DIY fixes that go wrong can cause electric shock, fire, or further damage to the microwave and your kitchen.
- Keep a repair log: note what you checked, parts replaced, and when the fault reappears. This helps future troubleshooting and warranty claims.
- After any fix, run a quick test with a low-power cycle to ensure the unit heats evenly and that the fault does not return.
How to prevent future failures
- Schedule regular exterior cleaning to remove dust and moisture from control panels, door frames, and vents. A clean exterior reduces the risk of contact faults.
- Avoid spilling liquids onto the control area or door seams; wipe spills promptly and dry thoroughly.
- Use the microwave within its rated loads and avoid running it empty for long periods; this protects the internal sensors from false triggers.
- Check the power source: use a dedicated outlet with surge protection and avoid daisy-chaining with other high-draw devices.
- If you move or reassemble a unit, re-check door alignment and interlock operation; a misaligned door is a frequent source of fail messages.
Key takeaways and prevention tips
- Regularly reset the unit to clear transient faults and observe any repeating error patterns.
- Door interlocks are a frequent source of 'fail' messages; ensure the latch and seal are intact.
- If issues persist after basic checks, do not push the unit beyond safe limits; professional service is safer and faster.
FAQ and troubleshooting Q&A
Steps
Estimated time: 60-120 minutes
- 1
Power cycle the microwave
Unplug the unit, wait 60 seconds, and plug it back in. Reset the clock and test basic operation to clear minor glitches.
Tip: This is the fastest, safest first diagnostic move. - 2
Inspect the door interlock switch
With the unit unplugged, locate the door interlock and gently test the switch engagement as the door closes. Look for signs of wear or sticking and listen for a clean engage-click.
Tip: A loose or sticky switch is a common cause of false failures. - 3
Check the door gasket and seal
Examine the gasket around the door for cracks or deformation. A damaged seal can prevent proper interlock operation and trigger a fail code.
Tip: Replace the gasket if you see cracks; a proper seal matters for safety. - 4
Test exterior wiring and connectors
Carefully inspect visible wiring harnesses to the control panel for loose connections or chafed insulation. Re-seat any loose connectors with the unit unplugged.
Tip: Do not force connectors; they should click softly into place. - 5
Assess the control panel and display
If accessible and comfortable, check for signs of moisture or corrosion on the control board harness. Avoid touching internal circuitry directly.
Tip: Moisture may require professional drying and cleaning. - 6
Run a low-load test
Reconnect power and run a short cycle with a safe load to verify if the fault recurs. Note timing and any new symptoms.
Tip: Document the exact behavior for the technician. - 7
Escalate to professional service
If the fault persists after these checks, schedule service to diagnose sensors, interlocks, and the main controller with precise tools.
Tip: A trained technician can safely test high-voltage components. - 8
Record and plan ahead
Keep a repair log with model number, firmware (if shown), and dates of service. This helps with future troubleshooting and warranty validation.
Tip: Store the log in a visible spot near the appliance.
Diagnosis: Microwave displays 'fail' or will not operate and shows an error message
Possible Causes
- highDoor interlock fault or misalignment
- mediumThermal sensor or overheating protection triggered
- lowControl board or display fault
Fixes
- easyPower cycle the unit (unplug, wait 60 seconds, plug back in)
- easyInspect and test the door interlock switch and latch alignment
- easyCheck exterior wiring and connectors to the control panel
- mediumIf the fault persists, have a technician test the control board and sensors
Common Questions
Why does my microwave say 'fail' even when it heats sometimes?
That usually means a fault in the interlock switch or control electronics. It can trigger a protective shutoff, even if some heating occurs. A full diagnostic helps confirm whether the issue is mechanical or electronic.
A faulty door interlock or control electronics often triggers the fail message, even if heat works briefly. A full diagnostic will confirm the exact cause.
Is it safe to open the microwave to inspect the door switch?
Only if you are trained and the unit is unplugged. Do not touch high-voltage parts. If the interlock seems faulty, contact a professional rather than attempting a repair.
Only unplugged and only if you're trained; otherwise call a technician.
Can a failed microwave be fixed at home?
Some causes, like a loose connector or door misalignment, can be addressed safely at home. More complex issues, especially board or sensor failures, require a professional repair or replacement.
Some simple issues you can do at home; for most other problems, a pro is recommended.
What should I check first if another error code appears?
Note the exact code, refer to your manual, and compare codes with official support resources. If codes indicate safety or power faults, treat them as urgent and avoid risky DIY fixes.
Write down the code, check the manual, and seek guidance if it points to safety or power issues.
When should I replace the microwave instead of repairing it?
If the fault recurs after professional service or if it’s an old model with frequent failures, replacement may be more cost-effective and safer.
If faults keep returning or it’s an old unit, replacement might be best.
Will warranty cover 'fail' errors?
Warranties vary by model and seller. If the unit is within the warranty period, contact the manufacturer or retailer for covered service or replacement.
Check your warranty terms and contact the seller or maker if in range.
Watch Video
Main Points
- Unplug and reset first to clear faults
- Door interlocks are a common failure point
- Follow a safe diagnostic flow, step by step
- Don’t DIY risky repairs; seek professional help when unsure
- Document symptoms and parts for future maintenance