Sharp Microwave Repair: Safe DIY Guide & Quick Fixes
Learn safe, practical steps to diagnose and repair common Sharp microwave issues. This DIY guide covers safety, tools, step-by-step diagnostics, and when to call a pro.

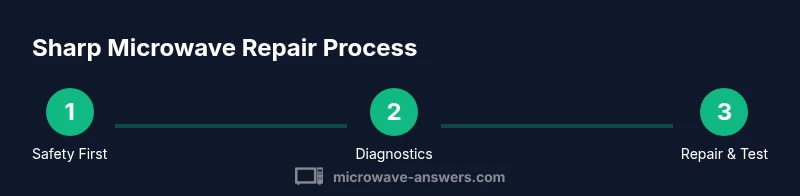
You will learn to diagnose and safely repair common Sharp microwave issues, from dead heating to door-interlock faults. This guide covers safety precautions, essential tools, and a step-by-step approach to testing components like diodes, capacitors, and magnetrons. By following proper procedures, you can identify faulty parts and decide whether DIY repair or professional service is best.
What Sharp Microwave Repair Involves
According to Microwave Answers, sharp microwave repair focuses on diagnosing issues that affect heating efficiency, door interlocks, or control boards, then replacing faulty components with model-appropriate parts. Regardless of the symptom, the core process is the same: verify safety, access the internal components, test critical parts with appropriate tools, and confirm operation through a controlled test. This approach reduces the chances of repeating symptoms and helps you decide when a full replacement is more economical.
For many homeowners, the first step is to consult the user manual for model-specific warnings and service cautions. The Sharp line is known for compact designs that integrate high-voltage components; even seemingly minor faults can indicate an issue with the door interlock, thermal fuse, or diode chain. Because high voltage can linger after unplugging, you should wait for a cool-down period and use a non-contact voltage tester to confirm that circuits are dead before touching any innards. By taking a careful, methodical approach, you can avoid accidental shocks and damaged parts. Remember: if you are unsure, prioritize safety and call a qualified technician.
Common Issues in Sharp Microwaves
Sharp microwaves experience a range of symptoms that guide repair focus. If the unit powers on but does not heat, the problem often lies with the high-voltage diode, magnetron, or the high-voltage capacitor. If the display is erratic or the keypad misreads input, control board or membrane issues may be at fault. Door interlock problems manifest as failure to start or a safety interlock that repeatedly trips. A humming noise or arcing can indicate worn waveguide components or a damaged magnetron. Finally, a microwave that runs with no light or the turntable stuck may point to faulty door switches or gear assemblies. In all cases, start with a clear symptom log, note when the issue started, and check for obvious signs of wear such as burnt connectors or melted insulation. Documenting symptoms helps narrow the fault and reduces unnecessary disassembly.
Safety First: DIY vs Pro
Electrical appliances contain high-voltage circuits that can cause serious injury. This section helps you decide whether to tackle a Sharp microwave repair yourself or hire a professional. If you can unplug the unit and avoid discharging capacitors, you can perform non-invasive diagnostics and basic component checks. However, if you encounter a live high-voltage area, a damaged magnetron, or a crack in the magnetron housing, stop immediately. The risk of shock, fire, or explosion demands professional service. Always confirm the model’s service manual guidance and local regulations. In the interest of safety, consider protective gear, a non-conductive workspace, and clear labeling of parts and wires. If there is any uncertainty, the Microwave Answers team recommends choosing professional repair to protect your home and appliance.
Tools and Materials You'll Need
When preparing for Sharp microwave repair, assemble a basic toolkit and model-specific parts. Essential items include a non-contact voltage tester, a multimeter, a screwdriver set with both Phillips and flathead bits, insulated gloves, needle-nose pliers, and a replacement parts kit that matches your Sharp model. A magnetic parts tray, flashlight, and a clean workspace with good lighting are helpful. Have a service manual or model-specific guide on hand to verify connector layouts and screw sizes. For testing high-voltage components, ensure you know the proper capacitor discharge technique and safe handling practices. Keep a spare fuse and diode set ready in case of fault diagnosis.
Diagnostic Flow: How to Identify Faults
Adopt a structured approach to pinpoint issues without unnecessary disassembly. Start by unplugging the unit and verifying power, then inspect the door interlocks for wear or misalignment. Use a multimeter to test the diode, high-voltage capacitor, and magnetron for continuity and proper resistance ranges. Next, examine the control board for burnt components, swollen capacitors, or loose wiring. If you observe sparking, arcing, or heat damage around waveguides, assume a waveguide or magnetron issue and replace with model-appropriate parts. Finally, reassemble carefully and perform a controlled dry-run test to confirm the fault has been resolved.
Replacing Components: When and How
Component replacement is appropriate when diagnostics point to a single failed part, such as a faulty diode, blown fuse, or degraded door interlock switch. Before replacing, confirm the replacement part matches your Sharp model’s specifications and wattage. Disconnect power, discharge any residual energy, then remove the outer cabinet to access the chassis. Replace the faulty part with a properly rated alternative, recheck all connectors, and ensure insulation is intact to avoid shorts. After replacement, run a short test to verify heating and safety features are functioning as expected.
Testing After Repair
Post-repair testing is crucial for safety and reliability. Reconnect power and perform a sequence of checks: verify the microwave heats evenly, test the door interlock with a manual press, and run a brief power cycle at low power. Listen for unusual noises, check that the turntable spins smoothly, and inspect the interior for loose screws or wires. Use a non-contact tester to ensure no exposed live circuits, and confirm there’s no smoke or unusual odor after a few minutes of operation. If any fault recurs, re-check your diagnostics and parts, or seek professional service.
Cost, Warranty, and Safety Considerations
Repair costs for Sharp microwaves vary based on the part, availability, and labor, and there is no universal price; the decision to repair or replace should consider warranty coverage, model age, and expected remaining lifespan. If your unit is still under warranty, consult the manufacturer or authorized service center before attempting any internal repairs. Keep in mind that high-voltage components are hazardous and improper handling can cause injury or fire. For best results, document symptoms, parts tested, and replacement steps to support future service or warranty claims. The Microwave Answers team emphasizes safety above all and recommends professional evaluation for high-voltage or magnetron-related issues.
Model-Specific Tips for Sharp Models
Sharp models vary in internal layout and safety interlocks, so always reference the exact service manual for your model number. This section offers practical tips drawn from common Sharp configurations: verify door interlock alignment before reassembly, replace the thermal fuse if it shows signs of overheating, and inspect the magnetron housing for cracks or arcing. For owners performing DIY work, label wires and take photos during disassembly to simplify reassembly and minimize the risk of miswiring. The Microwave Answers team also notes that keeping model-specific part catalogs on hand reduces downtime and improves repair success. As a closing note, the team recommends partnering with a qualified technician for any uncertain repair scenario.
Tools & Materials
- Non-contact voltage tester(Check for live circuits before handling internal components)
- Multimeter(Test diodes, capacitors, and magnetron circuits)
- Phillips and flathead screwdrivers(Magnetic tips preferred; ensure proper size for model screws)
- Nut driver set(Common for chassis screws)
- Insulated gloves(Protect hands during handling of energized parts)
- Replacement parts kit (matched to Sharp model)(Diodes, fuses, interlock switches, thermistors as needed)
- Magnetic parts tray(Keeps small screws organized)
- Service manual or model-specific guide(Essential for wiring diagrams and torque specs)
Steps
Estimated time: 60-120 minutes
- 1
Power down and unplug
Unplug the microwave from the outlet and disconnect any power sources. Wait at least 60 seconds for capacitors to discharge, then use a non-contact tester to confirm no live voltage is present before touching internal parts.
Tip: Never work on energized appliances; discharge capacitors safely using the advised method. - 2
Open the outer cover safely
Remove the outer cabinet screws per model guidelines and gently lift the cover. Keep track of screws and connectors, labeling them as you go. Do not touch internal wiring beyond accessible components.
Tip: Keep a clean, magnetized tray nearby to organize small screws and clips. - 3
Inspect door interlock switch and hinges
Visually inspect the door interlock switch and hinges for wear, burning, or misalignment. Use a multimeter to test interlock continuity when the door is operated. Replace any worn or sticking components.
Tip: Interlock issues are a common cause of start failure; verify both switches and wiring harness connections. - 4
Test high-voltage components
With power disconnected, test the diode and high-voltage capacitor for continuity and proper resistance ranges as per the service manual. Inspect the magnetron for signs of damage or arcing and replace if necessary.
Tip: Never bypass safety features; use model-specific test procedures exactly as documented. - 5
Replace faulty parts and reassemble
Install the identified faulty component with a correctly rated replacement. Re-seat all connectors firmly and restore safety shields. Reassemble the cabinet following the original sequence.
Tip: Double-check all connectors before powering on to prevent post-assembly faults. - 6
Final test and safety check
Plug in and run a short test cycle at low power to confirm heating and control operation. Listen for unusual sounds and check for any arcing or heat buildup. If stable, perform a full-cycle test.
Tip: Observe safety procedures; if anything feels off, power down immediately and re-check your work.
Common Questions
Is it safe to repair a Sharp microwave at home?
With proper precautions and the correct model-specific guidance, some non-high-voltage diagnostics and basic checks can be done at home. Always unplug the unit, discharge capacitors, and avoid touching high-voltage circuits. If you encounter high-voltage components or uncertain symptoms, seek professional service.
Yes, but only if you follow safety steps and stick to low-risk diagnostics; for high-voltage issues, consult a professional.
What are common signs magnetron failure in Sharp microwaves?
Common signs include no heating despite power, unusual humming, or arcing inside the cavity. A burnt smell or visible damage to the magnetron housing also indicates replacement is needed. Always verify with model-specific testing before replacing.
Common signs are lack of heating, loud humming, or arcing; verify with tests before replacement.
Should I replace the entire unit instead of repairing?
Consider the age of the microwave, warranty status, and expected remaining life. If many components show wear or the magnetron is failing, replacement may be more economical in the long run. Use a professional assessment to compare repair costs versus a new unit.
If it’s old or multiple parts fail, replacement may be wiser; otherwise, repairs can extend life.
Will repairing void my warranty?
Opening the unit can void warranties if done without authorization from the manufacturer or an authorized service center. Check the warranty terms and consider authorized service if the unit is still under coverage. Documentation of service is important for future claims.
Opening the unit can void warranty; check terms and consider official service if covered.
What safety steps are essential before starting repairs?
Always unplug the unit, discharge capacitors following model-specific guidance, wear insulated gloves, and use non-conductive tools. Keep a dry workspace and avoid liquids near electrical components. If any step feels risky, stop and consult a professional.
Unplug, discharge, and use proper protection; stop if anything seems risky.
Watch Video
Main Points
- Verify safety before any internal work
- Use model-specific manuals and parts
- Diagnose before replacing components
- Document findings for future service
- Seek professional help for high-voltage issues