How to Check Microwave Door Switch with a Multimeter: A Step-by-Step Guide
Practical steps to test a microwave door switch using a multimeter. Learn safety precautions, locate the switch, interpret readings, and decide when to replace components for reliable operation.

Learn how to check a microwave door switch with a multimeter to diagnose why your microwave won’t start or the door won’t latch. This guide covers safety steps, the tools you need, and a clear test procedure so you can confirm continuity and determine if the switch needs replacement.
Why test a microwave door switch with a multimeter
A microwave door switch, often called an interlock, is a small mechanical component that prevents the oven from operating when the door is ajar. If your microwave starts sporadically, won’t start at all, or refuses to run even when the door appears closed, a faulty door switch is a common culprit. By testing for electrical continuity with a multimeter, you can confirm whether the switch is doing its job or if it needs replacement. This test is a quick, inexpensive diagnostic that helps you avoid guessing about control boards or wiring. According to Microwave Answers, door-switch faults account for a notable share of non-start issues in home microwaves, especially in older models.
Safety and preparation for testing
Safety comes first when working on appliances. Always unplug the microwave and, if feasible, unplug the circuit from the wall outlet. Wait at least 2 minutes to allow any stored charge in the control circuitry to dissipate. Wear dry hands and avoid touching metal parts; use insulated gloves if available. Do not operate the microwave with the cabinet open or while touching exposed wires. If you’re unsure, pause and consult a professional. The Microwave Answers team emphasizes caution; faults can involve high-voltage components, even after unplugging, so handle with care.
What you need: tools and workspace
Before you begin, gather the essential tools and create a clean, dry workspace:
- Digital multimeter (set to continuity or diode mode, 200–500 ohms range)
- Small screwdriver (Phillips or flat-head, depending on your model)
- Replacement door interlock switch (optional, for quick replacement if fault is confirmed)
- Insulated gloves (optional for extra protection)
- Towels or a dry mat to protect the surface
- Your microwave’s model number or service manual for part compatibility
A tidy workspace reduces the chance of dropped screws or miswired connections during the test.
How to locate the door switch and access terminals
Most microwaves place the door interlock switch near the top edge of the door frame inside the cabinet. Access usually requires removing a back or side cover panel with the appropriate screwdriver. Once open, locate the switch assembly with two or more terminals and look for the wiring harness that leads to the control board. Take a photo of wires and terminals before disconnecting anything to make reassembly easier.
How to interpret multimeter readings for a door switch
With the door closed, the switch should present a low resistance path (continuity) between its two terminals. With the door open, continuity should disappear (infinite resistance). If your multimeter reads continuity in both states, the switch may be stuck or misaligned. If there is no continuity when the door is closed, the switch is faulty or not seated properly. Use the diode setting if available to verify the internal diode (if present) behaves as expected in both directions.
Common outcomes and next steps
If readings are correct (closed = continuity, open = no continuity), the switch is likely fine and the issue lies elsewhere. If readings are inconsistent or do not match the expected pattern, replace the switch or consult a technician. Re-seat any connectors carefully and verify that the door latch engages smoothly. When in doubt, replace the switch with a model-specific part to restore safe operation and avoid further electrical risk.
Tools & Materials
- Digital multimeter(Set to continuity or diode mode; 200–500 ohms range is typical.)
- Screwdriver(Phillips or flat-head, depending on cabinet screws.)
- Replacement door interlock switch(Have a model-specific part on hand in case replacement is needed.)
- Insulated gloves(Extra protection when handling internal components.)
- Towel or dry mat(Protect surfaces and keep the area clean.)
- Model number/manual(Helps verify correct part and wiring.)
Steps
Estimated time: 30-45 minutes
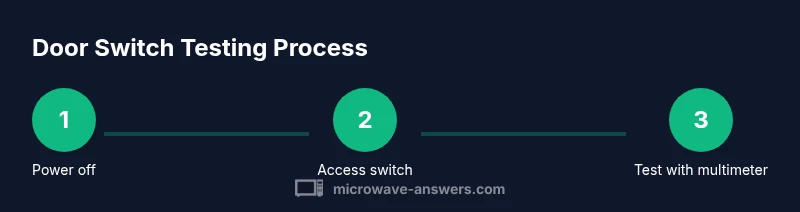
- 1
Power off and unplug
Unplug the microwave and wait a few minutes for any stored charge to dissipate before touching components. This reduces the risk of shock while accessing the door switch area.
Tip: Use a dry surface and dry hands; never work with wet hands around electrical parts. - 2
Open the cabinet to access the switch
Remove the outer screws and gently slide off the cabinet cover to reveal the interlock switch. Keep screws organized and avoid forcing panels.
Tip: Use a magnetized screwdriver or a labeled container for screws. - 3
Identify switch terminals
Locate the two primary terminals that feed the interlock switch and note wire positions. If possible, label wires so reassembly is straightforward.
Tip: Take a photo before disconnecting wires to avoid miswiring. - 4
Set multimeter to continuity
Touch the meter probes to the two terminals with the door closed, then open the door and observe changes in continuity. The reading should appear when closed and disappear when open.
Tip: If your meter has a beep mode, enable it for quick feedback. - 5
Test with door open and closed
Repeat the test for both door states to confirm consistent behavior. A faulty switch may show inconsistent readings or no change between states.
Tip: Move your probes gently to avoid bending or stressing terminals. - 6
Decide on replacement
If readings are abnormal or inconsistent, replace the door interlock switch with a compatible part. Reassemble and test the microwave to confirm proper operation.
Tip: If unsure, consult a repair technician for a safe outcome.
Common Questions
What is a microwave door switch and what does it do?
The door switch, or interlock, prevents operation when the door is open and allows the microwave to run only when closed. Testing ensures it engages correctly.
The door switch stops the microwave from running if the door is open. We test its contacts to confirm it switches on when closed.
Can I test the switch without opening the microwave?
No, access to the switch is required to test; unplug first and remove the cover panel if you’re comfortable.
You need to reach the switch; unplug the unit and remove the cover to test.
What readings indicate a good switch?
When the door is closed, the multimeter should show continuity; when open, no continuity. Inconsistent results mean replacement.
Continuity when closed and no continuity when open generally means a healthy switch.
Is it safe to test a microwave door switch?
Yes, if you unplug first and avoid touching live circuitry. Do not touch internal wires while testing.
Yes, as long as it’s unplugged and you’re careful not to touch live parts.
What if the test is inconclusive?
If readings don’t match expected behavior, replace the switch or consult a repair technician.
If readings don’t line up with expected behavior, replace the switch or seek help.
Watch Video
Main Points
- Unplug before testing and discharge any stored energy
- Test both door states for reliable readings
- A faulty switch is a common cause of non-start issues
- Replace with model-specific part for safe operation