Fix Microwave Door Switch: Step-by-Step Guide
Learn to diagnose and safely fix a malfunctioning microwave door switch with a practical, step-by-step approach from Microwave Answers. Includes safety tips, tools, and when to replace.

This guide will help you diagnose a faulty microwave door switch and perform a safe, effective repair or replacement. You’ll learn common symptoms, essential safety checks, and a clear, step-by-step flow to restore door operation. Expect guidance on when to test with a multimeter, how to disconnect power, and how to verify the interlock works after reassembly.
What a microwave door switch does and why it fails
The door switch in most microwave ovens acts as a safety interlock. It ensures the appliance only runs when the door is firmly closed and helps prevent arcing or accidental operation. Over time, the switch can wear out from repeated opening and closing, accumulate grime in the contact surfaces, or suffer from heat cycling that degrades the internal springs. According to Microwave Answers, understanding how this switch fits into the door latch assembly is the first step toward a safe and successful repair. When the switch fails, you may notice symptoms such as the oven not starting, the interior light behaving oddly, or the display showing errors even with the door shut. Some models have multiple interlocks for redundancy, which can complicate diagnosis but also improve safety. In any case, a faulty door switch can compromise safety and performance; addressing it promptly helps prevent further damage and ensures reliable operation.
Symptoms signaling a faulty door switch
Common symptoms include the microwave not starting when the door is closed, the oven running with the door ajar, inconsistent light behavior, or intermittent control panel responses. In rare cases, buzzing or arcing may indicate a stuck interlock or a damaged connector. If you notice the door latch feels loose or the door doesn’t seal consistently, the interlock mechanism is worth inspecting. Remember that a failing switch can affect other safety interlocks, so diagnosing early reduces the risk of more serious component failure. To keep safety intact, always verify power is disconnected before touching any interior components and consult the service manual for your model’s specific interlock layout.
Safety prerequisites before attempting a repair
Before you touch any internal parts, unplug the microwave and allow time for capacitors to discharge. Wear protective eyewear and use non-conductive gloves when handling wiring. Keep a dry, clean workspace and avoid touching metal surfaces with wet hands. If your model has a high-voltage interlock or involves the control board, treat the repair as potentially dangerous and consider professional service for anything beyond basic switch replacement. Always consult the manufacturer’s manual for disassembly instructions particular to your unit.
Understanding model variations and when to replace
Door switch designs vary by model. Some use a single interlock, while others employ a pair of interlocks for added safety. If you find a visibly burned connector, melted insulation, or corroded pins, replacement is usually the safer option. Repairs that involve delicate micro-soldering or accessing the high-voltage path should be handled by trained technicians. In general, quick wear through age and heavy use often makes a full switch replacement more reliable than attempting to repair a damaged internal contact.
Accessing the door switch housing behind the door panel
Gaining access typically involves removing the outer cabinet screws or opening the door frame. Start with the bottom panel screws, then locate the interlock housing near the hinge or under the door latch. Use a soft tool to release clips and avoid snapping delicate housings. Photograph each step for reassembly. If your model uses a nonstandard fastener, refer to the service manual or manufacturer diagrams. Take care to avoid bending wires and to maintain proper insulation when you move components.
Diagnosing without risky disassembly: tests you can perform
With power disconnected, you can often verify switch operation via simple continuity checks between the switch terminals as the door engages the latch. If the knob or lever is sticky, the switch may not be actuated properly. For non-destructive testing, use a multimeter on the continuity setting and observe whether contact is made when the door is pressed. If you cannot locate the terminals, consult the manual or wiring diagrams. Remember that some switches require the door to be closed to test; follow model-specific instructions.
The repair process at a glance: what to expect
If you determine the switch is faulty, you’ll remove the old unit, disconnect the harness, and replace it with a compatible replacement. Reassembly requires careful alignment, ensuring no wires are pinched and that springs return to their resting positions. After installation, you’ll test door closure, ensure the light and display respond correctly, and perform a dry run without food to verify the interlock sequence. Depending on model, you may also need to recalibrate or reset the control board after a switch replacement.
Replacing vs repairing: cost, availability, and reliability
Repairing a damaged door switch is often quicker and cheaper than a full control-board repair, but it depends on part availability and model compatibility. Replacement switches are sold as assemblies or individual interlocks; prices vary by OEM and aftermarket suppliers. While repairs can restore function, a damaged interlock might indicate broader wear in the door latch or frame. If in doubt, consider a professional assessment to ensure long-term reliability and safety.
Post-repair testing and safety checks
After replacement, reconnect power and perform a series of tests: close the door firmly, start the unit, and verify the interlock stops the microwave when the door opens. Check the door seal for gaps and ensure the light and timer behave correctly. Run a no-load test cycle first to confirm that the appliance behaves safely. If the oven fails any test, recheck wiring orientation and connector seating before calling a technician.
Maintenance tips to extend door switch life
Keep the door latch area clean from food debris that can interfere with the switch actuator. Inspect door seals for wear and replace damaged gaskets promptly. Handle the door gently to minimize switch wear, and if you notice any rapid changes in performance, address it early rather than waiting for a total failure. Regular inspections can prevent surprise breakdowns and extend the life of the door interlock.
Common mistakes and how to avoid them
Mistakes include ignoring safety steps, mixing up connector orientation, and forcing panels or fasteners. Another pitfall is missing hidden screws or underestimating the complexity of the interlock system. To reduce risk, work in a well-lit area, keep track of screws, and refer to the manufacturer’s diagrams. If you encounter unfamiliar connectors, stop and verify with the service manual or a professional.
What Microwave Answers recommends next
If you follow these steps and still have issues, the fault may lie in the control circuit or a secondary interlock. In that case, plan a professional evaluation. Microwave Answers emphasizes safety-first repair: never bypass interlocks or operate the unit with exposed wiring. For many users, replacing a worn door switch is a practical, reliable fix that restores safety and performance.
Tools & Materials
- Phillips head screwdriver (PH2)(for most door panel screws)
- Flathead screwdriver or prying tool(gently release clips without bending)
- Multimeter / continuity tester(verify door switch continuity)
- Replacement door switch assembly(match model if possible)
- Non-conductive gloves(protect hands and prevent shorting)
- Safety glasses(eye protection during disassembly)
- Screw organizer or magnetic tray(keep screws organized)
- Model-specific service manual(optional but helpful)
Steps
Estimated time: 30-60 minutes
- 1
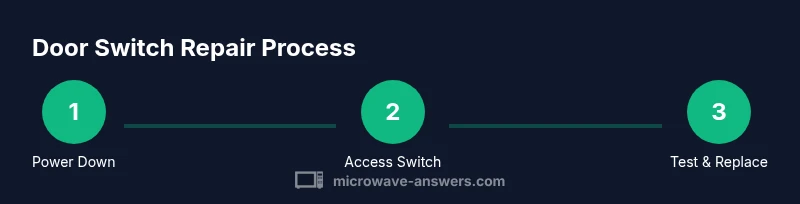
Power down and unplug the microwave
Unplug the unit from the wall outlet and wait at least 5 minutes to discharge residual energy. This reduces the risk of electric shock or capacitor discharge when you begin work.
Tip: Even if the unit seems off, always unplug first. - 2
Open the cabinet to access the door area
Remove exterior screws or clips following your model's manual. Gently separate the cabinet panels and avoid forcing any parts; keep track of screws and connectors.
Tip: Take photos during disassembly to help reassembly. - 3
Locate the interlock switch and connectors
Find the switch assembly adjacent to the door frame or latch. Inspect for broken clips, melted insulation, or loose wires that might prevent proper actuation.
Tip: Note connector orientation before unplugging wires. - 4
Test switch continuity with the door closed
With power still disconnected, use a multimeter to check continuity when the door is pressed. Inconsistent readings indicate a faulty switch.
Tip: If you cannot locate terminals, consult the service manual. - 5
Replace the faulty switch
Disconnect the harness, remove mounting screws, and swap in the new switch. Reconnect the harness in the correct orientation and secure the device.
Tip: Take a photo of wiring before removal. - 6
Reassemble and align the door
Carefully reattach the cabinet, ensuring no wires are pinched and the door aligns with the seal. Reinsert screws and check door fit.
Tip: Test door alignment before finalizing screws. - 7
Test the repaired unit safely
Plug in and run a no-load cycle with the door closed. Confirm the light, display, and start sequence behave correctly and the door interlock stops power when opened.
Tip: Never run the microwave with food until you’re confident in the repair.
Common Questions
What are the most common symptoms of a bad microwave door switch?
The microwave may not start, run with the door open, or show inconsistent lights or display behavior. These signs point to a faulty interlock that should be tested and possibly replaced. Always verify power is disconnected before inspection.
Common symptoms include the oven not starting or running with the door open. Make sure to unplug the unit before testing.
Can I test a door switch without taking the microwave apart?
In some models, non-invasive checks are possible on the exterior, but most reliable tests require access to the switch. Refer to the service manual for safe exterior checks and model-specific guidance.
Some tests can be done from the outside, but full testing usually needs interior access per the manual.
Is replacing the door switch safe for a beginner?
Yes, if you unplug the unit and follow the manual. If you encounter high voltage components or damaged wiring, stop and seek professional help.
Yes, as long as you unplug first and follow the manual. If you see damaged wiring, call a pro.
What tools do I need to replace the door switch?
A screwdriver, a multimeter for testing, and the correct replacement switch are the basics. Depending on the model, you may also need pliers or a connector release tool.
You’ll typically need a screwdriver, a multimeter, and the replacement switch. Some models need extra tools.
When should I call a professional?
If you encounter burnt connectors, a cracked door frame, or if the repair requires disassembling the high-voltage area, professional service is recommended. Safety-first is the guiding principle.
Call a pro if you see burned parts or you’re unsure about the high-voltage area.
Are there any safety tips for beginners?
Always unplug the unit, discharge capacitors if instructed, wear eye protection, and work on a non-conductive surface. Don’t rush the disassembly and refer to the manual for model-specific steps.
Unplug, wear eye protection, and follow the manual. Don’t rush the disassembly.
Watch Video
Main Points
- Identify the door switch layout for your model.
- Unplug and test safely before touching internal parts.
- Replace worn switches rather than attempting risky repairs.
- Test thoroughly with the door closed before using with food.
- Keep maintenance up to extend interlock life.