Black & Decker Microwave Ovens Troubleshooting Guide
Urgent, practical troubleshooting guide for Black & Decker microwave ovens. Learn quick fixes, safety checks, and step-by-step diagnostics to restore heating and safe operation.

The most likely causes are a power issue, a faulty door switch, or a blown fuse. Start by testing the outlet with another device, then verify the door latch and that the turntable rotates when the door is closed. If the unit still won’t heat, unplug and move to the diagnostic flow for Black & Decker microwave ovens.
Why black & decker microwave ovens fail and what to do first
When a microwave from this brand acts up, the root causes are often surprisingly simple. According to Microwave Answers, many issues stem from easy-to-fix problems like a stubborn power supply, a worn door interlock, or a blown fuse inside the unit. For home cooks, starting with a methodical, safety-first approach saves time and protects your appliance. In this section, we explore why black & decker microwave ovens fail and outline a practical plan to determine whether a quick home fix is possible or if a professional repair is warranted. By understanding symptom clusters and safe testing steps, you’ll gain clarity fast and reduce downtime in the kitchen.
This practical guide uses plain language and real-world examples to help you troubleshoot efficiently, without unnecessary disassembly. Remember: safety comes first, and if you’re ever unsure, contact a qualified technician. Microwave Answers emphasizes cautious, methodical testing tailored to the expectations of home cooks and homeowners.
Safety-first protocol before you touch the internals
Safety is non-negotiable when troubleshooting microwaves. Always unplug the unit and allow it to cool before inspecting any components. Keep hands dry, work on a non-conductive surface, and avoid touching metal parts that could cause shock. If the unit is still plugged in, never use metal tools near the cavity, and never operate with the door open. In addition, check that the power outlet is grounded and not sharing with a high-load device. The Microwave Answers team emphasizes caution: if you smell burning, see smoke, or hear buzzing, stop immediately and disconnect power. When in doubt, consult a qualified technician rather than attempting complex rewiring inside the housing. This mindset applies to all troubleshooting steps for Black & Decker microwave ovens.
Quick checks you can perform without tools
Before you dismantle anything, try these fast checks. Confirm the outlet provides power by plugging in a simple lamp or charger. Ensure the microwave door closes firmly and the latch engages the interlock; a misaligned door is a frequent cause of non-heating. Listen for the hum of the cooling fan when the unit is running, and verify the interior light turns on when you open the door. Also, inspect the exterior housing for signs of heat damage, discoloration, or a blown fuse indicator. If the unit lacks power or heating after these tests, progress to the diagnostic flow for a systematic diagnosis of the issue in Black & Decker microwave ovens.
Diagnostic indicators and their meanings
Microwave ovens give subtle clues about what’s wrong. A unit that powers on but won’t heat often hints at a failed door interlock or a blown fuse. A buzzing sound or sparking inside the cavity can indicate a damaged magnetron or fault in the high-voltage circuit, which requires professional attention. If the turntable won’t rotate, inspect the motor and alignment of the roller ring. A symptom like intermittently heating or random shutoffs usually points to a loose connection or a failing control board. By correlating the symptom with a likely component, you can target the most effective fixes without unnecessary disassembly.
Common electrical issues: power, fuses, and boards
Electrical problems are among the most common reasons a microwave stops working properly. A tripped circuit breaker or a blown fuse will cut power entirely, so confirm the outlet has voltage with a multimeter or a test device. Internal fuses can blow after a surge, leaving the unit unresponsive. If you suspect a faulty control board, look for signs of damage, swelling, or burn marks on the PCB. Remember that working on high-voltage components inside a microwave is hazardous; if you’re unsure, stop and call a technician. In all cases, avoid bypassing safety features to restore function.
Door interlock and latch: why it stops heating
The door interlock is a safety feature that prevents operation with the door ajar. Over time, magnets and switches can wear, causing the unit to run without heating or to fail to start. Check that the door seals are intact and the latch engages fully when closed. If the interlock tests show any malfunction, do not override the system; door sensor failures can lead to arcing and fires. This is a frequent cause of non-heating in many brands, including Black & Decker models, and a professional retrofit or switch replacement may be required.
Maintenance and cleaning habits to prevent overheating and failure
Regular cleaning reduces heat buildup and helps components last longer. Wipe the interior after use with a soft cloth and mild detergent, ensuring no moisture remains around the magnetic components. Avoid using harsh cleaners or abrasive scrubbers that could damage the cavity paint. Keep the exterior vents clear of dust, lint, or cooking splatter—blocked vents can overheat the control board. Periodically inspect the power cord for cracks and inspect the door gasket for wear. These habits contribute to safer operation and reduce the likelihood of unexpected breakdowns in Black & Decker microwave ovens.
Step-by-step home fix for the most frequent problem
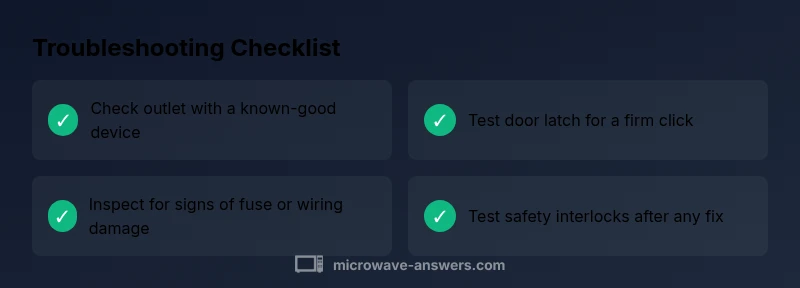
Power checks are the first line of defense. Unplug the unit, inspect the cord for signs of wear, and test the outlet with a known-good device. If the outlet is fine, perform a quick door-interlock test by closing the door firmly and listening for a definite latch click; a faulty interlock can prevent heating. If you identify a blown fuse or signs of wiring damage, discontinue use and seek professional help. Finally, after any fix, reassemble, plug in, and test with a small amount of water in a microwave-safe cup. If you observe any smoke, abnormal odor, or sparking, power down immediately. Estimated total time: 45-60 minutes.
Final checks before reassembly and test
Before you reinsert panels or run a full test, re-check all connections you touched, confirm the door closes properly, and verify the anti-spark safety remains intact. Make sure the unit sits on a stable, level surface away from water or metal surfaces. Run a quick heat test using a small amount of water in a microwave-safe container for 30 seconds; listen for unusual noises. If everything seems normal, progressively test longer heating times with low-power settings to verify stability, then unplug and store tools safely when finished.
Steps
Estimated time: 45-60 minutes
- 1
Power and outlet check
Unplug the microwave, inspect the cord for damage, and test the outlet with a lamp or charger to confirm power. If the outlet fails, move the unit to a known-good outlet and retest.
Tip: Never use a damaged cord; replace it or have an electrician evaluate the outlet. - 2
Door interlock test
Close the door firmly and listen for a definite latch. If the interlock doesn’t engage or you hear no click, the interlock switch or magnet may be faulty and require professional replacement.
Tip: Do not bypass the interlock or operate with an loose door—this is a serious safety risk. - 3
Fuse and wiring check
If you have access to the internal fuse and safe procedures, inspect for signs of a blown fuse or damaged insulation. Do not replace with improvised parts; use manufacturer-approved components.
Tip: Only perform this step if you’re comfortable with basic electronics and the unit is disconnected from power. - 4
Reassemble and test
Reconnect the unit, plug in, and run a short heating cycle with a microwave-safe cup of water. Observe for proper heating and any abnormal sounds or smells.
Tip: Start with low power and short duration to avoid overheating a suspected fault. - 5
If issues persist
If you notice smoke, sparks, or persistent failure after these steps, power down immediately and contact a qualified technician. Do not continue attempting risky repairs.
Tip: Document any symptoms and steps you took to help the technician diagnose quickly.
Diagnosis: Unit won’t heat or run but lights/sound may be present
Possible Causes
- highPower supply/outlet issue
- mediumDoor interlock failure
- lowBlown fuse or internal wiring fault
Fixes
- easyTest the outlet with a known-good device and try a different outlet if needed
- easyInspect the door latch and interlock operation; ensure the door fully engages and clicks
- mediumCheck for a blown internal fuse or damaged wiring; discontinue use and seek professional service if found
Common Questions
Why won't my Black & Decker microwave oven heat my food?
Most heating failures come from a faulty door interlock, a blown fuse, or a power outlet issue. Start with a power check, then inspect the door latch and interlock. If the issue persists, seek professional service rather than attempting risky repairs.
If your microwave won't heat, check the outlet and door interlock, then consider professional service if the issue remains.
Is it safe to open or inspect a microwave oven when it's not heating?
Opening a microwave can expose high-voltage components. Only perform basic external checks and unplug the unit first. For inside inspections or repairs, consult a qualified technician.
Open the unit only after unplugging it and avoid touching internal components; seek a technician for inside work.
What should I do if the door doesn't latch properly?
A faulty door latch can prevent operation or cause intermittent heating. Check the door seal and latch alignment, and replace the interlock if needed. Do not bypass the safety feature.
If the door won’t latch, avoid using it and have the interlock checked or replaced by a pro.
Can I reset a Black & Decker microwave to fix problems?
Resetting can clear minor control glitches. Unplug for a few minutes, then reconnect and run a brief test. If problems persist, use the diagnostic flow or contact support.
Try unplugging for a few minutes, then plug back in and test briefly before seeking help.
When should I call a professional for a Black & Decker microwave issue?
Call a professional if you smell burning, see smoke, hear buzzing, or find damaged wiring or fuses. High-voltage components can be dangerous, and improper repairs can worsen the problem.
If you smell burning or see smoke, stop and call a technician right away.
Watch Video
Main Points
- Unplug and test power first
- Check door interlock if it won't heat
- Avoid using damaged units
- Consult a professional for electrical faults
- Regular cleaning extends life