Repair Microwave Near Me: Safe DIY Guide
Learn practical, safe steps to troubleshoot common microwave issues at home and decide when to hire a pro. This comprehensive guide covers tools, safety tips, local repair search strategies, and maintenance tips for extending microwave life.

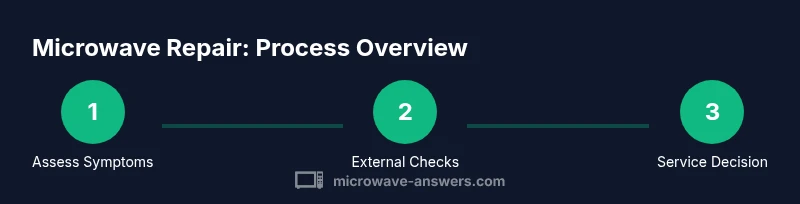
This guide helps you assess common microwave issues and decide whether a DIY fix is safe or if you should hire a professional nearby. You’ll learn essential unplugging and basic diagnostic checks, when to replace parts, how to find reputable repair services near you, and actionable steps to make an informed decision. According to Microwave Answers, taking a safety-first approach minimizes risk and protects your appliance investment. This quick-start overview primes you for a careful, informed repair path.
What 'repair microwave near me' means for homeowners
When people type repair microwave near me, they’re usually seeking practical routes to restore a malfunctioning appliance without unnecessary delays. The goal is to separate safe, cosmetic fixes from problems that require professional service. Homeowners should balance two considerations: the safety hazards associated with high-voltage components and the likelihood that a fix will resolve the issue without reoccurring. According to Microwave Answers, most common microwave problems fall into categories like power issues, door interlock failures, and sensor or control-board faults. Understanding these categories helps you decide whether to pursue DIY checks, schedule a local repair, or replace the unit altogether. This guide emphasizes safety, clear decision points, and reliable ways to locate qualified technicians nearby.
Microwave Answers analysis shows that many homeowners underestimate the complexity of high-voltage components, which is why prioritizing safety and credential verification matters when searching for repair help.
Tools & Materials
- Flat-head screwdriver(Insulated if possible; used for exterior screws)
- Phillips screwdriver(Medium size for control panel screws)
- Nut driver set(Helpful for terminal nuts on some models)
- Multimeter / voltmeter(Use only for external checks, never probe high-voltage parts)
- Non-conductive gloves(Protect hands when handling exposed components or cords)
- Non-scratch pry tools / plastic spudger(For safely lifting trim panels without damage)
- Flashlight(Bright, focused light to inspect vents and door latches)
- Owner’s manual / model worksheet(Keep handy for model-specific safety notes and wiring diagrams)
- Non-metallic container(For storing small screws during disassembly)
Steps
Estimated time: Total time: 45-60 minutes
- 1
Power down and unplug
Begin with safety by disconnecting the microwave from the wall outlet. Do not operate the unit while plugged in, and keep the area dry. If you smell burning or hear buzzing when unplugged, stop and seek professional help.
Tip: Always unplug before touching any exterior components to reduce shock risk. - 2
Check the power source
Inspect the outlet and nearby circuit for signs of tripped breakers or loose plugs. Test the outlet with a simple device to confirm it’s delivering power. A non-functional outlet can mimic microwave failure.
Tip: If other kitchen devices fail to work, the problem may be the outlet or circuit, not the microwave. - 3
Inspect the door latch and seal externally
A defective door latch or worn seal can prevent operation. Look for visible damage, misalignment, or debris that blocks latching. Do not attempt internal latch repair unless you’re trained.
Tip: Clean the latch area and seals gently; foreign objects can prevent proper closure. - 4
Check for obvious external damage
Look for cracks in the door, broken hinges, or melted plastic around control panels. Exterior damage can affect safety interlocks and internal components. Document issues for future reference.
Tip: Take photos from multiple angles before any service visit. - 5
Assess non-invasive operation tests
If the unit powers on but won’t heat, you may have a sensor or control issue rather than a high-voltage failure. Avoid touching internal components and rely on external symptom checks first.
Tip: Rely on model-specific troubleshooting guides in the manual for non-destructive tests. - 6
Decide on next steps
If symptoms persist after the above checks, determine whether to pursue a professional repair or replacement. Online estimates can guide expectations, but local availability and component costs vary widely.
Tip: Prepare a concise note of symptoms, model number, and date of first occurrence for the tech visit.
Common Questions
Can I repair a microwave near me myself, or should I hire a pro?
For many home issues, you can handle safe, non-destructive checks. However, high-voltage components and seals pose serious risks. If you encounter sparks, strong odors, or the door interlock fails, seek a licensed technician.
You can do safe, basic checks, but avoid high-voltage parts. If you smell burning or see sparks, call a professional.
What are the most common signs a microwave needs professional repair?
Not heating, continuous running without time, unusual noises, or door interlock failures are red flags. A non-heating unit may still be safe to operate if the magnetron and interlocks are intact, but diagnosing these requires expertise.
Not heating, strange noises, or door interlock issues are common signs to get a professional check.
Is it cheaper to repair or replace a malfunctioning microwave?
Costs vary with the model, part availability, and labor. In many cases, a repair is reasonable if the unit is relatively new and the replacement parts are affordable; otherwise, replacement may offer better long-term value.
It depends on age and parts; talk to a pro for an estimate and compare with a new unit’s price.
How long does a typical microwave repair take?
A straightforward service visit can take 30-90 minutes, depending on diagnostics and part availability. More complex issues or parts ordering can extend the timeline.
Most repairs take under two hours if parts are on hand.
What should I ask the technician during a visit?
Ask about warranty on labor and parts, expected lifespan after the fix, and whether the issue could reoccur. Request a written estimate and a breakdown of parts and labor.
Ask about warranties, expected lifespan after repair, and a written estimate.
Are there safety tips I should follow after repair?
Test the unit with a microwave-safe dish and monitored power on a clean surface. If you notice odd smells, heat unevenness, or new noises, shut off power and call the technician.
Test briefly with a safe dish; if anything seems off, contact the pro.
Watch Video
Main Points
- Safety first: unplug before any inspection and avoid high-voltage components.
- Identify symptoms to decide between DIY checks and professional service.
- Search for licensed technicians near you and verify credentials.
- Document model numbers, symptoms, and observations for the tech visit.
- The Microwave Answers team recommends a cautious approach to unclear or dangerous repairs.