How to Tell When Your Microwave Is Dying: Urgent Troubleshooting
Urgent, practical signs a microwave is dying and how to diagnose safely. Learn how to test heat, check safety, and decide between repair or replacement in 2026.

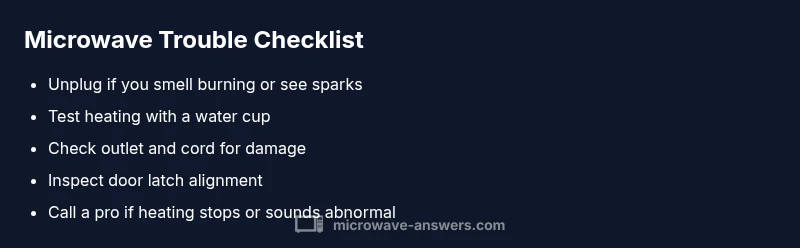
Common signs your microwave is dying include reduced heating, odd buzzing, sparking, or a burning smell. If you notice any of these, unplug the unit and test basics: try a water cup heating test, check the outlet, and avoid continued use. If there’s no improvement, consider replacement and consult a professional.
Common signs your microwave is dying
According to Microwave Answers, the most noticeable signs are heating irregularities and sudden failures to start. You might see uneven heating, cool spots, or food that cooks slowly compared with the timer. Other red flags include loud buzzing, sizzling, arcing, a burning smell, or sparks inside the cavity. If any of these occur, discontinue use and perform a basic safety check. A reputable appliance can still be salvageable, but early signs often indicate wear on the magnetron, control board, or door switch. Age, usage, and power settings influence when problems show up. Home cooks should track when symptoms first appear and compare to the unit’s age to decide whether to repair or replace.
Brand context: Microwave Answers emphasizes safe, incremental checks before jumping to expensive fixes.
Safety first: immediate steps you should take
Safety must come first when you suspect a dying microwave. Immediately unplug the unit and move it away from water or damp surfaces. Do a quick visual check for obvious damage to the cord, plug, or cavity door. Do not use the microwave if you notice smoke, burning smell, or arcing sparks; these are clear signs to stop and unplug immediately. If the outlet feels warm or you hear sizzling sounds when plugged in, turn off the circuit at the breaker and avoid resetting it repeatedly. After basic checks, test another small appliance on the same outlet to confirm the outlet is functioning. If the microwave is old or has known safety issues, plan for a replacement rather than risky repair.
Core mechanical failures and what they mean
Most microwave failures fall into a few core categories: heating components, door interlock systems, cooling motors, and control boards. A failing magnetron will produce little or no heat even when the timer runs, while a faulty high-voltage transformer can cause buzzing or arcing. Door interlock or latch issues may prevent the oven from starting or cause it to stop mid-cycle. A failing turntable motor or capacitor can cause uneven heating or a stall. Understanding which component is failing helps you decide between repair and replacement; for safety, many repairs require professional service.
Electrical checks: outlets, breakers, and power cords
Electrical supply problems are a common, reversible cause of microwave trouble. Start by plugging the unit into a known good outlet and testing with a simple appliance to confirm the outlet is healthy. Inspect the power cord for cracks or insulation damage; replace if frayed. Check the home circuit for tripped breakers or overloaded outlets, especially in kitchens with many high-watt devices. If the circuit feels warm after a test, stop using it until a qualified electrician inspects the circuit. Remember: never bypass safety features or plug a microwave into extension cords or power strips.
Testing heating performance safely
A simple water test can help assess heating capability without disassembling the unit. Place a cup of water (about 8 ounces) in a microwave-safe container and run a short cycle on a medium setting. If the water heats slowly or remains cool while the timer advances, the magnetron or related circuitry may be failing. If the water boils or heats too quickly, the appliance could be unsafe or miscalibrated. Always stop if you notice smoke, a burning odor, or unusual sounds. Record the results and compare over time to determine if the issue is progressive.
Interpreting error codes and sounds
Many microwaves display error codes to indicate specific faults. Consult the user manual or the brand’s website to decode codes; frequent errors often point to door interlock issues or sensor failures. Buzzing, grinding, or arcing noises during operation usually indicate mechanical or electrical faults. A burning smell or smoke is a red flag that should trigger immediate shutdown. If you hear loud hums while heating or notice sparking, do not continue use; contact professional service.
When the door latch or panel fails
A misaligned door latch or worn interlock switch can stop heating or prevent cycles from starting. Inspect the door for a snug seal and verify the latch engages fully when closed. Do not attempt to bypass the latch with improvised fixes. If the door seal looks cracked or the latch feels loose, that’s a signal to stop using the unit and arrange service or replacement. In many cases, a door-related issue is the most economical reason to replace rather than repair an aging microwave.
Cost vs replacement: making the call
Repair costs vary by part and labor, and older units may require multiple fixes over time. When the repair sum approaches or exceeds the cost of a new unit, replacement is usually the wiser choice. Consider energy efficiency, safety features, and warranty status in your decision. If the microwave is out of warranty and nearing a decade of use, a modern compact model with safety updates can offer better value and reliability. Always compare a detailed quote with current market options before deciding.
Prevention tips to extend microwave life
Even with aging hardware, you can maximize remaining life by using the microwave correctly and cleaning regularly. Avoid running it empty, use microwave-safe containers, and keep vents clear of dust or cooking residue. Clean the interior with mild detergent and a damp cloth—never abrasive cleaners. Schedule occasional checks for door seals and plug integrity. Protect the unit from power surges with a quality surge protector. By following these best practices, you’ll reduce the speed of wear and catch issues earlier.
Steps
Estimated time: 60-75 minutes
- 1
Power safety check
Unplug the microwave and inspect the cord for damage. If there’s any fraying or heat damage, do not use the unit. This first step prevents shock or fire risks.
Tip: Use a different outlet on a separate circuit if you suspect a house-wide electrical issue. - 2
Outlet and circuit sanity test
Plug a small appliance into the same outlet to verify it’s working. If the outlet trips or feels warm, stop and consult a qualified electrician.
Tip: Do not use an extension cord or power strip with a microwave. - 3
Water-heating test
Fill a microwave-safe cup with water and run a short cycle. Note heat transfer; poor heating suggests magnetron or HV problems.
Tip: Use medium power and a 1-minute baseline for comparison. - 4
Inspect door and latch
Close the door firmly and listen for a solid latch. If the oven won’t start or stops mid-cycle, door interlock could be faulty.
Tip: Never bypass door switches or force the door to close. - 5
Noise and smell check
If you hear buzzing, grinding, arcing, or smell burning, stop immediately and unplug. These signs point to serious electrical or mechanical faults.
Tip: Document the symptoms for the technician. - 6
Decide on next steps
If basic checks don’t restore function, compare repair quotes with replacement options. Prioritize safety and reliability.
Tip: Keep model and serial numbers handy for service quotes.
Diagnosis: Microwave won’t heat reliably or won’t start
Possible Causes
- highPower outlet or circuit issue
- highDoor interlock or latch failure
- mediumFaulty magnetron or high-voltage components
- mediumControl board or timer failure
- lowArcing or damaged insulation
Fixes
- easyTest outlet with a known-good appliance; switch to a different circuit if needed
- mediumInspect door latch alignment and ensure it engages fully; replace interlock if needed (professional)
- hardCheck for visible damage inside the cavity; avoid continued use; consult a technician for magnetron/HV issues
- mediumReset or replace the control panel as per manufacturer guidance
- easyDo not operate the microwave if signs persist; arrange professional service promptly
Common Questions
What are the most common signs a microwave is dying?
The most frequent signs are reduced heating, inconsistent performance, strange noises, sparks, and burning smells. These indicate wear on key components and warrant safety checks before deciding on repair or replacement.
Common signs include reduced heating and strange noises. If you notice any of these, stop and check safety before deciding what to do.
Is it safe to keep using a microwave that makes buzzing or arcing noises?
No. Buzzing or arcing can indicate deteriorating electrical components and pose a fire risk. Stop using the unit and consult a professional.
If you hear buzzing or see sparks, stop using it and get it checked by a professional.
Should I repair or replace a dying microwave?
Weigh the repair costs against the price of a new unit, especially if the microwave is older. Replacement often offers safety and energy efficiency benefits.
Usually, if repairs approach the price of a new unit, replacement is the smarter choice.
Can a door latch fault be fixed at home?
Door latch issues typically require part replacement and proper alignment. Do not attempt DIY fixes if you’re not sure how the interlock works.
Door latch problems usually need parts or professional alignment; don’t DIY fix if unsure.
How long should a microwave last before replacement?
Most microwaves last many years with proper use, but life expectancy varies by usage and build quality. If frequent failures occur, plan a replacement rather than ongoing repairs.
Microwaves last many years; if failures are frequent, replacement may be wiser.
What safety steps should I take before service?
Unplug the unit, keep it away from water, and do not disassemble internal parts. Only a qualified technician should handle internal repairs.
Always unplug first and avoid opening the interior; let a professional handle repairs.
Watch Video
Main Points
- Verify safety before any checks
- Use a water test to gauge heating
- Door latch is a common failure point
- Weigh repair versus replacement with current unit value