How to Tell If Your Microwave Is Going Bad
Urgent, practical guide to identify when a microwave is failing, with quick fixes, safety tips, and clear steps for home cooks and homeowners.

If your microwave shows sparking, a burning smell, unusual noises, or uneven heating, it may be going bad. Unplug it immediately, inspect for visible damage, and avoid using it until a pro has checked the internal components. This guide helps you confirm symptoms and determine the next safe steps.
Signs Your Microwave Is Going Bad
According to Microwave Answers, understanding how to tell if microwave is going bad can prevent kitchen hazards and wasted food. Signs appear gradually, from odd noises to sparks or a sour odor. In this section we outline clear symptoms to watch for and how to respond quickly to minimize risk. Look for: sparking or arcing inside the cavity, persistent burning smell, smoke, unusual buzzing or grinding noises, heat that is inconsistent or fails to heat, a malfunctioning turntable, door not sealing properly, or a nonfunctional display. If you notice any of these, stop using the appliance and unplug it immediately. Early recognition saves you from more dangerous failures later on.
Immediate Safety First: What Not To Do
Safety best practices protect you and your home. Never operate a microwave that sparks, smells like burning plastic, or makes popping or buzzing noises. Do not insert metal utensils or aluminum foil. If a fault appears, unplug the unit at the wall and keep children and pets away. Avoid attempting to open the housing or touching internal components. For any sign of electrical fault, contact a licensed technician. The Microwave Answers team emphasizes never ignoring warning signs; a small fault can become a dangerous failure.
Common Causes: Why It Happens
Typical failure modes fall into a few broad categories. Magnetron wear or degradation can reduce heating efficiency over time. Faulty door switches or gaskets may cause arcing or39 leakages. A failing high-voltage capacitor or transformer can produce odd noises, overheating, or inconsistent performance. Moisture intrusion from steam or spills can corrode internal parts and insulation. While some issues are straightforward to fix (cleaning or replacing a worn door seal), others require professional service due to high-voltage components and safety concerns. This section helps you distinguish between DIY-friendly checks and when to call a pro.
Diagnostic-Flow: Symptom to Solution Overview
To structure the troubleshooting process, start with the most common, easiest-to-check symptoms and progressively move toward professional assessment if no fix occurs. Confirm that the outlet is functioning, inspect the door latch and seal, listen for unusual noises, and note any smells or smoke. If the symptom persists after basic checks, the likely culprits shift toward magnetron or HV components. For safety, if you feel uncertain at any point, stop and contact a technician. This approach aligns with best-practice guidance from Microwave Answers.
Step-by-Step Fixes: From Easy to Advanced
This section provides practical steps you can take, starting with simple checks you can perform safely at home. If the issue involves high-voltage components or you are uncomfortable handling the unit, skip ahead to professional help. Each step includes a clear outcome and a time estimate to help you plan. Remember, if there is any risk of electrical shock or fire, discontinue use and seek professional service immediately.
Prevention Tips: Extend Microwave Life
Regular maintenance can reduce the frequency of faults. Clean the interior after spills, wipe the door seals, and ensure the vents are free of dust. Use microwave-safe containers only and avoid overheating fatty or sugary foods that can cause residue buildup. Store the unit in a dry, well-ventilated area away from heat sources. Periodically inspect the power cord for cracks or damage and replace damaged cords promptly. A well-maintained microwave lasts longer and heats more evenly.
When to Replace vs Repair: Making the Call
If the repair cost approaches or exceeds the price of a new unit, or if repeated failures occur despite fixes, replacement is often the smarter choice. Consider energy efficiency, warranty status, and the impact on cooking quality. For many households, upgrading to a newer model with better convection, sensor cooking, or inverter technology provides greater reliability and safety. In all cases, consult a technician for an accurate assessment before purchasing a replacement.
Troubleshooting Scenarios: Real-Life Examples
Consider a scenario where a microwave starts humming loudly and heats unevenly after several years of use. A quick home check reveals a damaged door seal, which you replace, restoring proper heating and eliminating sparking. In another case, a unit emits a faint odor and stops heating entirely; the problem is likely a failed magnetron, which requires professional service. These scenarios illustrate how systematic checks help you identify whether a simple fix will suffice or if replacement is warranted.
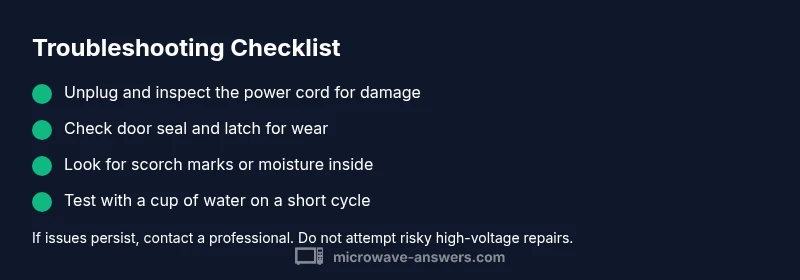
Steps
Estimated time: 60-90 minutes
- 1
Power down and unplug the microwave
Unplug the unit, then wait 60 seconds to discharge any residual voltage. Inspect the power cord for cuts or fraying and test the outlet with a known-good device.
Tip: Use a non-conductive flashlight to check for hidden damage along the cord. - 2
Check door seal and latch
Open and close the door several times to listen for a solid click. Inspect the gasket for damage, cracks, or deformities that could allow leakage or arcing.
Tip: Wipe the door seal with a damp cloth to remove residue that could interfere with sealing. - 3
Inspect the interior and vents
Remove turntable and interior components and look for melted plastic, scorch marks, or mineral buildup on the wave guide cover and vents. Clear any obstruction.
Tip: Do not use metal brushes; use a soft cloth and mild cleaner on non-electrical surfaces. - 4
Test with water and observe
Place a microwave-safe cup with water inside and run a short test cycle. Note any abnormal noises, sparks, or failure to heat the water.
Tip: If you see sparks, immediately stop the test and unplug the unit. - 5
Assess heating consistency
Heat a light meal in a microwave-safe container. Compare heating across areas; significant cold spots may indicate magnetron wear or turntable misalignment.
Tip: Rotate or rearrange items mid-cycle to determine if hotspots are position-related. - 6
Decision point: repair or replace
If heating is inconsistent after basic checks or if you hear persistent buzzing or smell burning, consult a professional. Weigh repair cost against a new unit’s price and efficiency.
Tip: Document symptoms and maintenance history for your technician to speed diagnosis.
Diagnosis: Microwave won't heat or sparks occur during operation
Possible Causes
- highPower issue (outlet or cord)
- mediumDoor switch or seal fault
- mediumMagnetron or HV capacitor failure
- lowMoisture intrusion or corrosion
Fixes
- easyTest the outlet with another device and inspect the cord for visible damage
- easyInspect and clean door seals and latch, ensure the door closes firmly
- hardIf the unit still fails to heat, disconnect power and contact a licensed technician to inspect high-voltage components
Common Questions
What are the most common signs a microwave is failing?
The most common signs are sparking or arcing inside the cavity, a burning smell, unusual noises, and uneven heating. If you notice any of these, stop using the microwave and unplug it. A professional should inspect persistent symptoms.
Common signs include sparks, a burning smell, odd noises, and uneven heating. Stop using it and call a technician if these appear.
Can a microwave be repaired if it sparks?
Sparks typically indicate electrical arcing, which can be caused by damaged door seals or internal components. A professional should assess the underlying issue before attempting any repair.
Sparks mean arcing; have a pro diagnose the cause before repairing.
Is it dangerous to use a microwave that smells?
Yes. A burning or chemical odor suggests insulation or wiring problems. Immediately unplug the unit and have it inspected by a qualified technician.
A burning smell is a serious warning—unplug and get it checked.
Why does my microwave beep but won’t heat?
That usually points to a door switch issue or a failing magnetron. Start with door seals and switches; if unresolved, a technician should evaluate the high-voltage components.
Beeping without heating often means a door switch or magnetron problem.
Should I replace the microwave instead of repairing it?
If repair costs rival or exceed a new unit, or if reliability is poor after several fixes, replacement is wise. Consider energy efficiency and warranty when deciding.
If repairs add up, replacing the unit is usually best.
What maintenance helps extend microwave life?
Keep seals clean, avoid overheating, and regularly remove spills. Use microwave-safe cookware and dust vents to prevent overheating and buildup.
Regular cleaning and safe usage help extend life.
Watch Video
Main Points
- Identify common symptoms early to prevent hazards
- Prioritize safety—unplug and avoid DIY high-voltage repairs
- Differentiate between simple fixes and professional service
- Regular maintenance extends microwave life