How to Repair IFB Microwave: A Practical Guide
Learn safe, practical steps to diagnose and repair common IFB microwave faults. This actionable guide covers symptoms, testing, basic part replacements, safety tips, and when to replace the unit.

This guide explains how to repair IFB microwave safely and effectively, covering common fault patterns, basic diagnosis, and practical repair steps. You will learn when to test circuits, how to disconnect power safely, and how to replace simple parts. Gather the required tools and follow the step-by-step workflow to extend your microwave's life.
Understanding common IFB microwave failure modes
IFB microwaves, like most modern ovens, integrate high-voltage electronics with microwave generation hardware. When diagnosing how to repair IFB microwave issues, start by recognizing common failure modes: failure to heat, door interlock problems, a non-rotating turntable, control panel errors, or unusual noises. By mapping symptoms to subsystems, you can avoid unnecessary disassembly and focus your efforts where it matters. Remember that this is a practical troubleshooting guide for home repair, not a guarantee of model-specific outcomes. The Microwave Answers team emphasizes that many heating-related faults originate in the door interlock circuit or the power supply. A careful symptom audit, using the steps below, helps you determine whether a safe self-repair is feasible. Throughout, keep the core question in mind: how to repair ifb microwave, and verify your skills against the risk level of high-voltage work.
Safety fundamentals before you begin
Power safety is non-negotiable when tackling IFB microwave repairs. Always unplug the unit and wait at least 2-5 minutes for capacitors to discharge before touching any internal components. Do not operate the oven with the casing removed or with the door open. Use insulated tools, wear eye protection, and avoid metal jewelry that could contact live circuits. If you smell burning or notice smoke, stop and disconnect power immediately. This guide prioritizes safe, small-scale diagnostics; if you encounter unfamiliar high-voltage components, stop and seek professional service. The Microwave Answers team notes that safe handling dramatically lowers the risk of shock or arc flash during basic testing.
Tools and prep: planning a repair
Before you open the chassis, assemble a minimal toolkit and review your microwave model’s safety notes. Gather a multimeter, insulated screwdrivers, non-conductive tweezers, heat-resistant gloves, a microfiber cloth, and a model-specific user manual if available. Label any wires or connectors as you disconnect them to ensure correct reassembly. Create a clean, well-lit work area, and keep a container for small screws to avoid losing parts. This preparation aligns with standard repair best practices and reduces rework when diagnosing various IFB microwave faults.
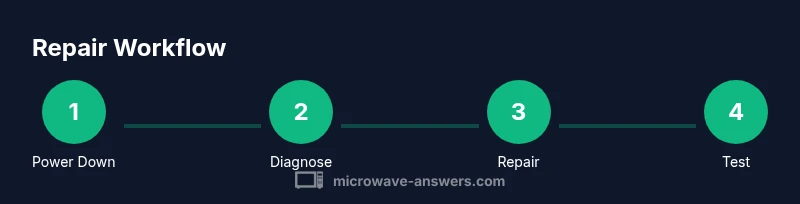
Step-by-step repair workflow for non-electrical issues
- Power down and verify unplugged status, then remove the outer cabinet as per the user manual instructions. This exposes the access panel where common trouble spots reside. 2) Inspect the door interlock switch and micro-switch for wear or misalignment; these are frequent culprits for door-related non-heating symptoms. 3) Check the turntable drive and roller ring for obstruction or damage, and reseat the drive if it looks misaligned. 4) Look for obvious signs of wear, such as loose wires, burnt connectors, or loose solder joints around the high-current bus. 5) Clean dust and food residue from fans and vents to prevent overheating in normal operation. 6) Reassemble the cover and run a short test with no load to confirm basic function before a full-cycle test. 7) If the microwave still doesn’t heat, proceed to electrical diagnostics only after you’ve exhausted non-electrical checks. 8) Document symptoms and parts tested to guide decision-making about further repair or replacement.
Diagnosing electrical problems: when to measure and test
Electrical faults in IFB microwaves often involve the power supply or high-voltage circuit. Use a multimeter to verify continuity on door interlocks and to check for proper voltage on the control board supply. Do not attempt to measure live HV components unless you’re trained and equipped with appropriate PPE; if you suspect magnetron or high-voltage transformer problems, consider professional service. Verify that the control panel responds to input and that the microcontroller correctly sequences the magnetron. A systematic electrical test plan, performed with the unit unplugged and discharged, supports reliable conclusions about whether a simple repair is possible or if replacement parts are necessary.
When to replace parts vs. discard
Not every fault is economical to repair. If the magnetron shows signs of arcing, major physical damage, or consistent failure after multiple testing cycles, replacement is often the safer choice. Door interlocks can be serviced in many models, but if the interlock assembly is damaged beyond safe reuse, replacement is preferred. Consider the age of the unit; for older IFB microwaves with multiple failing subsystems, a practical decision may be to replace the unit rather than chase several intermittent faults. Always compare estimated repair costs to the price of a new or refurbished model and factor in energy efficiency gains.
Preventive maintenance and safety tips
To prolong life and avoid recurring problems, perform light cleaning after each use and keep vents unobstructed. Periodically inspect gaskets, door seals, and hinges for wear, and replace as needed to maintain proper door alignment. Avoid running the microwave empty; this can lead to heat damage and unnecessary stress on the magnetron. Use microwave-safe containers and cover food to minimize splatter that can affect components. Finally, store the user manual and a simple parts list for quick reference if you need to order replacements later.
Common mistakes and how to avoid them
Common mistakes include skipping safety steps, using metal tools near high-voltage parts, or attempting magnetron repair without proper training. Always unplug and discharge capacitors before any disassembly, and never bypass the door interlock as a workaround. Rushing tests with the device still connected to a power source can create dangerous arcs. Take your time, verify connections, and follow model-specific safety instructions. The goal is to learn practical, safe steps to repair IFB microwave faults without creating new risks.
Tools & Materials
- Flathead screwdriver(1/4 inch blade, magnetic tip preferred)
- Phillips screwdriver(PH2 tip, insulated handle)
- Multimeter(for voltage, continuity, and resistance tests)
- Insulated gloves(to protect hands when working near exposed circuits)
- Non-conductive tweezers(to manipulate small parts without shorting components)
- Heat-resistant gloves(for handling hot surfaces during reassembly)
- Microfiber cloth(for cleaning dust and fingerprints from contacts)
- Owner's manual(model-specific safety and disassembly instructions)
- Replacement parts (as needed)(magnetron, door interlock, or high-voltage components only after diagnosis)
Steps
Estimated time: 60-120 minutes
- 1
Power down and prepare
Unplug the microwave and remove external power. Wait 2-5 minutes for capacitors to discharge before touching internal parts. This establishes a safe baseline for diagnosis and reduces shock risk.
Tip: Label cables before disconnecting any harnesses to simplify reassembly. - 2
Assess symptoms
Note whether the unit heats, beeps, or displays error codes. Record non-heating symptoms like non-rotation of the turntable or lights flickering; these clues guide the investigation toward door interlocks, control boards, or the magnetron.
Tip: Create a symptom log to avoid missing intermittent faults. - 3
Open the access panel
Carefully remove the back or top panel as directed by the model manual. Visually inspect for burnt components, loose wires, or obvious damage while keeping the chassis supported.
Tip: Work on a non-slip surface and keep screws organized. - 4
Test the door interlock
Use a multimeter to check continuity on the door interlock switches with the door closed. A stuck or broken switch can block power to the magnetron even when the door appears closed.
Tip: If you hear clicking without proper continuity, replace the interlock assembly rather than attempting wire bypasses. - 5
Inspect the turntable drive
Verify the motor, spindle, and drive gear for obstructions or wear. A seized motor or misaligned roller ring can appear as a heating fault or no heat with proper power.
Tip: Clean any lint buildup under the turntable to prevent bearing resistance. - 6
Check power supply connections
Inspect the high-voltage area only if you have proper training. Look for loose connections at the control board, fuses, and main power harness. Re-seat connectors firmly.
Tip: Never touch exposed HV components with bare hands; wear insulated gloves. - 7
Reassemble and test
Carefully reattach panels, plug in, and run a no-load test briefly to verify circuits, lights, and fan operation before full heating tests.
Tip: If any smoke or unusual smell returns, power down immediately and seek professional help. - 8
Document outcomes
Record what you tested, what you observed, and any parts replaced. This helps determine whether the next repair step is cost-effective or if replacement is a better option.
Tip: Keep receipts and part numbers for warranty or resale considerations.
Common Questions
Is it safe to repair an IFB microwave myself?
Basic non-electrical diagnostics and cleaning are generally safe if you follow unplug-discharge procedures and use non-conductive tools. For any work on high-voltage parts like the magnetron or power supply, professional service is advised.
You can do basic, safety-first checks yourself, but avoid working on high-voltage parts unless you’re trained.
What are the most common signs that I need professional repair?
If the microwave smells burning, arcs, or there is visible damage to the HV section, magnetron, or door interlock, seek professional service. Non-heat faults are usually easier to address with guided steps.
Call a professional if you notice burning smells, smoke, or obvious damage to high-voltage parts.
Can I replace the magnetron myself?
Magnetron replacement is a high-risk procedure and typically requires professional service. Incorrect handling can result in electric shock or microwave leakage.
Magnetron replacement is not recommended for DIY repairs unless you’re a trained technician.
Where can I find replacement parts for an IFB microwave?
Replacement parts can be model-specific. Check the manufacturer’s official parts desk, reputable repair shops, or authorized service centers. Avoid low-cost, unverified third-party parts that may compromise safety.
Look for genuine or recommended parts at the maker’s site or an authorized service center.
What should I do if the unit still doesn’t work after repairs?
If issues persist after non-high-voltage repairs, reassess the fault with fresh symptoms and consider a professional diagnostic. Persistent non-heating faults may indicate magnetron or transformer problems.
If it still won’t run after repairs, consider a professional diagnostic to avoid unsafe attempts.
How long should a microwave typically last?
A typical microwave can last many years with proper care, but performance issues often emerge with time and usage patterns. Regular maintenance and gentle handling extend lifespan, but not every fault is worth repairing.
Microwaves last several years with good care; consider replacement if costs approach new-unit pricing.
Watch Video
Main Points
- Identify symptoms first, then map to likely sub-systems
- Prioritize safety: unplug, discharge, and protect yourself
- Differentiate electrical vs. non-electrical faults before replacing parts
- Document steps and outcomes for future reference
- Know when to replace vs. repair for best value and safety