How to Microwave in OTG: A Practical Guide
Learn how to safely microwave using an OTG oven with practical steps, safety tips, and troubleshooting for home cooks seeking quick, even heating.

You can safely microwave in an OTG by using microwave-safe dishes and setting proper power levels. This guide explains how to prepare foods, adjust the OTG's convection and microwave functions, and how to avoid overheating or uneven heating. Follow these steps to achieve quick, even results with minimal risk. This approach assumes your OTG supports microwave mode; if not, consult the manual.
What is OTG and Why Use It for Microwave Tasks
If you're exploring how to microwave in OTG, this guide helps you understand how an OTG oven can support microwave heating in addition to traditional convection and baking modes. An OTG (oven-toaster-grill) is designed primarily for high-heat, metal-free cooking, but many models include a dedicated microwave function or a hybrid mode. Knowing your model's capabilities is essential for safety and performance. According to Microwave Answers, verifying that your unit supports microwave heating and following the manufacturer’s instructions reduces the risk of arcing, uneven heating, or damage to the appliance. This section outlines when and why you might use the microwave function on an OTG, and what that means for safety and results.
- If your OTG does not support microwave mode, do not attempt to microwave foods; use a separate microwave oven instead.
- When compatible, treat the microwave function as a supplemental tool rather than a full replacement for microwave ovens.
- Always use microwave-safe cookware and avoid aluminum foils or metal trim that can cause arcing.
In short, the pursuit of how to microwave in OTG hinges on model capability, proper containers, and mindful timing. Microwave Answers emphasizes checking your manual and testing with simple items before heating full meals.
Key Principles for Microwave in OTG: Safety, Timing, and Texture
Successful microwave use within an OTG relies on three core principles: safety, even heating, and texture control. First, confirm that your OTG supports microwave heating and that you use microwave-safe dishes. Second, adopt a conservative heating approach: start with shorter bursts and lower power, then pause to check progress and stir or flip as needed. Third, anticipate texture changes; items can dry out or heat unevenly if not monitored.
Throughout this section, keep best practices in mind: always vent lids or use covers designed for microwaving to reduce splatter; avoid stacking food too high, which can trap steam and leave the center cold or undercooked; and choose containers with even heat distribution, such as ceramic or glass plates rather than thin plastics that may warp.
Microwave Answers notes that safe, effective heating in OTG setups often requires multi-pass heating and rest periods to equalize temperature. If your OTG offers a combination mode (convection plus microwave), use it sparingly to finish off textures without overcooking edges.
- Use medium to medium-low power settings unless the model guidance specifies higher power for short intervals.
- Pause between intervals to stir, rotate, and check for hotspots.
- Let foods rest briefly after heating; residual heat continues the cooking and improves texture.
Preparing Your OTG for Microwave Tasks
Before you attempt any microwave task in an OTG, prepare both the unit and the food properly. Check that the oven is clean, free of debris, and turned off before you begin. Ensure that you understand the microwave function on your particular model, because some OTGs may require a specific sequence to engage microwave mode. According to Microwave Answers, starting with a clean cavity prevents old residues from affecting flavor and heating patterns.
Next, select a microwave-safe dish and cover. Glass, ceramic, or microwave-safe plastic with vented lids works well. Avoid metal, including foil and metal-trimmed dishware, as they can cause arcing and damage the oven. Place foods in a flat, even layer to promote uniform heating. If you’re reheating leftovers, break up large chunks to create more surface area for even heat distribution.
Finally, verify that you have a timer or clock nearby. You’ll want to alternate short heating bursts with rest periods to let heat distribute evenly. If you’ll be heating items that release steam (like vegetables or sauces), cover loosely or use a vented lid to prevent splatter while preserving moisture.
Selecting Cookware and Accessories
Choosing the right cookware is essential when microwaving in OTG. Always use microwave-safe dishes made of glass or ceramic. Plastic containers marketed as microwave-safe are convenient but may warp under high heat; choose sturdy options and avoid thin plastics. For lids, use vented covers to trap moisture but allow steam to escape.
Additionally, consider a silicone mat or parchment paper to prevent sticking and ease cleanup. A microwave-safe thermometer can help check internal temperatures for safety, especially when reheating proteins. Keep metal out of the cavity at all times, and remember that some OTGs have different microwave power outputs; refer to the manual for recommended settings.
Common Mistakes and How to Avoid Them
A few frequent missteps can undermine results when using OTG for microwave tasks. Avoid using metal-trimmed dishware or foil, which causes arcing. Do not overfill dishes; food must have room to expand and heat evenly. Do not rely on a single long heating cycle; it often creates hotspots and uneven heating.
To reduce risk of uneven heating, pause every 30-60 seconds (or as recommended by your manual) to stir or flip the food. If you smell burning or notice smoke, stop immediately and unplug the unit. Clean the cavity after use to prevent leftover food from affecting future heating.
Safety, Cleaning, and Long-Term Care After Using OTG for Microwave Tasks
Safety is paramount when combining OTG usage with microwave tasks. Always operate with the door closed and ensure the chosen cookware is microwave-safe. After use, unplug the unit if you are performing maintenance or cleaning, and allow it to cool before wiping down the interior with a damp cloth. Regular cleaning reduces off-flavor transfer and maintains heating efficiency. Finally, store food and containers properly to prevent contamination or accidental heating of non-food items.
Tools & Materials
- Microwave-safe dish (ceramic or glass)(No metal trim; flat, even surface preferred)
- Microwave-safe lid or vented cover(Vent to release steam; avoid sealed, non-vented lids)
- Heat-resistant oven mitts(Protect hands when removing hot dishes)
- Timer or smartphone(Accurate timing for intervals)
- Measuring cup (optional)(Useful for portioning liquids or adding moisture)
- Food thermometer (optional)(Check internal temperature when reheating proteins)
- Silicone mat or parchment paper(Prevents sticking and eases cleanup)
- OTG manual(Check for model-specific microwave usage guidelines)
Steps
Estimated time: 20-30 minutes
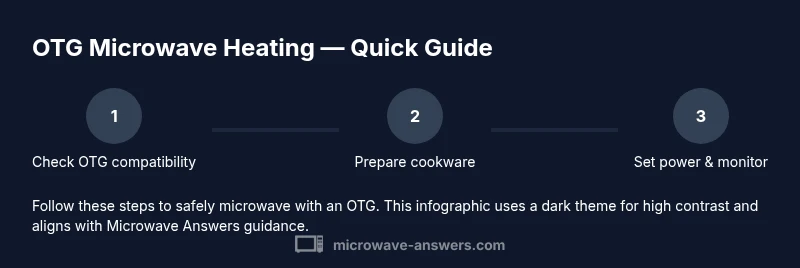
- 1
Check OTG compatibility
Consult your OTG manual to confirm that microwave mode is supported and safe. If unsure, do not attempt microwave heating; use standard OTG modes instead. Always start with a simple test item like a plain microwave-safe plate to verify behavior.
Tip: If your model doesn’t support microwave mode, stop and avoid attempting it. - 2
Choose the right cookware
Select microwave-safe dishes, and ensure lids are vented. Avoid metal and foil. Lay a silicone mat or parchment to prevent sticking and to simplify cleanup.
Tip: Use a plate that’s slightly larger than the food to prevent overflow. - 3
Prepare food and portion
Cut food into uniform pieces and spread in an even layer. For liquids, ensure even distribution to promote uniform heating. Do not overfill the dish.
Tip: Uniform portions heat more evenly and reduce hotspots. - 4
Set power and time
Start with medium to medium-low power and short intervals (e.g., 30–60 seconds, then check). If the OTG has a convection option, use it only for finishing touches after microwaving.
Tip: Pause between intervals to stir, flip, or rearrange food for even heat. - 5
Heat with monitoring
Keep an eye on progress; stop if you notice steaming or unusual odors. If your OTG supports combination modes, use them sparingly to avoid overcooking edges.
Tip: Stir or rotate halfway through heating to distribute heat evenly. - 6
Rest and verify safety
Let the food rest a minute or two after heating to finish uniform heating. Check the center is hot and steaming; for proteins, verify safe texture and color before serving.
Tip: If unsure about doneness, reheating in short bursts reduces risk of overcooking.
Common Questions
Can I microwave in OTG if my oven is convection?
Only if your OTG model explicitly supports microwave mode; otherwise do not attempt to microwave in OTG. Use the convection features for heating instead.
Only if your OTG model supports microwave mode; otherwise avoid microwaving in OTG and use convection.
What foods are safe to microwave in OTG?
Most foods can be heated in OTG if they are in microwave-safe containers and not wrapped in metal. Avoid sealed containers and materials not rated for microwaving.
Most foods can be heated if you use microwave-safe containers and avoid metal or sealed items.
How do I avoid hotspots when microwaving in OTG?
Heat in short bursts, stir or flip the food between intervals, and use a shallow, even layer to promote uniform heating.
Heat in short bursts and stir between intervals to prevent hotspots.
Can I microwave liquids in OTG?
Liquids can heat unevenly and create hot spots. Use short intervals, stir, and monitor closely to prevent boiling over or splatters.
Yes, but heat in short bursts and stir often to avoid uneven heating.
Why does my OTG smell when microwaving?
A burning or plastic smell often signals unsafe cookware or food residue. Stop heating, remove the item, and clean the cavity before trying again.
If you smell something unusual, stop and inspect the cookware and residue before retrying.
Watch Video
Main Points
- Verify OTG microwave capability before use
- Use microwave-safe cookware and vented lids
- Heat in short bursts and stir regularly
- Rest and verify internal temperature after heating