How to Get a Microwave Out of the Wall Safely
A practical, step-by-step guide to safely removing a wall-mounted microwave, with safety checks, tool lists, and post-removal options for repair or replacement.

In this guide, you will learn how to safely remove a microwave from a wall installation, whether it's mounted in a cabinet, on a wall bracket, or in a built-in enclosure. We'll cover essential tools, safety checks, and a clear step-by-step process to prevent damage to the appliance, wall, or electrical system.
Why Removing a Wall-Mounted Microwave Needs Care
If you're wondering how to get microwave out of wall, you must recognize that built-in and wall-mounted units demand careful handling. The weight of the appliance, the mounting hardware, and any electrical connections in a tight wall cavity all create potential hazards. A careless tug can damage drywall, trim, cabinets, or the microwave itself. The Microwave Answers Team emphasizes safety-first planning: understand how the unit is mounted, where the electrical box sits, and how the venting and cabinetry are arranged before you touch a screw. Knowing these details helps you avoid surprises and makes the removal smoother. Consider weathered drywall, older electrical work, or hidden fasteners that could complicate the task. A little forethought now saves time, material, and frustration later.
Safety First: Electrical, Mounts, and Wall Structure
Removing a wall-mounted microwave begins with assessing electrical and structural safety. If the unit is hard-wired, you must locate the appropriate shut-off and verify there is no live current in any exposed conductor. Even when a plug is present, power can travel through junction boxes behind a wall. A secure plan includes turning off the circuit at the breaker, using a non-contact voltage tester to confirm de-energized wires, and having a secondary helper ready to support the weight. Also inspect the wall or cabinet framing for solid mounting. If the mount attaches to studs or a solid back panel, cutting or damaging the surrounding drywall could compromise wall integrity. Remember: a well-lit workspace and a clean floor reduce accidents and mistakes.
Tools, Materials, and Prep Steps
Before you begin, gather the essential tools and protective gear to avoid mid-task trips. You’ll want safety glasses and gloves, screwdrivers (flat and Phillips), a voltage tester, a stud finder, a flashlight, and a stable ladder or step stool. A helper is highly recommended for lifting and guiding the microwave. Have towels or moving blankets on hand to cushion the unit, and keep a container for screws and small parts. Also prepare a patch kit for drywall repair if you encounter gaps around the opening. Keeping a camera or phone handy to photograph connections can help you recreate the setup later. This prep phase sets a foundation for a smoother, safer removal.
Setup the Area: Clear, Protect, and Plan
Clear the counter area and floor, protecting surfaces with drop cloths or towels. Turn off the power to the microwave’s circuit and verify there is no voltage present with a tester. If you need to access the appliance behind a cabinet or trim, gently remove trim pieces with a flat-head screwdriver, being careful not to crack the veneer or paint. Mark the location of screws and brackets with painter’s tape for easy reassembly. Ensure you have sufficient lighting in the wall cavity and use a helper to steady the unit as you start loosening fasteners. A deliberate setup reduces chasing loose screws and minimizes the risk of dropping the microwave.
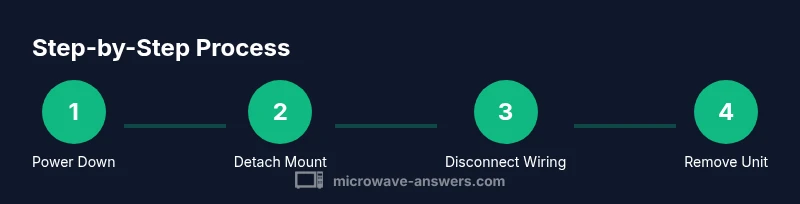
Step-by-Step: Detach the Microwave from Mount
With the area prepared, begin by locating all mounting screws or brackets securing the unit to the wall or cabinet. Loosen or remove these fasteners one at a time, while your helper supports the unit to prevent it from tipping. If there is a trim kit, remove it last so you maintain access to the mounting points. Keep track of fasteners in labeled containers so you can reassemble later. Do not pull the microwave straight out without checking that all fasteners are released, as this can shear the cabinet edge or damage the wall opening.
Step-by-Step: Disconnect Electrical Connections Safely
Carefully expose the junction box or power connections once the unit is free to move. If the microwave is plug-in, unplug it before disconnecting any wires. If it is hard-wired, remove the cover plate on the junction box and disconnect the conductors, labeling wires to keep track of their original arrangement. Use a voltage tester to verify there is no live current after disconnecting. Cap off any exposed conductors with appropriate wire nuts and apply electrical tape for additional security. Take clear photos for reference and maintain an organized workspace to prevent any confusion during reinstallation.
Step-by-Step: Remove the Microwave from the Wall Cavity
With all connections and screws addressed, the helper should cradle the microwave while you lift evenly and slide the unit out of the wall cavity. Move slowly to avoid chipping paint or denting drywall, and keep the unit level to prevent shattering glass components or bending metal. Lower the appliance onto a protective surface such as a blanket or padded surface. Inspect the cavity for any damage, rubble, or loose insulation that might need attention before storage or replacement.
Aftercare: Cleaning, Inspecting, and Storing
Wipe down the removed microwave and clear dust from the wall cavity. Inspect for any signs of moisture intrusion, mold, or chafed wiring around the wall opening. Patch the drywall to cover the exposed opening, using appropriate filler, sanding, and painting to match the surrounding surface. If you plan to reinstall the appliance later, store fasteners in labeled bags and document the original mounting method. If you’re replacing the unit, use a new mounting kit designed for the new model, ensuring proper clearance and ventilation. Finally, re-check the area for any hazards and keep tools organized for the next project.
Reinstallation Considerations: Options for Replacing or Relocating
When planning a replacement, decide whether you’ll reinstate the same wall opening with a new built-in unit, or relocate to a different location. The new installation should maintain proper clearance, ventilation, and electrical access. If you’re moving the microwave, assess studs, studs’ spacing, and available cabinet space to ensure a secure mounting. Consult local building codes if you’re altering wall structure or electrical wiring. A well-planned reinstallation reduces future repair needs and ensures safe, compliant operation.
Tools & Materials
- Voltage tester (non-contact preferred)(Check for live wiring before touching any wires)
- Screwdrivers (Phillips and flat-head)(Used to remove trim, screws, mounting brackets)
- Stud finder(Locate studs to avoid cutting into them)
- Electrical tape(Cover exposed conductors; label wires)
- Wire nuts or connectors(Cap wires if needed)
- Pliers and adjustable wrench(Loosen nuts and connectors)
- Level and measuring tape(Assess alignment for reinstallation)
- Utility knife(Carefully trim drywall patch material)
- Dust mask and safety glasses(Protect from dust and debris)
- Work gloves(Protect hands during handling)
- Drop cloth or old towels(Protect floor and countertop)
- Helper or sturdy ladder(Assistance for lifting the unit)
Steps
Estimated time: 60-90 minutes
- 1
Power down and protect the area
Turn off the microwave's circuit at the breaker and unplug if accessible. Confirm no power is present with a tester. Clear the workspace and lay down protective coverings to catch any debris.
Tip: Use lockout/tagout procedures if another person is nearby handling electricity. - 2
Check mounting hardware and access screws
Look for screws or brackets that secure the unit to the wall or cabinet. Take photos before removing anything so you can reassemble correctly later.
Tip: Document the exact order and location of fasteners for easier reinstallation. - 3
Clear the area and support the unit
Have a helper ready to cradle the microwave as you loosen fasteners. Use towels or blankets to cushion the appliance as it becomes free.
Tip: Never rely on drywall alone to bear the weight. - 4
Remove trim pieces and access panels
If present, remove trim or faceplates carefully with the appropriate screwdriver. Keep trim parts together in labeled bags to avoid loss.
Tip: Work slowly to avoid chipping or cracking veneer. - 5
Loosen mounting screws and detach from wall
Loosen screws gradually while your helper supports the unit. Once free, slide the unit forward slightly to clear the wall edge.
Tip: Do not yank; hold the unit and guide it away evenly. - 6
Disconnect electrical connections safely
Access the junction box and disconnect conductors if the unit is hard-wired; unplug first if there is a plug. Cap wires with nuts and tape for safety.
Tip: Label wires or photograph connections before removal. - 7
Remove the microwave from the wall cavity
With assistance, lift the appliance away from its mount and lower it to a padded surface. Inspect the cavity for damage or loose insulation.
Tip: Keep your fingers under the edges to prevent pinching. - 8
Patch, inspect, and store or reinstall
Patch the drywall opening if not reinstalling immediately; repaint to match. If reusing the unit, store fasteners and document mounting details for the next installation.
Tip: Plan ahead for venting and clearance in the new setup.
Common Questions
Is it necessary to unplug the microwave before starting?
Yes. Always disconnect power first, then verify there is no voltage in exposed conductors. If a plug is not accessible, switch off the corresponding circuit breaker and test the area. This prevents shocks during handling.
Yes. Always unplug or switch off the circuit before touching wiring to avoid shocks.
What if the microwave is hard-wired behind a panel and has no plug?
A hard-wired unit requires disconnecting the conductors in the junction box. If you’re not comfortable with electrical work, hire a licensed electrician. Always verify the circuit is de-energized before proceeding.
If it's hard-wired, you’ll need to disconnect the wires in the junction box or call a professional.
Can I DIY removal if I’m not experienced with electrical work?
You can perform non-wiring steps, like removing trim and mounting screws, if you are confident and the power is off. For any wiring work or if the unit is heavy, consult a professional.
You can do the non-wiring parts, but for wiring or heavy units, consider a pro.
How do I patch drywall after removal?
Use appropriate patch material, apply joint compound, sand smooth, and repaint to match surrounding areas. Clean any debris and inspect for moisture or mold before repainting.
Patch the wall with the right material, sand smooth, then repaint to blend in.
How long does the removal typically take?
Time varies depending on wall access and mounting type. Plan for a few hours to account for prep, detachment, safety checks, and cleanup.
Time varies; plan for a few hours depending on access and mounting.
Watch Video
Main Points
- Power down before touching wiring.
- Support the unit when detaching from the mount.
- Document connections for safe reinstallation.
- Patch drywall carefully after removal.