How to Move a Microwave Off the Wall Safely
Learn how to safely remove a wall-mounted microwave and relocate it to a countertop or freestanding stand. This step-by-step guide covers safety, tools, electrical and venting considerations, and best practices for 2026.

Quick answer: You can safely move a wall-mounted microwave by planning, turning off power, and using proper supports. Start by unplugging, then removing the unit from its bracket with a helper, and choosing a stable freestanding surface or new wall bracket. This guide covers tools, safety steps, and reinstallation best practices.
Why getting the microwave off the wall matters
For many kitchens, a wall-mounted microwave saves counter space but can create safety risks if not managed properly. The Microwave Answers team finds that improper relocation can damage walls, strain cords, or block ventilation. Before you move, assess the unit's weight, venting requirements, and the available space on the new surface. If you rent or live in a small apartment, alternative configurations like freestanding stands or compact cabinets may better balance footprint, reach, and airflow. This strategy reduces the chance of accidental bumps, overheating, and cord wear. By planning ahead in 2026, you reduce surprises and ensure the unit continues to work as intended.
According to Microwave Answers, thoughtful relocation also helps preserve ventilation paths and keeps cleaning simple, since a freestanding setup is often easier to access for routine maintenance.
Choose the right alternative: freestanding vs wall-mounted
If you are relocating, decide whether you want a freestanding stand, a countertop cart, or a new wall bracket. Freestanding options offer flexibility, easier cleaning access, and typically simpler wiring, while a dedicated countertop space preserves the previous efficiency. When selecting a stand or cart, check that it can support the microwave's weight, has non-slip feet, and leaves ventilation clearances on all sides. According to Microwave Answers, the best choice depends on your kitchen layout, current outlets, and typical cooking patterns in 2026. Consider how often you need to access the microwave during meals and whether you prefer to keep it near a prep area or the main cooking zone.
Safety prerequisites before relocation
Before touching any wiring or mounting hardware, unplug power at the outlet and verify there is no residual charge. Use a non-contact voltage tester to confirm the outlet is de-energized. Wear work gloves and avoid lifting while unsteady. Keep children and pets away. If the microwave vents into a cabinet, ensure the path remains clear from obstructions and that there is adequate clearance at the sides and above the vent. These precautions reduce the risk of shocks, burns, and accidental drops during movement.
As you proceed, document any original configurations with photos so you can accurately reproduce safe clearances in the new setup.
Electrical and venting considerations
Many wall-mounted microwaves are connected to a dedicated circuit. If the unit is hardwired, or if you must reroute a venting duct, these steps require professional help. Do not cut cords or force vents through tight spaces. Document the existing outlet location and vent points with photos to guide reinstallation. When reconnecting in a new location, use the correct gauge wiring and follow the manufacturer's instructions. If you’re unsure about venting paths or electrical loads, contact a licensed electrician or appliance technician. This reduces fire risk and ensures compliance with local codes.
In 2026, following official guidelines is especially important as home layouts vary and newer models may use different venting configurations.
Planning the new location: counter, shelf, or cabinet
Measure the target area carefully. Ensure the new location has a clear vent path, at least 4 inches of side clearance, and a minimum of 6 inches above to avoid heat buildup. If mounting, ensure studs or solid anchors are used. If placing on a counter, keep it away from heat sources and moisture. Plan the route, check doorways, and confirm that the power outlet will be reachable without stretching cords. This planning reduces drama during installation and keeps the unit performing as designed.
Quick comparison: wall-mount vs freestanding
Wall-mounted units save counter space but require mounting hardware and vent considerations. Freestanding units are easier to relocate and service, but take up surface area. Your choice should balance access, airflow, and power availability. For many households, a hybrid approach—temporary freestanding during redecorating, then a wall mount in a different location—offers flexibility without compromising safety.
Final practical considerations
Always refer to the microwave’s user manual for model-specific guidance on mounting, venting, and electrical requirements. If you’re unsure about any step, pause and seek professional help. Keeping a small toolbox and a labeled hardware bin on hand speeds up future maintenance and avoids repeated trips to the hardware store.
The takeaway for 2026
Relocating a wall-mounted microwave is doable with careful planning, the right tools, and a helper. By prioritizing power-off, ventilation clearance, and appropriate mounting supports, you protect your investment and avoid common mishaps. The Microwave Answers team emphasizes clear planning, professionalism for electrical/venting tasks, and testing the unit after relocation to ensure optimal performance.
Tools & Materials
- Voltage tester(Checks outlet is live before handling wiring)
- Screwdriver set (Philips & flat-head)(Remove mounting screws and brackets)
- Stud finder(Locate secure mounting points for new setup)
- Measuring tape(Measure clearance and heights for safe placement)
- Work gloves(Protect hands during lifting)
- Ladder or stable step stool(Reach high mounting points safely)
- New mounting bracket or freestanding stand(Ensure compatibility with microwave model)
- Camera or notepad(Document original configuration for reference)
Steps
Estimated time: 1.5-2 hours
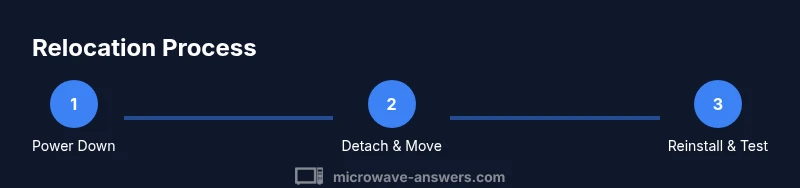
- 1
Power down and unplug
Power off at the wall and unplug the microwave. If it’s on a dedicated circuit, switch off the breaker and verify no power is present with a voltage tester. This ensures you won’t shock yourself or damage wiring during removal.
Tip: Always unplug before handling any wiring; verify with a tester if unsure. - 2
Secure and empty the unit
Remove all contents and place the microwave on a stable, level surface with padding. Have a helper ready to support the unit as you begin detaching it from the wall or stand.
Tip: Use a helper to prevent dropping the unit during lifts. - 3
Remove mounting screws/bracket
With the appropriate screwdriver, back out mounting screws holding the unit to the wall bracket. Keep screws together in labeled bags to ease reassembly. Have a second person support the microwave as the last fasteners come free.
Tip: Label and store screws to simplify reinstallation. - 4
Detach vents and electrical connections cautiously
Respect venting paths; disconnect only as allowed by the manual. If the unit vents outside, avoid loosening ductwork unless you’re sure how it’s routed. Take photos for reference before disconnecting components.
Tip: Take photos before disconnecting for easier reassembly. - 5
Move to a temporary safe spot
Lift the microwave with a partner and move it to a clear, stable area away from the work zone. Keep cords untangled and avoid twisting. Clear a wide enough path to prevent tripping.
Tip: Use a dolly or helper for heavy units to reduce strain. - 6
Prepare new mounting surface or stand
Decide whether you’ll mount on a new wall bracket or place the unit on a freestanding stand. Ensure the surface is level, sturdy, and sized to accommodate ventilation clearance.
Tip: Use a level and ensure studs or anchors are properly placed if mounting. - 7
Reinstall at the new location and test
Attach to the chosen surface using the appropriate hardware. Reconnect the power supply and perform a short test cycle to confirm heating and venting function. Check for proper ventilation clearance after operation.
Tip: Run a 1-minute test cycle with water to check heating and noise. - 8
Final checks and cleanup
Verify all fasteners are tight, cords routed safely, and vents unobstructed. Store removed hardware and take photos of the final setup for future reference.
Tip: Keep a simple diagram of the setup for next time.
Common Questions
Is it safe to move a wall-mounted microwave by myself?
With power off and a helper assisting with lifting, it’s feasible to move a wall-mounted microwave. Avoid doing it from high elevations or without support. If you’re unsure, seek professional help.
Yes, but it’s safer with a helper and power off. Don’t attempt from an unstable position.
Should I disconnect venting or the exhaust duct when removing from the wall?
Only disconnect venting if you know exactly how it’s routed and can reassemble correctly. Otherwise, follow the manual or consult a professional to avoid leaks or poor venting.
Only disconnect if you’re sure how the venting works; otherwise, get help.
What if the microwave is hardwired or integrated into the wall?
If the unit is hardwired or integrated into the wall, consider hiring a licensed electrician or installer to avoid electrical hazards and ensure code compliance.
If it’s hardwired, a pro is the safer route.
What tools are essential for safe relocation?
Use a voltage tester, stud finder, screwdrivers, measuring tape, and a helper. Keeping a labeled hardware bag helps reassembly.
Basic tools plus a helper are enough for most relocations.
Can I mount the microwave again on a wall or switch to a countertop?
Yes. You can mount again on a wall or move to a countertop or freestanding stand, provided you maintain ventilation clearance and have accessible power.
There are multiple safe options; just ensure venting and outlets are appropriate.
Watch Video
Main Points
- Plan power-off and unplug before any movement.
- Choose a stable surface with adequate clearance.
- Use a stud-backed mount or a sturdy stand.
- Test the unit after relocation and ensure venting is unobstructed.
- Document changes and keep hardware organized.