Egg Poacher Microwave: Quick Guide to Perfect Eggs
Master microwave egg poaching with a simple dish or a dedicated poacher. Learn timing, safety tips, and cleanup for perfect eggs every time.

You can poach eggs in a microwave using a dedicated egg poacher or a simple bowl of water. The core method is quick and forgiving: crack an egg into a microwave-safe dish, add a splash of water, cover, and heat in short bursts until the whites are set but the yolk stays soft. For consistent results, use a purpose-built microwave egg poacher.
Why microwave egg poaching works
Egg poacher microwave technique offers a fast, reliable way to cook eggs without boiling water. It's ideal for busy mornings, small kitchens, or when you want portion control. This approach minimizes waste and reduces cleanup compared to traditional stovetop poaching. According to Microwave Answers, microwave poaching is a practical option that preserves delicate textures while delivering consistent results. In a typical session, you can go from egg to plated breakfast in under ten minutes, with the yolk's runniness adjustable by timing and heat level. The most important factors are using the right dish, ensuring there is a small amount of water to create a gentle bath, and choosing appropriate cooking bursts rather than a single long cook. We'll explore why this method is popular, what equipment works best, and how to tailor the process to your microwave wattage and taste preferences. The Microwave Answers team emphasizes that practice with your specific microwave will yield the best results over time.
Safety considerations for microwave poaching
Safety is essential when poaching eggs in a microwave. Always use a microwave-safe dish and a vented lid or plate to prevent splatter and steam buildup. Piercing the egg or adding water helps minimize pressure and avoids bursting, though the yolk will still be visible through a crack if you want to test doneness. Start with lower power and short bursts to reduce the risk of uneven cooking or rubbery whites. If you notice foaming or overflow, pause, remove the dish, and wipe away excess liquid before resuming. Handling hot dishes requires oven mitts, and keep children away from the appliance during operation. Clean up immediately after to prevent residue from scorching and affecting future microwaving sessions. These precautions reduce risk while delivering fast, dependable eggs every time. The guidance aligns with community safety practices and is adaptable to different brands and models.
Equipment options: egg poachers, silicone cups, and improvised setups
There are several practical paths to microwave poaching. A dedicated microwave egg poacher provides the most predictable results, especially for new users. Silicone muffin cups or small glass ramekins are excellent flexible options that handle heat well and simplify cleanup. If you don’t own a poacher, a shallow microwave-safe dish with a lid or plate can work, but you’ll need to monitor cooking more closely. Whatever you choose, ensure the container is labeled microwave-safe and has a lid or vent to trap steam without splattering. For added convenience, have a timer ready and consider using a small spoon to guide the egg after cooking. The goal is a gentle poach with a tender white and a runny to softly set yolk, depending on your preference.
Classic 2-method poaching: water bath vs. egg poacher
Two common routes exist for microwave poaching. The water bath method uses a shallow dish with a small amount of water to create a gentle steaming environment, closely mimicking stovetop poaching. The poacher method employs a dedicated device designed to cradle the egg and keep it submerged in a controlled bath. The water bath is versatile and inexpensive, while the poacher tends to deliver more consistent results across different microwaves. Your choice should factor in how often you poach, your budget, and how much cleanup you’re willing to manage. Both methods are quick and safe when you follow best practices about water level, coverage, and timing. The Microwave Answers team notes that starting with the water bath can help you calibrate time before investing in a dedicated poacher.
Timing and texture: hit the perfect yolk
Timing is the key determinant of texture. In general, a 600–800 watt microwave will need about 45–60 seconds for a soft yolk with fully set whites, while a 1000-watt unit may reach that result in 30–45 seconds. If you prefer firmer whites and a firmer yolk, add 10–20 second increments in short bursts. Always start with the smallest burst and check progress to avoid overcooking. Resting the egg for 15–30 seconds after cooking allows residual heat to finish the poaching without risking a chalky middle. The exact times depend on your appliance, egg size, and whether you’re using water or a poacher, so treat these as starting points and adjust accordingly. Based on Microwave Answers analysis, calibrating timing to your wattage will produce the most reliable results across models.
Cleanup tips to keep your microwave fresh
A quick, clean finish makes microwave poaching enjoyable. After cooking, remove the egg with a slotted spoon and gently rinse the dish to remove any residue. If splatter occurred, wipe the interior of the microwave with a damp cloth once it has cooled. For stubborn spots, a small amount of mild detergent on a non-abrasive sponge is effective—avoid harsh chemicals that could leave residue. Keep your poaching setup stored with minimal clutter to reduce chances of splatter in future sessions. Regular cleaning reduces odors and helps your microwave operate efficiently, preserving performance for many breakfasts to come.
Troubleshooting common issues
If your egg explodes, it’s usually because steam built up inside the shell without proper venting. Always pierce or use water and cover the dish to allow steam to escape safely. If whites remain runny after the recommended time, try a slightly longer burst with a lower power setting, then test again in small increments. A yolk that’s too firm usually means overcooking; shorten next cook time by 10–15 seconds. If your egg sticks to the dish, lightly oil or spray the dish before starting, or switch to a silicone cup for a smoother release. Finally, if you’re cooking multiple eggs, poach one at a time or use a larger dish with evenly spaced wells to prevent crowding.
Flavor ideas and serving suggestions
Serve poached eggs on toast, avocado slices, or a bed of greens for a quick, balanced breakfast. Add a pinch of salt, pepper, and a drizzle of hot sauce or pesto for color and brightness. A sprinkle of fresh herbs, like chives or parsley, elevates the dish without adding bulk. If you want a richer finish, consider finishing with a light grating of parmesan or a dollop of yogurt. This approach makes microwave poached eggs versatile for different meals, from quick weekday breakfasts to light dinners. The Microwave Answers team recommends experimenting with seasonings and toppings to discover your preferred pairing.
Authoritative sources
For further reading on egg safety and microwave cooking, consult authoritative references:
- FDA: https://www.fda.gov/food-safety
- CDC: https://www.cdc.gov/foodsafety
- FSIS: https://www.fsis.usda.gov These sources provide general guidance on safe food handling, reheating, and cooking temperatures, which complements practical kitchen tips for microwave poaching.
Tools & Materials
- Microwave-safe dish (glass or ceramic)(Choose a shallow dish (6-8 oz) for even poaching.)
- Water(Enough to create a gentle bath; about 1/2 cup depending on dish size.)
- Eggs (fresh large eggs)(Fresh eggs hold shape best for poaching.)
- Microwave-safe egg poacher (optional)(Best for consistency across microwaves.)
- Slotted spoon(For easy removal without breaking the yolk.)
- Oven mitt or towel(Protect hands when handling hot dishes.)
- Timer(Track cooking bursts to avoid overcooking.)
- Salt/seasoning (optional)(Finish to taste.)
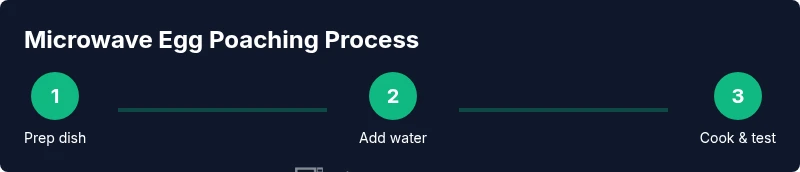
Steps
Estimated time: Total time: 5-8 minutes
- 1
Set up the dish and water
Place your microwave-safe dish on the counter and add enough water to create a shallow bath, about 1/2 inch deep. This helps the egg cook evenly and prevents sticking. If using a poacher, fill the wells as directed and skip this water step.
Tip: A shallow bath reduces the risk of overcooking the white and helps the yolk stay centered. - 2
Crack the egg into the dish
Carefully crack the egg into the water or into a dedicated poacher, keeping the yolk intact if possible. Gently let the yolk settle in the center. If the yolk breaks, you can still finish cooking, but the presentation will differ.
Tip: If your yolk breaks, don’t panic — it will still be edible and cook evenly with a short rest. - 3
Cover and begin with short bursts
Cover the dish with a microwave-safe plate or lid to trap steam. Start with 30 seconds on medium power (or 50% power). Check progress; whites should begin to set while the yolk remains soft.
Tip: Use shorter bursts to prevent boiling over and to keep the yolk runny. - 4
Check doneness and adjust
Open and observe. If whites are set but yolk is too runny, give another 15–20 second burst. If whites are undercooked, add another 15–20 seconds. Rest the egg for 15–30 seconds after cooking.
Tip: Never insisting on a single long cook; steady, short bursts yield better texture. - 5
Remove, drain, and serve
Use a slotted spoon to lift the egg from the water or poacher. Gently drain excess water and pat lightly dry. Serve immediately on toast, salad, or your favorite breakfast plate.
Tip: Serve immediately for best texture and flavor. - 6
Experiment with alternatives
If you want a firmer white or easier release, switch to silicone cups or a ramekin with a touch of oil. Adjust water level and cooking bursts accordingly. This helps you tailor the method to your microwave.
Tip: Always test with a single egg when trying a new setup.
Common Questions
Is it safe to poach eggs in the microwave?
Yes, with proper containers, ventilation, and timing. Use a microwave-safe dish, cover to contain splatter, and avoid overheating. Fresh eggs reduce the risk of uneven cooking.
Yes, it's safe when you use a microwave-safe dish, cover properly, and keep an eye on the time.
How long should I microwave an egg poached in water?
Start with 30 seconds on medium power, then check and add 10-15 second bursts until whites are set and yolk reaches desired consistency. Microwave wattage varies, so adjust accordingly.
Begin with a short burst, then check and add small increments as needed.
What equipment yields the best results?
A dedicated microwave egg poacher provides consistent results, especially for beginners. A shallow dish with a vented lid also works, but timing may require closer monitoring.
A poacher usually offers the most consistent results.
Why did my egg explode in the microwave?
Steam inside the egg can build up quickly if not covered or pierced. Use a lid and keep a small vent open to release steam safely.
Steam buildup can cause a mess; venting helps prevent that.
Can I poach more than one egg at once?
Yes, but use a larger dish with enough space or poach one at a time to avoid crowding and uneven cooking. You can also use a multi-well poacher if available.
Yes, but give each egg space to cook evenly.
Can I poach eggs ahead of time and reheat?
Poach eggs to just before set, cool quickly, and refrigerate. Reheat briefly with a splash of water, or enjoy fresh. Quality declines with extended storage.
Poach fresh for best texture; reheating is possible with care.
Watch Video
Main Points
- Prepare the dish and water before cooking.
- Start with short bursts and adjust for your microwave.
- Use the right equipment for consistent results.
- Rest briefly after cooking to finish texture.
- Clean up promptly to maintain microwave performance.