Microwave Egg Poacher: A Practical How-To
Learn how to poach eggs in a microwave using a dedicated egg poacher. This practical, step-by-step guide covers safety, wattage adjustments, cleaning, and delicious serving ideas for fast, reliable results.

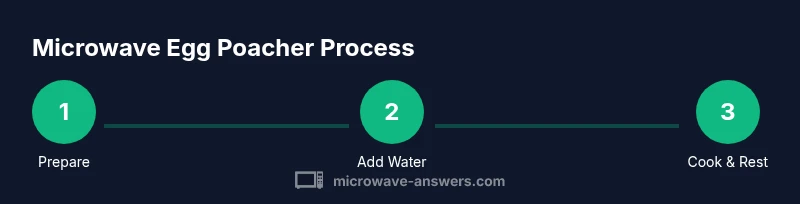
You can perfectly poach eggs in minutes with a microwave egg poacher. Gather a microwave-safe poacher, fresh eggs, water, and a vented lid, then follow a tested step-by-step routine tuned to your microwave’s wattage for reliable results.
What is a microwave egg poacher and how does it work?
A microwave egg poacher is a compact, dedicated tool that uses steam to gently cook eggs inside cups or a shallow dish. By filling a bottom chamber with a small amount of water and sealing with a vented lid, the microwave turns water into steam that cooks the eggs evenly without direct contact with hot surfaces. This method minimizes splatter and makes cleanup easier while delivering a delicate poached texture.
According to Microwave Answers, the right poacher setup can dramatically reduce overcooking and yolk breakdown compared with improvised methods. The goal is a tender white with a glossy, set yolk, served on toast or as part of a balanced plate.
Safety first: what you need to know before heating eggs in a microwave
Safety starts with materials. Always use microwave-safe plastic, glass, ceramic, or silicone designed for food contact. Never use metal cups or foil in a microwave egg poacher unless the manufacturer explicitly allows it. Vent the lid to prevent steam buildup, and avoid sealed configurations that can explode under pressure. Handle hot poachers with oven mitts and keep water away from electrical outlets. Finally, discard or refresh the water after each use to prevent stagnation and bacterial growth.
The Microwave Answers team emphasizes following the manufacturer’s guidelines for your model and keeping the setup simple to prevent overheating or spills.
Choosing the right microwave egg poacher: silicone, BPA-free plastics, or ceramic options
Silicone poachers are flexible, heat-resistant, and easy to clean. BPA-free plastic options are affordable and lightweight, but check for dishwasher safety. Ceramic poachers feel sturdier and distribute heat well, though they can be heavier and break if dropped. Regardless of material, ensure the unit sits flat in your microwave and has a vented lid to release steam. Avoid metal parts in most microwaves, as metal can cause arcing. For households with shared kitchens, look for dishwasher-safe pieces and parts clearly labeled microwave-safe.
Basic microwave poaching method: standard eggs in 1–2 minutes (adjust for wattage)
Start by filling the bottom chamber with water up to the line. Crack a fresh egg into the poacher cup, taking care not to break the yolk. Place the poacher in the center of the microwave, cover with the vented lid, and cook on high power for a baseline time. Many microwaves require a short rest after cooking to finish, so keep a 20–30 second pause.
Tip: If your microwave runs hotter or cooler than average, start with a shorter baseline and adjust in small steps until you see consistent results.
Variations: soft-set, medium-set, and hard-set eggs; poaching multiple eggs
The cooking time may vary with how you like the yolk. For softer results, start with shorter times and test. For firmer yolks, increase the cook time in small increments. If you need to poach two eggs, use a double-cook approach or stagger the timing and rotate the poachers to ensure even heating. Always keep the lid slightly ajar if your model requires venting for multiple eggs.
Note: Log your times for your specific microwave so you can reproduce results reliably.
Common problems and practical fixes
If the whites stay runny, your time may be too short or the water level too low. If yolks crack or the white turns rubbery, adjust the time and consider lowering power to avoid overheating. Splattering can occur if the lid is too tight; opt for vented lids or leave a small gap for steam. If the egg sticks to the cup, lightly oil the inner surface or spray with non-stick spray before cracking in the egg. Always ensure sufficient steam buildup before closing the lid.
Cleaning and care to extend the life of your microwave egg poacher
Rinse immediately after use and wash with warm, soapy water. Avoid abrasive scrubbers that can scratch silicone or ceramic surfaces. Many poachers are dishwasher-safe, but hand-washing extends their life and prevents warping. Dry thoroughly before storing to prevent odor buildup and mold. Inspect the vent and seals monthly to ensure proper steaming.
Troubleshooting wattage differences and timing across different microwaves
Microwaves vary widely in wattage, so start with a conservative baseline and test with a single egg before attempting multiple poaches. If your microwave runs hotter than standard, shorten cook times by a small margin and let the egg rest longer after cooking. For deeper poaches, place the poacher on a microwave-safe rack to improve heat distribution. Keep a notebook of times for your specific model and repeatable results.
Creative uses and essential reminders for safe, tasty results
Use herbs, a sprinkle of cheese, or a dab of cream cheese for extra flavor. Pair poached eggs with toast, avocado, or sautéed greens for a balanced breakfast. Always serve immediately after poaching for best texture, and avoid reheating eggs in the microwave to minimize texture changes and safety concerns. The Microwave Answers team reminds readers to maintain hygiene and never leave perishable ingredients at room temperature.
Tools & Materials
- Microwave-safe egg poacher (cup-based or silicone tray)(Ensure it fits your microwave turntable and has a vented lid)
- Eggs (fresh)(Prefer medium to large eggs; freshest eggs hold shape better)
- Water(Add enough to fill the bottom chamber to the manufacturer’s line)
- Microwave-safe lid or cover(Vented lid recommended to control steam)
- Spoon or fork(For removing egg and checking doneness)
- Nonstick spray or oil (optional)(Lightly coat inner cup to prevent sticking)
Steps
Estimated time: 6-8 minutes
- 1
Gather your tools and ingredients
Collect a microwave-safe egg poacher, fresh eggs, water, a vented lid, and optional seasonings. Check your poacher’s capacity by reviewing the manual or testing with a dry run. This step sets the stage for clean, predictable results.
Tip: Tip: Confirm the egg poacher fits your microwave turntable before you begin. - 2
Add water to the bottom chamber
Pour water into the bottom chamber up to the indicated line. The water creates steam that cooks the egg gently and avoids direct contact with hot surfaces. If your poacher requires pre-wetting, do so according to the manufacturer.
Tip: Tip: Use warm water to help generate steam a bit faster. - 3
Crack the egg into the poacher
Carefully crack a fresh egg into the central cup, keeping the yolk intact. Fresh eggs hold shape better and are less likely to break during poaching. If you’re trying for a runny yolk, work quickly to minimize yolk damage.
Tip: Tip: Crack the egg into a small bowl first to avoid yolk breakage. - 4
Cover and position in the microwave
Place the poacher on a flat surface in the center of the microwave. Cover with the vented lid to trap steam, but ensure there’s a vent for release. The container should sit level to promote even cooking.
Tip: Tip: If your lid is tight, leave a small gap for steam to escape. - 5
Cook for a baseline time and monitor
Cook on a baseline high power until the whites set and the yolk begins to thicken. Time depends on wattage; start with a conservative baseline and adjust in small increments in future trials. Resist the urge to overcook in a single pass.
Tip: Tip: If your microwave runs hot, reduce time by 10–20 seconds and test again. - 6
Pause briefly to finish via residual heat
Let the poached egg rest for 20–30 seconds after cooking. The residual heat completes the set without overcooking. This step helps achieve a tender white with a partially set yolk.
Tip: Tip: Don’t skip this rest; it stabilizes texture. - 7
Check doneness and remove carefully
Open the lid away from your face to avoid steam. Use a spoon to lift the poacher and gently remove the egg. If the yolk is not as you like, adjust future times by small increments.
Tip: Tip: Wear oven mitts—poachers can be hot even after resting. - 8
Season and serve immediately
Season lightly with salt, pepper, or herbs. Serve the poached egg on toast, avocado, or greens for a complete breakfast. Fresh taste is best when served right away as texture can change with time.
Tip: Tip: A dash of hot sauce or lemon zest can brighten the flavor. - 9
Clean the poacher and store properly
Wash the poacher promptly with warm, soapy water or place in the dishwasher if permitted. Dry thoroughly before storing. Regular cleaning prevents odors and buildup that can affect future poaching.
Tip: Tip: Inspect seals and vents monthly to ensure consistent steam production.
Common Questions
Can you safely poach eggs in a microwave egg poacher?
Yes. A purpose-built microwave egg poacher is designed to cook eggs with steam in a controlled environment. Always follow the manufacturer’s instructions and use vented lids to prevent pressure buildup.
Yes. A microwave egg poacher is designed for safe steaming of eggs when you follow the instructions and vent the lid.
What is the best wattage for microwave poaching?
Most recipes rely on standard household wattage rather than a precise number. Start with the baseline time for your model, then adjust up or down in small steps based on results.
Start with your microwave’s baseline time and adjust a little at a time based on how your eggs cook.
Can I poach more than one egg at a time?
Yes, you can poach multiple eggs, but you should stagger the cooking times or use two poachers and rotate them to ensure even heating. Don’t stack cups on top of each other.
Yes, you can, but stagger times or use two poachers and rotate them for even cooking.
Why does my egg explode in the microwave?
Steam pressure is the culprit. Always vent the lid and avoid sealing the poacher tightly. If the egg yolk ruptures, reduce cook time and give the egg a brief rest before checking.
Steam pressure can cause explosions; vent the lid and don’t seal the poacher tightly.
How can I tell when the egg is done?
Check by gently tilting the poacher or using a spoon to peek at the white. If the white is set and the yolk is tender, it’s ready. If you want a firmer yolk, cook a little longer in small increments.
Check the white—it should be set. If you want a firmer yolk, cook a bit longer in small steps.
Watch Video
Main Points
- Choose a microwave-safe poacher with a vented lid.
- Start with a conservative time and adjust based on wattage.
- Use fresh eggs for the best texture and shape.
- Pause after cooking to finish with residual heat.
- Clean promptly to extend the poacher’s life.