Microwave Egg Cooker Instructions: A Practical How-To
Learn safe, reliable microwave egg cooker instructions for perfect eggs every time. This practical guide covers choosing the right cooker, safety tips, power settings, step-by-step methods, cleaning, and troubleshooting for home cooks.

You can cook eggs quickly and safely with a dedicated microwave egg cooker. This guide covers choosing the right cooker, safe handling of eggs, power settings, water levels, and common pitfalls. Follow the steps below to achieve soft, medium, or hard textures with minimal cleanup, all in minutes.
What is a Microwave Egg Cooker and why use it?
A microwave egg cooker is a compact, microwave-safe vessel designed to cook eggs quickly with steam and gentle heat. It typically includes a lid, a water reservoir or pour lines, and a vent to control steam. Following microwave egg cooker instructions helps you achieve consistent textures—soft, medium, or hard—without standing at the stove. The design reduces clean-up and speeds up busy mornings. Whether you’re preparing quick scrambled eggs or a couple of hard-cooked eggs for lunch, using the cooker correctly matters for safety and flavor. Remember to use only microwave-safe materials and to avoid metal parts. With proper times, water levels, and power settings, you’ll enjoy reliable results that align with Microwave Answers recommendations.
Keyword usage note: microwave egg cooker instructions should be followed closely to ensure safe handling and predictable outcomes.
Types of Microwave Egg Cookers: Which one fits your kitchen?
There are several styles of microwave egg cookers, each with its own strengths. Silicone molds or cups provide flexible shapes and easy release, while hard plastic or glass varieties offer rigid form and durability. Some designs include a built-in water reservoir for steam, others rely on a measured water line you fill before cooking. When evaluating options, consider capacity, ease of cleaning, dishwasher safety, and whether you prefer a lid with a vent. Regardless of type, ensure the cooker is labeled microwave-safe and free of cracks or damage. If you’re new to microwave egg cooker instructions, start with a simple silicone cup and a small batch to calibrate timing and texture. Also verify that the lid seals well to prevent splatter during cooking.
Safety First: Handling eggs in the microwave
Eggs can explode if heated improperly due to rapid steam buildup. To minimize risk, never seal the cooker airtight and always use a vented lid or leave a small gap for steam to escape. Prick or pierce yolks only when your recipe or cooker design instructs it; otherwise, rely on steam to do the work. Work on a microwave-safe plate to catch any overflow, and wear oven mitts when removing hot components. Start with shorter cook times and check for doneness, especially if you’re cooking at higher power. If you notice any unusual smell or cracking, stop cooking and inspect the cooker for damage.
Preparing Your Egg Cooker and Ingredients
Before cooking, wash the egg cooker and lid with warm, soapy water, then rinse and dry. If your model requires water, measure it carefully up to the indicated fill line. Bring eggs to room temperature if possible, as this helps achieve even cooking. Crack eggs into the cooker or into separate compartments as your design requires; season lightly if desired. Have a timer ready and clear the space to avoid spills. A well-prepped setup makes microwave egg cooker instructions easier to follow and reduces the risk of undercooked eggs.
Power, Time, and Water: Understanding the core controls
Microwave cooking depends on power level, time, and the amount of water in the cooker. Most egg cookers perform best at medium power (roughly 50–70% of full power) with enough water to generate steam but not so much that you dilute flavor or risk overflow. Times vary by egg size, altitude, and cooker design. A good starting point is one large egg with a 40–60 second baseline, then extend in 15–20 second increments. Always monitor the first few batches to establish your kitchen’s unique timing curve. This section distills general guidance, but always align with your specific model’s microwave egg cooker instructions.
Soft-Scrambled Eggs: A gentle, creamy texture in minutes
To make soft-scrambled eggs, lightly whisk eggs with a splash of milk or water and a pinch of salt. Pour into the cooker, add a teaspoon of butter or oil to prevent sticking, and seal with the vent slightly open. Microwave in short bursts of 20–30 seconds, stirring between bursts to encourage even cooking. Let the mixture rest for 60 seconds after the final cook to finish carryover cooking. This approach yields a tender, custard-like texture you can finish with chives or cheese.
Hard-Cooked Style Eggs: Portable, ready-to-eat perfection
For hard-cooked eggs, fill the cooker with a small amount of water according to the model’s line. Place the eggs (still in their shells or peeled, depending on design) in the designated slots or on a rack. Cook on medium power for 2–4 minutes per egg, then rest the eggs for 1–2 minutes to finish cooking through residual heat. If you prefer multiple eggs, cook in batches to avoid crowding, which can lead to uneven results. Always test doneness with the tip of a knife or by gently twisting the shell.
Poached Eggs: Delicate, restaurant-style results at home
To poach eggs in a microwave egg cooker, add a small amount of water and break the egg into the cooker’s cavity. The water creates steam that gently cooks the egg white while preserving a runny yolk if timed precisely. Cover with a vented lid and cook in short intervals (about 25–35 seconds), checking frequently. Remove promptly to prevent overcooking. Add a splash of vinegar or lemon juice to the water for a cleaner finish if your recipe calls for it.
Cleaning and Maintenance: Extend the life of your cooker
After cooking, allow the cooker to cool briefly before washing. Use warm, soapy water and a non-abrasive sponge; avoid harsh scours that could scratch surfaces. If stains linger, a gentle soak with a pinch of baking soda can help. Dry thoroughly to prevent mold and mildew. Regular inspection for cracks or warping is essential; any damage means the cooker should be retired. Proper cleaning and mindful use keep microwave egg cooker instructions reliable for years.
Troubleshooting Common Issues: Quick fixes for common problems
If eggs explode, reduce power and/or cooking time, and ensure enough venting. If shells resist peeling, try cooling eggs in cold water briefly after cooking to stop the carryover heat. If texture is rubbery, shorten cooking time or reduce power slightly and add a touch more moisture. Overfilling can lead to overflow; adhere to the model’s fill line strictly. For persistent issues, consult the manufacturer’s microwave egg cooker instructions and consider trying a different batch to calibrate timing.
Flavor Variations and Quick Add-Ins
Eggs are versatile; try adding shredded cheese, a pinch of smoked paprika, chopped herbs, or diced vegetables after cooking. A splash of hot sauce or a drizzle of olive oil can elevate flavor without adding fat. If you’re mixing eggs for scrambling, consider a tablespoon of cream or milk per two eggs to improve richness. Always temper additions to avoid altering cooking times substantially.
Quick-Start Checklist: Ready-to-cook in 60 seconds
- Confirm your cooker is microwave-safe and intact.
- Fill to the recommended water level.
- Crack eggs into the cooker, season lightly if desired.
- Set power to medium and start with conservative times.
- Check doneness in increments and rest briefly before serving.
- Clean the cooker after use and store properly.
Why Following Microwave Egg Cooker Instructions Matters for Safety
Adhering to microwave egg cooker instructions reduces the risk of burns, hot steam exposure, and uneven cooking. Proper venting and water use help prevent splatter and pressure buildup. By using safe, microwave-approved materials and avoiding damaged cookware, you protect yourself and your kitchen. The take-away is simple: follow the model-specific directions, calibrate times with your unit, and enjoy consistent, safe results every time.
Tools & Materials
- Microwave egg cooker (silicone, plastic, or glass)(Must be microwave-safe and undamaged)
- Fresh eggs(Large eggs work best for standard times)
- Water(Fill to the cooker’s indicated line or as directed)
- Salt, pepper, or optional seasonings(To taste)
- Milk, cream, or butter (optional)(For creamier texture in scramble)
- Microwave-safe plate or tray(Catches overflow and prevents mess)
- Measuring cup or spoon(For accurate water and seasoning)
- Kitchen tongs or oven mitts(Handling hot cooker safely)
- Timer or microwave’s built-in timer(Track cooking intervals)
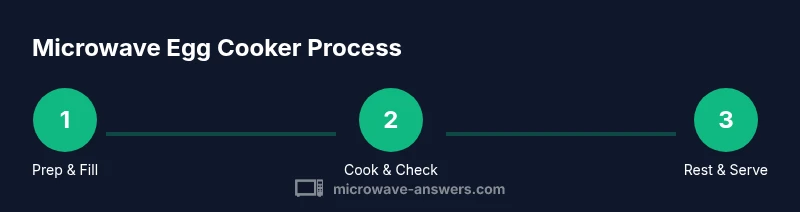
Steps
Estimated time: 12-20 minutes
- 1
Gather tools and ingredients
Collect your microwave egg cooker, eggs, water, and any add-ins. Clear the workspace and wipe down the cooker if needed. This preparation reduces interruptions and ensures consistent results.
Tip: Have a timer ready and arrange ingredients within arm's reach. - 2
Prepare the cooker and water
Wash the cooker and lid, then fill with the recommended amount of water. The water creates steam that gently cooks the eggs and helps prevent sticking.
Tip: Use fresh water and verify the fill line before starting. - 3
Crack eggs and season
Crack eggs into the cooker or into separate compartments as your model requires. Lightly season if desired. Avoid overflowing the compartments to prevent spills.
Tip: If your eggs tend to stick, lightly oil the surfaces or add a knob of butter. - 4
Set power and time
Place the lid on and set the microwave to medium power. Start with short intervals (20–40 seconds) and check for doneness between bursts to avoid overcooking.
Tip: Calibrate times with a test batch before cooking a full meal. - 5
Check doneness and rest
After the final interval, inspect texture. If needed, cook in additional 15–20 second bursts. Let the eggs rest for 60 seconds to finish carryover cooking.
Tip: If yolks are undercooked, return to the cooker in short increments. - 6
Release and serve
Carefully unlock and remove the cooker using oven mitts. Plate the eggs and enjoy immediately for best texture.
Tip: Be mindful of steam when opening the lid. - 7
Clean the cooker while warm
Rinse with warm, soapy water while still warm to dissolve oils and egg residue. Dry thoroughly before storing.
Tip: Avoid abrasive scrubbers that can scratch surfaces. - 8
Store leftovers safely
Cool eggs briefly, then refrigerate promptly in a sealed container. Reheat gently with an additional splash of water if needed.
Tip: Label leftovers with date to ensure safety.
Common Questions
Can I cook eggs without a dedicated egg cooker if I only have a bowl?
Yes, you can improvise with a microwave-safe bowl and water, but outcomes may vary. An egg cooker is designed to control steam and prevent spills, which improves consistency.
It’s possible to improvise with a microwave-safe bowl, but a dedicated egg cooker helps you get consistent results.
What power setting is best for large eggs?
Start at medium power and adjust based on results. Larger eggs often need slightly longer cooking with careful checking to avoid overcooking.
Start at medium power and check doneness; you may need a touch longer for large eggs.
How do I prevent eggs from exploding in the microwave?
Use vented lids, avoid sealing completely, and cook in short bursts. Rest periods after cooking help release built-up steam gently.
Vent the cooker and cook in short bursts, then rest to avoid explosions.
Is it safe to reheat eggs cooked in a microwave egg cooker?
Reheat quickly with a splash of water and cover to retain moisture. Do not reheat multiple times; discard leftovers that look off.
Reheat briefly with moisture and avoid reheating more than once.
Can I cook multiple eggs at once in a single cooker?
Some cookers support multiple eggs in a single batch; check the capacity and avoid overcrowding to ensure even cooking.
Yes, some models handle several eggs, but don’t crowd the cooker.
Watch Video
Main Points
- Test eggs first to calibrate timing.
- Use the water line as instructed to generate steam.
- Cook on medium power for even results.
- Rest briefly after cooking for best texture.