Times Microwave: A Practical How-To Guide
Learn how to time microwave heating accurately by accounting for wattage, moisture, and containers. A step-by-step approach with safety tips, practical examples, and a ready-to-use plan.

Mastering times microwave means learning to estimate and adjust cook times across different foods, wattages, and containers. This guide explains how wattage affects heating rates, how to test times safely, and how to build a reliable timing routine you can apply to daily reheating and cooking tasks with confidence. Whether you’re starting from a manufacturer suggestion or testing at home, this approach helps prevent undercooked meals and overcooked edges.
What times microwave means in everyday cooking
In everyday cooking, the phrase times microwave refers to the estimated duration required to heat, cook, or reheat food in a microwave oven. The goal is to achieve consistent results across different foods and microwave models. Understanding this concept helps home cooks avoid rushed microwaving and frozen centers alike. By thinking in terms of times microwave, you learn to calibrate heat, moisture loss, and edge doneness to fit your kitchen routine.
This section lays the foundation: you’ll discover how to interpret manufacturer guidelines, how to test times with safe, incremental steps, and how to translate a few simple factors—food density, volume, and container—into reliable reheating plans. The aim is to give you a repeatable method that reduces guesswork and improves results across breakfasts, lunches, and dinners.
How microwave power affects timing
Microwave ovens heat by delivering energy at a certain wattage. A higher wattage (commonly 800–1200W in consumer models) typically cooks faster, while lower wattage (around 600–700W) requires longer times. The same portion of food will therefore need different times depending on the oven’s wattage, the volume of food, and its moisture content. When you see recipe times, treat them as starting points and adjust them to your own appliance.
To build confidence, you can run a few controlled tests: heat a known quantity of water or a simple test item, then measure how long it takes to reach a target temperature. This helps you translate a wattage difference into a practical time adjustment. In practical terms, if your microwave runs about 20% slower, you’ll add a portion of that time to your baseline.
Building a baseline: a timing framework
A robust timing framework starts with a baseline time for a standard portion at a typical wattage, then adjusts for size, moisture, and container. Start with a neutral test item, such as 1 cup of water or a small portion of leftover vegetables, and record the time to reach a safe temperature. Use a thermometer to verify doneness and take note of texture changes. Once you have a baseline, you can scale it up or down for different meals, always referencing your oven’s wattage and the container’s lid or cover.
Create a simple table in your notebook or phone notes that lists: dish, portion, baseline time, oven wattage, and observed outcome. This turns vague memories into repeatable results you can reapply when you’re rushing.
– Why a container matters: covering speeds heating and prevents moisture loss. – Why moisture matters: drier foods heat unevenly; adding a splash of water or covering can improve uniform heating.
Testing and calibrating with leftovers
Testing leftovers is a practical way to calibrate times. Start with a known portion, reheat in short increments (for example, 30 seconds at a time), and probe the center with a thermometer or a fork. Record every trial: the time, the final temperature, and the perceived texture. If the center remains cool, add another increment and resume testing. Keep track of your results to build a personal timing profile for your refrigerator staples.
Always stir or rotate halfway through if your microwave does not have a turntable; residual heat can create uneven results. If you’re reheating rice or pasta, break up clumps before heating to promote even warmth. The goal is steady progress rather than one big jump that risks scorching edges or leaving cold centers.
Quick-reference cooking times by food category
Different foods require different timing strategies. For beverages like coffee, reheating 1 cup at 800–1000W usually takes 30–60 seconds, depending on initial temperature. For vegetables, a cup of mixed vegetables often needs 1–2 minutes with stirring. Proteins such as chicken strips may need 1.5–2.5 minutes, with heat distributed through the center. Grains and starches often reheat best with a splash of water and a quick stir midway.
Remember: these ranges are starting points. Your exact times depend on wattage, container, and moisture. When in doubt, test in small steps and log outcomes. A small notebook keeps you from confusing today’s results with yesterday’s.
Step-by-step method to adjust times for wattage
- Identify your microwave’s wattage and note it in your timing log. 2) Start with the baseline time that matches your wattage category. 3) Adjust upward by 10–20% for every 100W less than the baseline, and downward for more power. 4) Test in short intervals (30–60 seconds) and check for even heating. 5) If edges heat faster than the center, pause to stir and rotate. 6) Confirm doneness with a thermometer if reheating proteins, then log the final time.
By following this method, you’ll develop a precise, repeatable method for a wide range of foods.
Safety and best practices while timing
Safety should guide every timing decision. Always heat foods to a safe internal temperature before serving. Do not run microwaves empty for testing; it can damage the magnetron. Use microwave-safe containers with vented lids to allow steam to escape. Covering food helps retain moisture and heat more evenly, but leave a small vent to prevent splatters. Allow hot dishes to stand for a minute or two after heating to allow the heat to distribute.
Common pitfalls and how to avoid them
Overreliance on a single timer without testing can ruin texture. Skip stirring halfway through heating and you’ll get uneven heating. Using glass or ceramic containers without venting can trap steam and cause uneven cooks. Always verify a few test results across different days to ensure consistency. If in doubt, start with a smaller increment and test again rather than overshooting the time.
Advanced tips: using moisture, containers, venting
Moisture retention improves even heating. Sprinkle a tiny amount of water on dry foods or cover with a damp paper towel to keep moisture in. Vent all lids slightly or use vented microwave covers to manage steam. The container should be microwave-safe and free of metal. If you notice sizzling sounds or arcing, stop and inspect the food and container for safety issues.
Putting it all together: a sample 3-day plan
Day 1: Reheat 1 cup of leftovers at 800W for 60 seconds, stir, then reheat another 30 seconds. Day 2: Reheat a larger portion (2 cups) at 800W for 90 seconds, check center temperature, rotate, and reheat 60 seconds more if needed. Day 3: Test a protein by reheating a small portion for 1.5 minutes, check internal temperature, then adjust for future meals. Maintain a log and update your baselines as you gain experience.
Tools & Materials
- Microwave oven with timer(Know your oven's wattage rating; typical models range 600–1200W)
- Food thermometer(Verify safe internal temperatures (e.g., 165°F for poultry))
- Notebook or timer app(Record baselines, tests, and outcomes)
- Measuring cup and spoons(Helpful for portioning and moisture checks)
- Microwave-safe containers with vented lids(Avoid metal; vent lids slightly to let steam escape)
Steps
Estimated time: 45-75 minutes
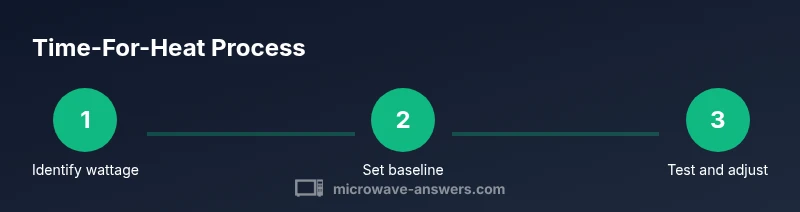
- 1
Identify wattage and baseline
Check your microwave’s wattage label or manual. Note this value and start from a manufacturer baseline time for a standard portion. Record both values in your timing log.
Tip: If you can’t find wattage, contact the manufacturer or test with a simple water-heating trial. - 2
Test with a simple baseline
Heat a neutral item (e.g., 1 cup water) using the baseline time. Measure the final temperature or temperature rise in the water to gauge heating rate.
Tip: Use increments of 30–60 seconds for safety and accuracy. - 3
Adjust for portion size
Scale time up or down based on portion size. Larger portions need longer times, smaller portions need less. Maintain a log of adjustments.
Tip: If in doubt, start with +10 seconds per extra cup. - 4
Stir, rotate, and re-check
For best results, stir or rotate halfway through heating to promote even heating. Recheck center temperature after the final minute.
Tip: Rotation helps prevent cold spots in dense foods. - 5
Verify safety for foods with protein
Reheat proteins to safe internal temperatures and allow standing time for heat to distribute. Check temperature again before serving.
Tip: Use a thermometer instead of relying on time alone. - 6
Document your results
Record each test’s times, wattage, container, and outcome. Build a reliable personal timing profile you can reuse.
Tip: A simple table makes future reheats faster and more accurate.
Common Questions
How do I know my microwave’s wattage?
Most microwaves show wattage on a label inside the door frame or in the manual. If you can’t locate it, check the model number online or contact customer support. Knowing wattage helps tailor heating times to your appliance.
Look for the wattage on the label or in the manual. If you can’t find it, search the model number online to confirm the wattage.
Should I follow recipe times exactly?
Recipes provide starting points, but your appliance and portion size can differ. Use them as a baseline, then test in small increments and adjust until you achieve even heating and safe temperatures.
Treat recipe times as starting points, then test and adjust for your microwave and portions.
Is it okay to reheat in a plastic container?
Only use microwave-safe plastics. Avoid old or scratched containers that may leach chemicals. If in doubt, transfer to glass, ceramic, or approved BPA-free containers.
Use microwave-safe containers and avoid questionable plastics; glass or ceramic is a safer choice.
What if the food heats unevenly?
Stir and rotate food halfway through heating. Let it stand briefly after heating to distribute heat evenly and check for hot spots before serving.
Stir, rotate, and let it rest a moment to even out the heat.
Can I test times without food?
Testing without food can save energy but provides limited data about real heating. Use water as a neutral test medium and avoid running the oven empty for safety reasons.
Testing with water is okay, but avoid running the microwave empty.
How can I build a reliable timing routine?
Start with a baseline, test using increments, and log results. Over time, you’ll develop repeatable timings for common foods and portions.
Begin with a baseline, test incrementally, and log results to build a routine.
Watch Video
Main Points
- Identify your microwave wattage to adjust times accurately
- Test and log results to build a reliable timing routine
- Choose containers and covers to optimize heat distribution
- Verify safety with a thermometer before serving