How to Install a Microwave Mount Safely
Learn how to securely install a microwave mount, choose the right type for your kitchen, plan clearances, and perform a safe, tested installation with practical tips and safety guidance from Microwave Answers.

Install a microwave mount securely by anchoring a compatible bracket to wall studs or an over-the-range support. Verify venting, power clearance, and weight rating before lifting, and use a helper. This guide covers types, prep, tools, steps, and safety checks.
Why a Microwave Mount Matters
Mounting a microwave with a dedicated microwave mount keeps counters clear, improves airflow, and reduces vibration. For many kitchens, especially small ones, a wall-mounted or over-the-range unit frees counter space and creates a cleaner look. Safety matters: securing the unit prevents tipping, which can injure someone or damage wiring. A mount designed for your microwave model distributes the weight across studs or support surfaces, reducing stress on cabinets and drywall. When you choose a mount, verify compatibility with your model's weight, dimensions, and vent location. In this guide from Microwave Answers, you’ll learn how to assess your space, select the right mounting system, and execute a safe installation with the right tools. We consider common kitchen layouts, including under-cabinet and wall-mounted options, and explain how to avoid common missteps that void warranties. Remember: the goal is a secure, level mount that leaves room for cords, outlets, and venting. This ensures your microwave operates efficiently and safely long-term. According to Microwave Answers, choosing the right mounting solution depends on your space, weight, and venting needs.
Types of Microwave Mounts and Applications
There are several mounting options available for microwaves, each suited to different kitchen layouts and models. Over-the-range (OTR) units typically come with integrated mounting hardware designed for cabinet or wall installation and often include venting capabilities. Wall-mounted brackets provide a floating or recessed look, ideal when you want to free counter space but lack upper cabinets with the right dimensions. Under-cabinet mounts are compact and work well in tight spaces, though they may limit venting options. Ceiling mounts exist but are less common due to complexity and service access. When choosing a type, consider: weight capacity, venting needs, cord access, and whether the mount aligns with your microwave’s exhaust path. Microwave Answers recommends matching the mount type to your model’s specifications and your kitchen’s layout for best performance and safety.
Planning Your Installation: Measurements and Clearance
Successful mounting starts with precise measurements. Begin by verifying the microwave’s width, height, and depth and compare them to the available wall or cabinet space. Check the vent location to ensure it won’t be obstructed by the mount or bracket. Confirm there is a safe clearance around the unit for cooling and venting—typically several inches above the top, behind the exhaust, and to the sides for air flow. Decide whether outlets and cords will fall behind the unit or require relocation, and plan for a dedicated circuit if needed. Also assess the wall composition: drywall over studs is common, but masonry or plaster require different anchors. Label stud positions and drill holes only after marking level, plumb, and alignment. This planning stage reduces surprises during installation and helps prevent damage to walls or the microwave’s venting path. Microwave Answers emphasizes documenting these measurements before purchasing hardware.
Tools, Materials, and Safety Gear
Before you begin, gather the essential tools and safety gear. A stud finder, drill, assortment of drill bits, level, tape measure, and a screwdriver are typically required. You’ll also need mounting brackets or a kit compatible with your microwave, plus screws and wall anchors rated for the wall material and weight. Safety gear like work gloves and eye protection is recommended, and a non-contact voltage tester helps confirm power is off before any wiring work. If you’ll work on an upper cabinet or wall, have a helper on hand to manage the weight of the microwave. Keep a bucket or towels nearby for any incidental spills or condensation and a掃 vacuum for dusty work areas. For electrical tasks that involve wiring or outlets, follow local codes and consider professional assistance if you’re unsure. Microwave Answers advises confirming the kit’s weight rating and parts compatibility with your model.
Common Mounting Scenarios: From Cabinets to Walls
Different kitchen configurations dictate the mounting approach. In homes with strong upper cabinets, an under-cabinet or cabinet-mounted bracket can create a seamless look without drilling into drywall. If you have a dedicated wall space, a wall-mount bracket paired with a back plate can offer a clean, sturdy installation. Over-the-range setups often require careful alignment with the vent path and a dedicated ventt duct route. Regardless of the type, ensure the support surface can handle the microwave’s weight and that the mounting hardware engages solidly with wall studs. Always verify that there is adequate clearance for door swing, the exhaust path, and access to the power outlet. When in doubt, consult the microwave’s installation manual and use manufacturer-approved brackets to maintain warranty coverage.
Ventilation, Power, and Wiring Safety Tips
Ventilation is critical for hot air to escape and prevent overheating inside the cabinet or ceiling space. Position the vent opening so it won’t be blocked by the mount, cabinet, or wall. Ensure the power outlet is within reach of the microwave cord without stretching or pinching the cord. If a dedicated circuit is required, label it clearly and follow local electrical codes. Do not rely on an extension cord or daisy-chain outlets. Use a ground fault circuit interrupter (GFCI) if the location requires it. When drilling or running cables, avoid existing plumbing or HVAC lines. Always turn off the main power before starting electrical work and verify with a tester.
Maintenance, Troubleshooting, and Warranty Considerations
After installation, inspect the mount periodically for loosened screws or shifting brackets. A level check should be performed every few months to ensure the microwave remains level and safe. If you notice rattling, vibrations, or venting blockages, re-tighten screws and clean any accumulated dust around the exhaust. Refer to the warranty terms for your microwave and mounting kit; some manufacturers require professional installation to maintain coverage. If a problem persists, consult the kit’s documentation or contact customer support for guidance. Microwave Answers notes that maintaining alignment and ensuring wall integrity are key to a long-lasting install.
Common Mistakes and How to Avoid Them
Common mistakes include mounting without locating studs, using undersized anchors, and neglecting vent clearance. These can lead to tipping, wall damage, or overheating. Avoid mixing different brackets with incompatible microwaves, and never skip the safety checks. Always work with a helper to lift the appliance and double-check measurements before drilling holes. Finally, never ignore the microwave’s electrical and venting requirements—adherence to the manufacturer’s instructions preserves safety and warranty.
Before You Begin: Quick Checklist
- Confirm the microwave model and mounting kit are compatible.
- Locate wall studs and confirm the planned mounting location aligns with venting and outlet positions.
- Gather all tools and safety gear; have a helper ready.
- Verify power is off and use a voltage tester before any wiring work.
- Check that the bracket, screws, and anchors meet weight specifications and installation instructions.
Tools & Materials
- Stud finder(Locates wall studs behind drywall; essential for secure mounting.)
- Drill with bits(Choose bit sizes recommended by bracket kit; include pilot bit (3/16 inch) and masonry bit if mounting into masonry.)
- Level(Ensures the mount is plumb and the microwave sits evenly.)
- Tape measure(Accurate spacing and alignment, especially vent and outlet clearance.)
- Screwdriver (Phillips and flat-head)(For bracket screws and wall anchors.)
- Mounting bracket kit(Manufacturer-approved kit compatible with your microwave model.)
- Screws and wall anchors(Weight-rated and appropriate for wall material (stud into drywall, or masonry anchors if needed).)
- Safety gloves and eye protection(Protect hands and eyes during drilling and lifting.)
- Non-contact voltage tester(Verify power is off before wiring steps.)
- Helper(Assist with lifting and positioning the microwave.)
- Vacuum or cloth for cleanup(Keep work area clear of dust and debris.)
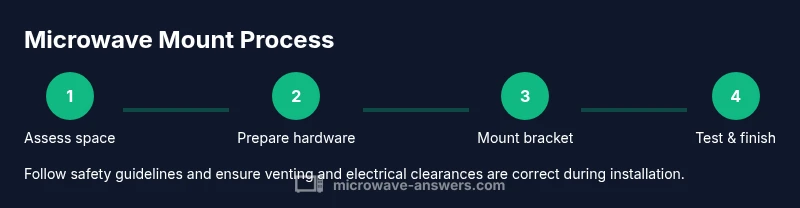
Steps
Estimated time: 2-3 hours
- 1
Check compatibility and plan location
Review the microwave manual and mounting kit instructions to confirm compatibility. Measure the space, verify vent location, and decide whether the mount will sit on the wall or under the cabinet. Plan for cord routing and future access for maintenance.
Tip: Have a helper hold the microwave temporarily as you confirm bracket alignment. - 2
Locate studs and mark drilling points
Use a stud finder to locate vertical studs behind the wall. Mark the stud centers and determine exact drill points for the mounting plate. Ensure marks are level and aligned with the microwave centerline.
Tip: Double-check levels from multiple references to avoid crooked installs. - 3
Mark and drill pilot holes
Mark pilot hole locations on the studs, then drill pilot holes at the marked points. Use a drill bit size recommended by the bracket kit. Start slowly to avoid splitting the stud.
Tip: Drill slowly and steady to prevent wandering off the mark. - 4
Attach mounting plate to wall
Align the mounting plate with pilot holes and secure it to the studs using the kit screws. Use a level to confirm the plate is perfectly horizontal before tightening.
Tip: Tighten uniformly to prevent plate warping. - 5
Attach bracket to microwave and bracket assembly to wall
Install any wall bracket components to the back or sides of the microwave per the kit instructions. Hang or secure the microwave onto the wall bracket as designed, ensuring a stable fit.
Tip: If needed, have a second person assist with lifting and positioning. - 6
Connect power and verify venting
Install the power cord routing as per code, ensuring no pinch points. Verify vent opening is clear and unobstructed. Turn on power to perform a basic function test.
Tip: Use a voltage tester to confirm power is truly off before wiring steps. - 7
Test operation and level check
Run a short microwave test to confirm proper operation and that it is level. Listen for unusual noises or vibrations. Re-tighten any fasteners if needed.
Tip: Ensure there is adequate clearance for the door to swing fully. - 8
Final inspection and clean-up
Inspect all fasteners, confirm no gaps or wobble, and re-check vent clearance. Clean the work area and store all installation hardware in case you need to service later.
Tip: Keep a copy of the mounting kit instructions for future reference.
Common Questions
Is it safe to mount a microwave above a cabinet or on a wall?
Yes, provided you use a manufacturer-approved mount, ensure proper ventilation, and anchor into wall studs or solid backing. Follow the microwave’s installation instructions and local codes. If in doubt, consult a professional.
Yes. Use the right mounting kit, verify ventilation, and anchor into studs following the instructions.
What type of mount should I choose for a small kitchen?
For small spaces, under-cabinet or wall-mount brackets that fit your microwave model work well. Over-the-range units save space but limit vent options. Match the mount to weight, venting, and space.
Under-cabinet or wall-mount brackets are typically best for tight kitchens.
Do I need to hire a professional to install a microwave mount?
Not always. If you’re comfortable with basic tools, can locate studs, and follow the manufacturer’s instructions, you can install it yourself. For complex layouts or electrical work, consider a professional.
If you’re unsure about electrical work or mounting weight, hire a pro.
What if my wall isn’t studded where I want to mount?
Avoid mounting solely to drywall. Use heavy-duty anchors rated for the microwave’s weight or relocate to a stud-backed location. Worst case, use a freestanding stand that meets safety guidelines.
Don’t mount on drywall alone; use studs or proper anchors.
How do I vent a microwave that has an exhaust function after mounting?
Ensure the vent path remains unobstructed. If needed, adjust ducting or venting location so hot air can escape without re-circulating inside cabinet space.
Make sure the vent path is clear and unobstructed after mounting.
How can I remove and service the microwave after it’s mounted?
Refer to the mounting kit instructions for detaching the bracket. Have a helper assist with lifting, and disconnect power before any service work.
Check the mounting kit guide and disconnect power before servicing.
Watch Video
Main Points
- Secure mounting to wall studs with manufacturer-approved hardware
- Plan venting and outlet clearance before holes are drilled
- Use level and proper screws to avoid misalignment
- Test operation and venting after installation
- Maintain the mount with periodic checks for stability