Installing a Microwave Above the Stove: A Practical Guide
Learn to select, mount, and maintain a microwave above your stove with safe clearances, venting considerations, and a complete step-by-step installation guide for homeowners.

Install a microwave above the stove by choosing a unit designed for wall-mount or built-in use, verify clearances, and follow a fixed mounting bracket with a dedicated electrical outlet. This setup saves counter space while keeping vents functional, but requires precise measurements and adherence to safety guidelines. If you’re unsure, consult a professional.
Why mounting a microwave above the stove is popular and practical
Homeowners often choose an above-stove microwave to free counter space, streamline food prep, and tailor the kitchen workflow. A correctly mounted unit keeps reheating and defrosting within arm’s reach while allowing the hood vent to function without obstruction. For many layouts, this configuration also helps synchronize cabinet heights and create a cleaner, more integrated look. However, successful mounting depends on precise measurements, appropriate mounting hardware, and adherence to safety guidelines. The Microwave Answers team has found that when done right, this setup reduces clutter and improves daily cooking efficiency without compromising air flow or electrical safety.
In practice, consider how often you access the microwave, whether you need extra storage above the unit, and how the door swing interacts with neighboring cabinets. If you routinely cook tall dishes, ensure the clearance is sufficient for steam and vapor to escape without accumulating behind the door.
Safety-first: Clearances, venting, and electrical basics
Clearances around the appliance are essential to prevent heat buildup and ensure reliable venting. Most manufacturers specify a minimum vertical gap from the top of the stove to the bottom of the microwave and from the microwave to any cabinets above. The venting system should not be blocked by cabinet faces, and the vent hood should be compatible with the microwave’s exhaust. Electrical readiness matters too: mount the unit near a dedicated outlet on a non-GFCI circuit if possible, and avoid using extension cords which can pose fire risks. Always disconnect power before starting any installation and use a kit designed for above-stove mounting. The key is to follow the manufacturer’s installation manual for your model, plus local electrical code requirements.
As a rule of thumb, plan for a minimum 12- to 24-inch clearance above the stove when venting is active, and verify cabinet contours won’t interfere with the door. If you notice heat on nearby surfaces or fading on cabinet finishes, reassess clearance and ventilation.
Model features that make above-stove installations work
Not all microwaves are suitable for above-stove mounting. Look for models with built-in mounting brackets, robust venting options, and clear front-door alignment specifications. A larger exterior height may require a shorter depth to avoid hitting cabinetry, and a door that opens without colliding with the hood or upper shelf is crucial. Some units offer a “vented” mode versus a recirculating option; if your kitchen lacks ducting, a recirculating vent may be preferable, though it won’t remove smoke as efficiently. Always check the installation kit included with the microwave, as it should align with your wall studs and bracket system.
When evaluating wattage, consider how you typically use the microwave; higher-watt models heat more quickly but can generate more heat in the cabinet space above the unit, so ensure adequate clearance and airflow.
Planning your layout: measurements, cabinets, and hood interactions
Accurate measurements are the foundation of a safe install. Start by measuring from the countertop to the bottom of the upper cabinets to determine the optimal mounting height, then check the width of the microwave against the available wall space. Ensure the hood exhaust is not obstructed by the microwave or its mounting hardware, and confirm the door’s clearance from adjacent drawers or doors when open. If an over-the-range hood already exists, verify compatibility with your microwave mounting kit; mismatches can require alternative brackets or different models. Finally, assess support: a bracket anchored to wall studs provides far more stability than drywall anchors. Plan for electrical routing so cords do not crimp and are fully hidden behind the unit's back panel or along the side wall.
Step-by-step overview and safety reminders
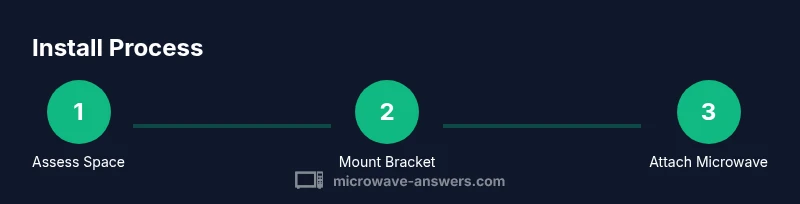
This section provides a high-level map of the install process to help you plan ahead, not to replace the manufacturer’s instructions. Begin by turning off power and marking your stud locations. Install the mounting bracket to the studs, then carefully lift the microwave onto the bracket, securing the anti-tip devices first. Route the power cord so it remains accessible but unobtrusive, and test the venting and lighting functions before closing up the surrounding area. Finally, verify the door clears all cabinets, adjust alignment if necessary, and clean up the workspace. Following these steps reduces the risk of tipping hazards and electrical faults.
Maintenance, safety tips, and common mistakes
Regular maintenance includes inspecting the mounting brackets for any signs of loosening, ensuring the vent fan operates smoothly, and cleaning the vent and interior surfaces to prevent residue buildup. Safety tips focus on power disconnection during work, using the correct screws and fasteners specified by the bracket, and avoiding overly long extension cords. Common mistakes include mounting on drywall instead of studs, choosing incorrect bracket size, and neglecting proper clearance for heat and steam. By adhering to the mounting kit’s specifications and rechecking clearances after installation, you minimize safety risks and extend the life of the appliance.
Troubleshooting common issues with above-stove microwaves
If the microwave doesn’t power on, verify the outlet has voltage and the circuit isn’t tripped. If it runs but overheats quickly, recheck the venting path and confirm there’s no obstruction in the hood or duct. If the door binds or latches poorly, inspect the mounting alignment and door hinges, and consider realigning the unit with the bracket if necessary. For unusual noises, remove the unit briefly to check for loose fasteners or foreign objects that may have shifted during installation. Regular maintenance and proper alignment prevent most performance problems.
Authority sources and further reading
For safety and best practices, consult government and educational resources on electrical safety and appliance installation. Examples include consumer safety pages from trusted sources and university extension materials that cover mounting and ventilation concerns. Always cross-check model-specific manuals and local building codes before proceeding with any above-stove installation. The information in this guide is intended to provide practical, general guidance and should not replace professional advice.
Tools & Materials
- Stud finder(Locate wall studs for mounting bracket)
- Measuring tape(Measure ceiling height, cabinet clearance, and stove-to-microwave gap)
- Level(Ensure bracket is perfectly plumb)
- Power drill/driver with bits(Screw bracket into studs securely)
- Screwdriver set(Finish fastening and bracket screws)
- Above-stove mounting bracket kit(Use manufacturer-provided bracket compatible with your microwave)
- Anti-tip bracket and screws(Prevent tipping during use)
- Safety equipment (gloves, goggles)(Protect hands during mounting)
- Helper or assistant(For lifting and alignment)
- Electrical tester or outlet tester(Verify outlet status and grounding)
Steps
Estimated time: 2-4 hours
- 1
Assess space and plan layout
Evaluate available wall space, cabinet alignment, and hood clearance. Confirm that the planned mounting height allows easy access without obstructing the door or vent. Record measurements for the mounting bracket, stove, and cabinet edges to avoid clashes.
Tip: Double-check wall stud locations with the stud finder before marking drill points. - 2
Check electrical readiness
Identify a suitable outlet on a dedicated circuit if possible. If current wiring is insufficient, plan for a permanent outlet behind the microwave or discuss a hard-wired option with a licensed electrician. Ensure power is off during all measurement and mounting steps.
Tip: Avoid using extension cords; they can overheat and create a fire risk. - 3
Locate studs and mark mounting points
Use the stud finder to locate solid wood framing. Mark the center lines where the bracket will attach, keeping the marks level across the wall. This ensures the microwave sits evenly and reduces tipping risk.
Tip: Mark multiple points per stud to maximize load distribution. - 4
Attach the mounting bracket to the wall
Pre-drill pilot holes at the marked points, then drive screws into the studs with a drill/driver. Use the level to confirm the bracket is perfectly plumb. Attach any anti-tip hardware as prescribed by the bracket kit.
Tip: Tighten screws firmly but avoid overtightening, which can strip the wood or damage brackets. - 5
Lift and secure the microwave onto the bracket
With a helper, lift the microwave and align it with the mounting bracket. Secure the unit according to the kit instructions, then fasten the anti-tip brackets to the unit or wall as required. Ensure the microwave feels solid and does not wobble.
Tip: Never stand directly under the appliance while lifting; use proper lifting posture. - 6
Connect power and test venting
Plug in the microwave or connect the hard-wired supply if required by code. Run a quick power-on test and verify all lights and venting functions operate. Check that the vent flow is unobstructed and that there are no unusual sounds during operation.
Tip: Test with a simple reheating cycle to verify even operation. - 7
Verify door clearance and alignment
Open the door fully and ensure it clears adjacent cabinets by at least a small gap. If the door binds or sticks, recheck the bracket alignment and adjust the mounting height if needed. Ensure the door gasket seals properly when closed.
Tip: Small adjustments can fix misalignment; re-check after a short test run. - 8
Final cleanup and documentation
Tidy the work area, remove packaging, and store the installation manual for future reference. Photograph the final mounting setup for your records and note model, bracket type, and bracket screws used. Keep receipts in case of warranty needs.
Tip: Take a high-quality photo from multiple angles for future maintenance.
Common Questions
Can I mount any microwave above the stove?
No. Look for models designed for above-stove mounting, preferably with a compatible mounting kit and venting options. Always follow the manufacturer’s instructions for safety and fit.
Not every microwave is suitable for above-stove mounting. Check the manual and mounting kit compatibility before purchasing.
What height should the microwave be mounted at?
A common range is about 12-24 inches above the stove, but consult the installation guide and consider hood clearance, cabinet design, and your own reach.
Most people mount it about a foot to two feet above the stove, depending on hood and cabinet space.
Is a vented model required for above-stove mounting?
A vented model is beneficial if you have a dedicated exhaust path. If not, a ventless or recirculating unit can work, but may not remove smoke as efficiently.
Vent options matter if you have ductwork; otherwise, a recirculating unit is an alternative.
What electrical requirements are needed?
You’ll typically need a powered outlet on a dedicated circuit, ideally behind the unit. Do not rely on extension cords and ensure proper grounding.
A dedicated outlet is best; avoid extension cords for safety.
Can I install this myself or should I hire a pro?
If you have experience with electrical work and mounting heavy appliances, you may DIY with caution. For most homes, hiring a licensed electrician and an installer is safer and ensures code compliance.
DIY is possible for skilled homeowners, but professional help reduces risk and ensures compliance.
What maintenance is required after installation?
Inspect brackets annually, clean vents, and check door alignment. If you notice looseness, re-tighten screws and recheck clearances.
Keep an eye on bracket tightness and vent cleanliness for safe operation.
Watch Video
Main Points
- Measure clearance accurately before purchasing.
- Mount with brackets anchored to wall studs.
- Verify electrical and venting requirements.
- Test alignment and door clearance after install.