LG Microwave Over the Range: Install, Use, and Safety
Learn how to safely install and operate an LG microwave over the range. This practical guide covers mounting, venting, electrical needs, and maintenance for busy home kitchens.

This guide shows you how to install, operate, and maintain an LG microwave over the range safely. You’ll learn mounting considerations, venting options, electrical requirements, and troubleshooting steps to keep it performing well in a busy kitchen. The instructions apply to typical 30-inch LG models and configurations common in modern homes.
Understanding LG Microwave Over the Range: Design and Benefits
LG microwave over the range units are designed to save counter space and provide convenient ventilation for the cooktop. They combine microwave heating with ventilation functions that remove steam and cooking odors, which can simplify kitchen workflows. Common features include sensor cook programs, automatic defrost, and easy-clean interiors, plus venting configurations that can be vented to the outside or recirculated back into the kitchen. When selecting a model, consider cabinet depth compatibility, mounting height relative to the cooktop, and available ducting paths. The goal is a flush, stable install that aligns with your cooktop and doesn’t obstruct cabinet doors or drawers. This combination of cooking and ventilation helps keep your kitchen comfortable during busy meal prep and cleanup.
Planning Your Installation: Measurements, Venting, and Clearances
Successful installation starts with careful planning. Begin by measuring the existing cabinet opening to confirm a 30-inch width and the height needed for a comfortable, level mounting position. Check the recommended venting path and decide between external venting or recirculating options, accounting for any existing ductwork. Assess nearby outlets and wiring—LG models typically require a grounded electrical connection in a reachable location. Finally, read the installation manual for your specific model to verify any model-specific clearances and bracket requirements, ensuring the unit will align with the stove and won’t interfere with cabinet doors.
Mounting and Electrical Requirements: Safety-first steps
Safety is the priority in every install. Before you touch a tool, disconnect the circuit to the installation area, then locate studs for secure mounting. Install the mounting bracket or hanger rail according to the LG manual, making sure it is level and securely anchored. Connect the electrical supply through a grounded outlet or dedicated circuit as specified by the model’s requirements, and verify the power source is readily accessible after installation. Finally, prepare the vent pathway, attaching ductwork in a straight line with minimal bends to optimize airflow and minimize back-pressure on the fan.
Operating Tips and Common Use Cases
Once installed, operate the LG microwave over the range with attention to airflow and door clearance. Use sensor-based cook programs for common foods to improve energy efficiency, and allow the fan to run for a few minutes after heavy steaming to clear residual moisture. If you frequently cook foods that generate strong odors or steam, ensure the vent function is dedicated and unobstructed. Regularly check for unusual noises, vibrations, or door misalignment, and consult the manual for model-specific care instructions. With proper usage, the unit can become a reliable centerpiece for quick meals, reheating, and snack prep.
Maintenance, Cleaning, and Troubleshooting
Maintenance is simple but essential. Regularly wipe the interior after use to prevent residue buildup and inspect the vent grilles for obstructions. Clean the exterior with a soft cloth and mild detergent, avoiding harsh abrasives that can harm finishes. For troubleshooting, note common signs such as odd smells, failure to heat, or poor venting; consult the LG manual first and document any observed symptoms before calling support. If you detect electrical smells, sparks, or overheating, discontinue use immediately and seek professional assistance. A routine maintenance check every few months can extend the life of your LG microwave over the range and keep it performing like new.
Tools & Materials
- Measuring tape(To verify cabinet opening, clearance, and alignment with the cooktop)
- Stud finder(Locate wall studs for secure mounting brackets)
- Level(Ensure the mount and unit are perfectly horizontal)
- Phillips head screwdriver(Screws and bracket mounting)
- Flathead screwdriver(Optional for certain bracket screws)
- Electrical tester or outlet tester(Confirm circuit grounding if you’re unsure)
- Duct tape and utility knife(Seal and trim vent ducts if ducted venting is used)
- Safety gear (gloves, goggles)(Protect hands and eyes during installation)
Steps
Estimated time: 60-90 minutes
- 1
Verify compatibility and prepare workspace
Confirm the cabinet opening matches a 30-inch width and that there is adequate space above the cooktop for venting. Clear the area and remove any obstacles. Gather your tools and read the model’s manual to identify bracket types and electrical needs before touching hardware.
Tip: Double-check the wall surface to ensure a solid mounting base before drilling or fastening brackets. - 2
Power down and unpack safely
Turn off the circuit to the installation area and remove packaging from the microwave. Inspect the unit for any shipping damage and verify you have all required mounting plates and brackets. Keep the model’s installation sheet handy for reference during mounting.
Tip: Leave the appliance on a soft surface to avoid scratches during handling. - 3
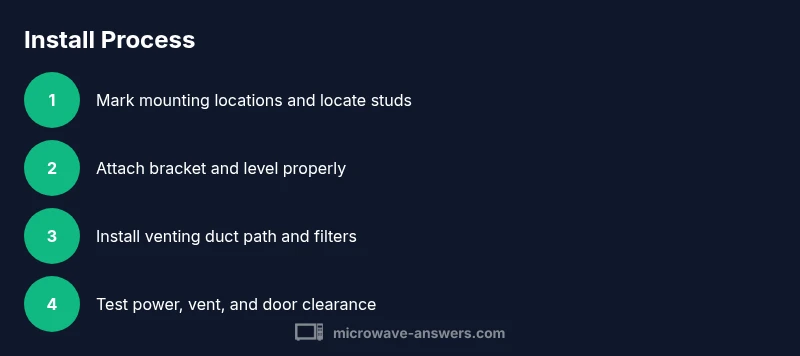
Mark mounting locations and locate studs
Use the stud finder to locate wall studs behind the cabinet. Mark where brackets will anchor to ensure a secure mount. Use a level to confirm horizontal alignment as you mark, so the unit sits flush once installed.
Tip: If studs aren’t in the ideal location, use a toggle anchor kit rated for appliance mounting. - 4
Attach mounting bracket or rail
Secure the mounting bracket or rail to the wall or cabinet structure per the LG manual. Ensure the bracket is level and firmly anchored before placing the microwave on it. Confirm there is no movement when you gently apply pressure.
Tip: Run a quick check with a level after fastening to prevent skewed installation. - 5
Mount the microwave to the bracket
With assistance, lift the microwave and seat it onto the mounting bracket. Align the unit with the cabinet edges and verify door clearance as you secure it with screws. Tighten all fasteners to specification without over-tightening.
Tip: Have a second person help to avoid injury and damage during mounting. - 6
Install venting duct or vent kit
Attach ductwork according to your model’s venting configuration. If external venting is used, direct the duct toward the outside with minimal bends. For recirculating venting, install the charcoal filter as recommended and ensure the path is unobstructed.
Tip: Keep duct runs as straight as possible to optimize airflow and reduce noise. - 7
Connect electrical supply
Plug the microwave into a grounded outlet or connect to a dedicated circuit if required by your model. Ensure cords are routed safely and away from heat sources. Restore power and prepare to test the unit.
Tip: If you’re unsure about electrical work, hire a licensed electrician. - 8
Test fit and door clearance
Open and close the door to test clearance and ensure no binding against cabinets. Check that controls are accessible and the display is readable without obstruction. Make final adjustments if necessary.
Tip: Make sure the door has a full range of motion without hitting surrounding surfaces. - 9
Run a basic functional test
Power the unit and run a short test cycle at a low setting to check heating, ventilation, and fan operation. Listen for unusual noises and observe vent airflow. If anything seems off, power down and recheck connections.
Tip: Never operate the unit with loose screws or unusual sounds. - 10
Review safety and provide user orientation
Explain basic operation, safety reminders, and venting options to household members. Leave the installation guide accessible for future reference and note model-specific maintenance tasks.
Tip: Provide a quick safety checklist to all users for ongoing use.
Common Questions
Do LG microwaves over the range require venting to the outside?
Most LG over-the-range models offer venting options, including external vent and recirculating configurations. Check your model’s manual to confirm the venting type and required duct size. If you choose external venting, ensure a proper path to the exterior.
If your model supports external venting, follow the manual to route ductwork to the outdoors, otherwise use the recirculating option.
Will an LG over-the-range microwave fit in a standard 30-inch opening?
Many LG over-the-range microwaves are designed to fit standard 30-inch openings. Always verify the exact width of your unit against the cabinet opening and check for clearance around the cooktop. Model-specific dimensions are in the manual.
Most LG models fit standard 30-inch spaces, but always double-check the exact width in the product specs.
What electrical requirements should I plan for?
LG over-the-range microwaves generally require a grounded electrical outlet on a dedicated circuit, as specified by the model. Do not run on a shared dimmer or incompatible circuit. If you’re unsure, have a licensed electrician confirm the setup.
Make sure you have a grounded outlet on a suitable circuit before wiring the unit.
How do I clean and maintain an LG over-the-range microwave?
Regular cleaning with mild soap and water is recommended. Wipe the interior after use and inspect vents and filters for blockages. Avoid harsh abrasives and consult the manual for care instructions for your specific model.
Clean with gentle cleaners and keep vents clear for best performance.
Is DIY installation safe, or should I hire a pro?
Basic mounting and venting tasks can be done by a confident DIYer, following the manual. Major electrical work or complex vent routing is safer when handled by a licensed professional.
If you’re unsure about electrical or venting work, hire a pro for safety.
What should I do if the microwave sparks or the vent makes unusual noise?
Turn off power immediately and inspect for loose connections or obstructions. If the issue persists, stop using the unit and seek professional service. Sparks can indicate a serious electrical problem.
Turn it off and check connections; if it continues, contact a pro right away.
Watch Video
Main Points
- Measure precisely before mounting
- Mount securely and align vents for optimal airflow
- Follow electrical safety and grounding best practices
- Test operation and inspect for clearance regularly
- Refer to LG manual for model-specific steps