How to Fix a Microwave Handle: A Practical DIY Guide
Learn how to diagnose and fix a loose or broken microwave door handle with clear, safe steps. This guide covers parts, tools, safety, and maintenance to help you repair confidently.

You will learn how to diagnose a loose or damaged microwave door handle and perform a safe repair. This guide covers identifying wear, choosing between tightening screws, adhesive fixes, or replacement parts, and safety precautions to protect your appliance and yourself. It also explains how to test the handle after reassembly and when to replace the entire door handle assembly.
Understanding Common Issues with Microwave Handles
According to Microwave Answers, a common issue is a loose mounting screw or a worn mounting bracket, which can make the handle feel wobbly or detach slightly when you pull on it. In many cases, the root cause is simple wear or a misalignment that developed over time rather than an obvious break. Plastic housings can crack, metal screws can loosen, and the latch mechanism behind the handle may wear out from repeated use. By recognizing these common patterns, you’ll know whether a quick tightening, a small part swap, or a full replacement is required. This section lays the groundwork for a practical repair plan by explaining how the handle is mounted, what parts are typically involved, and how heat and repeated opening contribute to accelerated wear in microwave hardware.
If you notice the handle feels loose but remains firmly attached, you may only need to re-torque screws or replace a single worn component such as a screw collar or spacer. If there’s visible cracking or deformation of the handle itself, replacement is usually the safer option to maintain door seal integrity and child-safety standards. Microwave Answers recommends checking the entire mounting area for hidden wear rather than replacing the handle alone when the fasteners or brackets are damaged.
Safety Considerations Before You Begin
Before you touch any electrical appliance, unplug it and turn off any residual power at the circuit breaker if accessible. Use insulated tools and wear cut-resistant gloves to protect your hands from sharp edges inside the enclosure. Ensure the microwave is cool to touch; interior components can retain heat long after use. Keep your workspace clean and dry to avoid slipping or misplacing small screws. If you will be disassembling the outer housing, take photos as you go so you can reassemble correctly. Do not force any parts; plastic components can crack if stressed, and metal hardware can shear if overtightened. Finally, avoid using any penetrating oils or cleaners near electrical contacts,
This safety mindset helps prevent injury and damage to the microwave during inspection and repair.
Diagnosing the Problem: Loose Screws, Cracks, and Wear
Start by removing the outer cover to access the handle mounting points. Check for loose screws and stripped threads in the door frame. If screws turn easily or the holes appear worn, you’ll need to replace mounting hardware or the entire handle bracket. Inspect the handle itself for hairline cracks or warping; even small cracks can worsen with heat exposure. Look for bent or damaged hinges or latching components that might alter the alignment of the handle. If the latch does not engage smoothly or the door seams are uneven, the issue may involve the latch keeper or strike plate rather than the handle alone. When diagnosing, differentiate between cosmetic issues and structural failures so you don’t replace a part that still functions adequately.
Document any damaged parts and confirm compatibility with your microwave model before purchasing replacements.
Replacement Parts: When to Repair vs Replace
Decide between a targeted part swap and a full replacement by evaluating the extent of wear. If the handle itself is intact but the mounting hardware or bracket shows wear, you can often repair by replacing those components and re-tightening the screws. If the handle is cracked, deformed, or the mounting points are stripped beyond repair, replacement is safer and more durable. Ensure any replacement kit matches your microwave’s model and door type. When in doubt, consult the manufacturer’s parts list or a reputable repair guide to verify compatibility. If a non-original handle kit is significantly cheaper, weigh the potential impact on door seal integrity and warranty coverage before purchasing.
Choosing the correct replacement parts is critical to restore proper door alignment and safe operation.
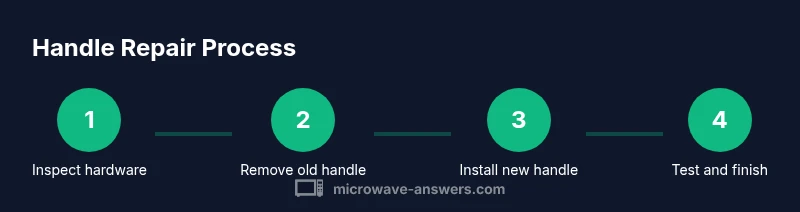
Step-by-Step Repair Workflow
This section provides a practical workflow for repairing a microwave handle. Begin by unplugging the unit, then remove the outer cover to access mounting hardware. Verify the handle’s attachment points and prepare the workspace by organizing screws and small components. If you’re replacing parts, attach the new handle or bracket per the manufacturer’s instructions, ensuring correct orientation. Reassemble the outer housing and check that the door closes firmly with a satisfying latch. Finally, recheck fit and operation using a light load test. Refer to the step-by-step guide below for precise actions and the rationale behind each move. Visual references can help you align screws and brackets correctly, reducing the risk of misalignment or cosmetic damage.
Tip: A torque driver can help apply even pressure, but use a low setting to avoid stripping plastic threads.
Reassembly: Screws, Springs, and Alignment
Reinstall the outer cover and verify that all screws return to their original positions. Tighten mounting screws gradually in a cross pattern to distribute pressure evenly and prevent warping. Confirm that the handle sits flush against the door and that the latch engages smoothly when the door is closed. If springs or small retaining clips were removed, reinsert them in their original orientation to avoid binding the latch mechanism. Wipe away fingerprints or residue from the mounting area before final closure to ensure a clean fit. This reassembly step is where many repairs fail if hardware isn’t replaced in the correct order or if parts are misaligned. Double-check the sequence and ensure no tools remain inside the cabinet when you reseal the unit.
Pro tip: Photograph each step after installation to facilitate future maintenance or potential warranty claims.
Testing the Handle After Repair
With the unit plugged back in, gently test the door handle by pulling and releasing multiple times to assess robustness. Confirm that the door seals properly and that the latch engages consistently without excessive force. If there’s any wobbling, re-open the housing and inspect the mounting points for looseness or misalignment. A successful test should show a firm handle with no play and a door that closes with a solid, consistent latch. If the latch feels sticky or inconsistent, re-check the strike plate alignment and ensure the gasket remains intact. Safety remains the priority; never run the microwave while the door is open or while you suspect a misalignment.
Record your test results and note any residual play for future maintenance.
Maintenance to Extend Handle Life
Perform periodic inspections to prevent future handle issues. Tighten screws at regular intervals, and replace any worn mounting brackets or grommets as soon as they show signs of wear. Keep the door area clean and dry to avoid corrosion or dirt buildup that can affect latch operation. Use a silicone-based gasket conditioner if your model recommends it to maintain seal integrity. Store spare screws and small parts in a labeled container to speed future repairs and reduce the risk of misplacing components. Regular maintenance reduces the likelihood of sudden handle failure and helps maintain safe operation of the appliance.
What If You Can't Fix It? Replacement Options
If the handle or mounting hardware is beyond simple repair, consider professional service or model-specific replacement parts. Replacement parts from the manufacturer ensure compatibility and preserve warranty terms where applicable. A licensed technician can assess whether the issue extends to the door frame, latch, or electrical interlocks, which may require additional servicing. In some cases, it may be more cost-effective to replace the microwave rather than pursue a complex repair, especially for older models. When shopping for a replacement, compare models with reinforced handles and robust door assemblies to minimize future maintenance needs.
Tools & Materials
- Screwdriver set (Phillips and flathead)(Precision tips; magnetic tip recommended)
- Replacement microwave door handle kit(Match model number; include screws and spacers)
- Safety gloves(Protect hands from sharp edges)
- Cloth or lint-free wipe(Clean surfaces before reassembly)
- Thread-locking adhesive (low-strength)(Optional for securing screws in metal-to-plastic joints)
- Magnetic tray or small containers(Keep screws organized)
- Torx/Hex wrench (model dependent)(Only if your model uses non-pin screws)
Steps
Estimated time: 60-90 minutes
- 1
Power down and gain access
Unplug the microwave and, if possible, switch off the circuit at the breaker. Remove the outer cover to expose the handle mounting area. This initial step ensures your safety and gives you a clear view of the screws and brackets you’ll work with.
Tip: Keep screws in a labeled container to avoid misplacement. - 2
Inspect mounting hardware
Examine screws, brackets, and any spacers for wear or damage. If threads are stripped or a bracket is bent, plan for part replacement rather than force-fitting a repair.
Tip: If a bracket is bent, replace it rather than attempting to bend it back into shape. - 3
Remove the old handle or hardware
Gently detach the handle assembly, keeping track of each screw and bracket. Photograph each stage to assist correct reassembly and to verify part orientation.
Tip: Use the magnetic tray to keep track of tiny screws. - 4
Install replacement parts
Position the new handle or bracket so holes align with the mounting points. Secure with screws using even pressure, avoiding overtightening to prevent plastic thread damage.
Tip: Lightly thread first, then snug securely with a screwdriver—do not over-tighten. - 5
Reassemble the cabinet
Reattach the outer cover once all fasteners are back in place. Ensure the door sits flush and that no parts are pinched during reassembly.
Tip: Double-check seal area for any gaps that could affect performance. - 6
Test for proper latch engagement
With the unit plugged in, close the door and operate the latch several times. Confirm the door latches securely and that the handle remains stable.
Tip: If the latch sticks, remove the cover again to inspect the strike plate alignment. - 7
Wait for any adhesive to cure (if used)
If you used any adhesive or sealant to secure components, allow the recommended cure time before heavy use. This ensures a solid bond and reduces risk of failure during regular operation.
Tip: Check the product label for exact cure times. - 8
Final safety and function check
Do a final safety check by ensuring there are no loose components and that the door seal is intact. Run a brief test cycle with no load to verify normal operation.
Tip: Document any changes and keep a note for future maintenance.
Common Questions
What causes a microwave handle to become loose?
A loose handle is usually caused by loose mounting screws, worn brackets, or a cracked handle. Inspect the attachment points and hardware first, then decide if a replacement is needed.
A loose handle usually comes from loose screws or worn parts. Check the screws and brackets before deciding on replacement.
Can I fix a cracked handle without replacement?
A cracked handle typically requires replacement, as adhesives may not withstand heat cycles. If the crack is minor, you may temporarily brace it, but replacement is the safer option.
A cracked handle usually needs replacement; adhesives don’t hold up to microwave heat.
Is it safe to repair a microwave handle while plugged in?
No. Always unplug the unit before starting any repair. Wait for any residual energy to dissipate and avoid handling live components.
Never repair a microwave while it’s plugged in. Unplug first and follow safety steps.
How do I know if the door needs replacement?
If the latch alignment is off, the door may not seal properly. Visible cracks in the handle or housing also indicate replacement is safer.
If the door doesn’t seal or latches poorly, you likely need a replacement.
Will repairing the handle void my warranty?
Warranty terms vary. Some repairs are allowed, but replacing critical parts may affect coverage. Check the manufacturer’s policy or contact support for guidance.
Warranty rules vary; check your policy before repairs.
What tools do I need to start?
A basic screwdriver set and the replacement handle kit are essential. Optional items can simplify the job, such as a torque driver and a magnetic tray.
You’ll need a screwdriver and replacement handle kit to begin.
Main Points
- Identify whether the issue is simple hardware wear or structural damage
- Use model-appropriate parts to ensure fit and safety
- Follow a step-by-step process to avoid misassembly
- Test door function thoroughly after repair
- Maintain the handle area to prevent future failures