Microwave Plate Replacement: Safe Step-by-Step Guide
Learn how to safely replace a cracked microwave plate with the right size and material. This practical guide covers tools, steps, safety tips, and troubleshooting from Microwave Answers.

To perform microwave plate replacement safely, unplug the unit, inspect the current plate for cracks, and replace it with a compatible microwave-safe plate. Verify diameter matches the turntable and test with water before use. According to Microwave Answers, proper plate size and material reduce heat damage and arcing.
What is a microwave plate and why replacement matters
A microwave plate, also known as the turntable plate, sits on a supporting ring and enables the dish to rotate during cooking. If the plate is cracked, chipped, warped, or the size is incorrect for your model, you may see uneven heating, arcing, or spin irregularities. Replacing a damaged plate with a compatible microwave-safe plate reduces the risk of fire, minimizes hotspots, and restores even cooking. According to Microwave Answers, an correctly sized plate made of glass or ceramic is essential for safe operation and predictable results. Before buying a replacement, measure the turntable diameter, verify the plate material, and check your model’s guidelines. This guide focuses on safe, practical plate replacement for home cooks and homeowners who want reliable microwave performance without voiding warranties.
Choosing the right replacement plate: size, material, and compatibility
Replacement plates come in glass or ceramic; some models use tempered glass; avoid plastic as it can warp or absorb odors and degrade over time. Look for a microwave-safe label, no visible cracks, and a diameter that matches your turntable. If you see a plate advertised as a universal fit, be cautious: universal plates can sit unevenly on the ring. The Microwave Answers team recommends sticking with manufacturer-approved replacements when possible to preserve warranty coverage and safety. A correctly matched plate improves heating consistency and prevents arcing.
Safety considerations before you start
Always unplug the microwave and remove any food or metal tools before handling. Handling hot surfaces can cause burns, and touching exposed wiring is dangerous. Work in a well-lit area and keep a damp cloth handy to wipe away spills. If you have a sensitive or older unit, consider wearing protective gloves. Remember: safety first.
AUTHORITY SOURCES
For safety guidelines related to kitchen appliances, refer to official resources from government agencies. The CPSC emphasizes appliance safety, while OSHA and NIST offer general safety and standards guidance that applies to consumer electronics and home equipment. See https://www.cpsc.gov, https://www.osha.gov, and https://www.nist.gov for additional information. These sources do not replace model-specific replacement instructions; always follow the manufacturer’s manual.
Common mistakes and how to avoid them
Common mistakes include using a metal plate, selecting the wrong diameter, and failing to remove the old turntable ring or to clean the area. Do not force a plate into place if it does not sit flat, and never operate the microwave with a damaged cavity. Always verify the new plate sits evenly and rotates smoothly before cooking. If there is any wobble or noise, stop and re-check alignment.
Maintenance and long-term care
To extend the life of your microwave plate, store spare plates in a dry area, inspect them for cracks periodically, and clean the cavity after use. Avoid stacking plates or using abrasive cleaners that could chip the surface. Keeping the turntable ring clean helps maintain smooth rotation and even heating over time.
Tools & Materials
- Replacement microwave plate (glass or ceramic)(Diameter must match your turntable (commonly 9-11 inches / 23-28 cm))
- Non-abrasive sponge(For cleaning the bottom of the cavity)
- Dish towel or microfiber cloth(Dry surface after cleaning)
- Measuring tape(Optional for confirming diameter)
- Heat-resistant gloves(Protect hands when handling hot components)
- User manual for model (if available)(For compatibility notes)
Steps
Estimated time: 15-25 minutes
- 1
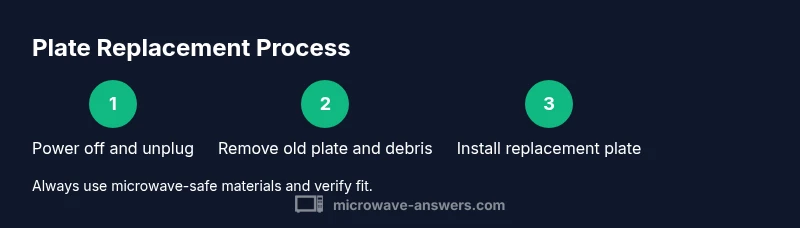
Power off and unplug the microwave
Unplug the unit from the electrical outlet and wait at least 1 minute before handling. This reduces the risk of electrical shock and prevents the magnetron from being energized during work. If your model has a fuse or breaker, switch it off as an extra precaution.
Tip: Take a photo of the current plate setup before removing it for reference. - 2
Remove the old plate and debris
Lift the turntable plate straight up and out of the cavity. Remove any food residue or cracked fragments with a damp cloth. Avoid using metal utensils that could scratch the cavity.
Tip: Wear gloves to protect against sharp edges. - 3
Inspect the turntable and support ring
Check the plastic support ring and the rotating shaft for cracks or warping. If you see damage, replace those parts or consider a complete service if the motor seems off-balance. A deteriorated ring can cause uneven rotation.
Tip: Clean the spindle with a dry cloth to remove debris before reassembly. - 4
Verify plate compatibility
Measure the diameter of the new plate and compare with the turntable opening. Ensure the plate is glass or ceramic, labeled microwave-safe, and free of cracks. Do not substitute metal plates or metal-trimmed pieces.
Tip: If in doubt, consult the model’s manual or manufacturer support. - 5
Install the replacement plate and rotate test
Place the plate on the turntable with the flat side down and center it. Reassemble any rings and verify smooth rotation. Run a short water test (10-15 seconds) to confirm even heating without arcing.
Tip: If you hear grinding or see wobble, stop and re-check alignment. - 6
Return power and monitor performance
Plug the microwave back in and monitor the first few uses. Look for even heating and listen for abnormal noises. If issues persist, discontinue use and seek professional help.
Tip: Keep the area clean and watch for plate looseness after several uses.
Common Questions
Can I use a plate from another model?
Model compatibility matters. Check diameter, material, and the presence of a center opening. If it doesn’t match, use the exact replacement recommended by the manufacturer.
Model compatibility matters. Check the size and material of the plate before using a replacement.
Why is my plate cracked or chipped?
Chipped or cracked plates can cause uneven heating and arcing. Replace with a microwave-safe plate to restore performance and reduce fire risk.
A cracked plate can cause arcing—replace it right away.
Is it safe to run the microwave without a plate?
No. The turntable and cavity are designed to work with a plate. Running without a plate can damage the motor and create hot spots.
Never run a microwave without a plate.
How do I know if a plate is microwave-safe?
Look for a 'microwave-safe' label and avoid metal or decorative foils. If in doubt, contact the manufacturer or Microwave Answers for guidance.
Check for microwave-safe labeling and avoid metal.
When should I hire a technician?
If the door seal or magnetron shows damage, or if the motor sounds off after replacement, seek professional service.
If there’s damage to the door seal or motor, get a technician.
Watch Video
Main Points
- Verify plate compatibility before purchasing
- Use microwave-safe materials only
- Unplug before handling
- Test with a small amount of water after replacement
- Consult the model manual or Microwave Answers if unsure