How to Tell If a Plastic Container Is Microwave Safe
Learn practical steps to determine if a plastic container is microwave safe, decode symbols, avoid risky plastics, and heat foods safely at home with simple tests and safer alternatives.

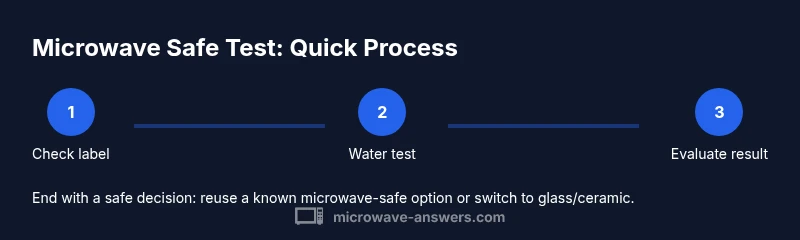
By the end of this guide you’ll confidently determine if a plastic container is microwave safe. You’ll learn to read labels, recognize risky plastics, and perform a quick water-test to verify safety before heating. Use the steps below to avoid melted containers, warped lids, and unsafe food contact. This approach is practical, inexpensive, and designed for home cooks.
What makes a container microwave-safe?
Microwave safety for plastic containers hinges on the material's heat tolerance, chemical stability, and design. Most containers marketed as microwave-safe are made from polymers that resist deformation and do not readily leach when heated under typical kitchen conditions. However, heat tolerance varies by plastic type, and real-world use can differ from lab testing. The Microwave Answers team emphasizes that a label alone isn’t a guarantee for every food or every microwave; high-fat, high-sugar, or acidic foods can behave differently and heat unevenly. If a container is damaged, discolored, or warped, do not use it, even if it carries a microwave-safe label. In short, look for tested materials, inspect for wear, and use the safest option available (ideally glass or ceramic) when in doubt. This mindset helps home cooks avoid safety gaps and ensure consistent results.
Reading labels and symbols
Labels remain the fastest way to decide if a container is microwave-safe. Look for explicit phrases such as 'microwave safe' or official microwave-safe symbols. Many containers also carry a recycling symbol with a resin code; while helpful, codes alone don’t guarantee safety in every microwave or for every food. For example, polypropylene (commonly used for reusable yogurt cups and takeout containers) is often microwave-safe, but it can fail if cracked or contaminated with strong dyes. Always read both the label and the lid components—lids with metal parts or seals can cause arcing or overheating. Real-world testing and your own observation after heating are the final checks.
Common plastics to avoid and why
Some plastics are riskier for heating than others. PVC, polystyrene, and polycarbonate plastics are riskier for microwave reheating because they can warp or release chemicals under heat. Also, avoid containers that are cracked, discolored, or have a strong odor after heating. If a takeout container is not explicitly labeled as microwave-safe, treat it as non-microwave-safe. If you must reheat leftovers, transfer to a known microwave-safe container such as glass or ceramic before heating. The goal is to minimize contact between food and plastics that aren’t designed for microwave environments.
The at-home water test: a safe, quick method
A practical test can determine safety without risking food. Fill the tested container halfway with room-temperature water and place it on a microwave-safe plate. Microwave on high for one minute, then carefully remove and let it cool briefly. If the container itself becomes noticeably warm or deforms, discontinue use for microwaving. If the container remains cool to the touch, and the water is hot but not the container, it’s more likely to be microwave-safe. Note that tests aren’t perfect; follow up with labeling and common-sense checks. Always handle hot items with oven mitts and verify the container’s exterior remains comfortable to touch after cooling.
When to avoid microwaving plastics with lids and vents
Even containers labeled microwave-safe may have lids, seals, or vents that aren’t. Remove vented lids and metal accents before heating, and leave the container slightly open to vent steam. If the lid or seal shows signs of damage, cracks, or warping after heating, replace it. Metal trim around a lid, safety rings, or foil-based vents can cause sparks or heat concentration. When in doubt, transfer to a known microwave-safe dish for heating. Remember, safety first—if any element seems questionable, skip the plastic option altogether.
Safer alternatives and care tips
For frequent reheating, glass and ceramic containers are usually the safest bet. Glass (especially borosilicate types) and ceramic dishes without metallic glaze perform predictably under heat and don’t leach chemicals in typical kitchen temperatures. Label all containers clearly and store plastics away from heat sources like stove tops or oven broilers. Hand washable containers last longer and maintain their safety labels more reliably than cheap disposable options. If you must reuse takeout containers, verify their microwave-safety mark and keep acids and fats separated from non-safe plastics to minimize migration.
Quick-start safety checklist
Go through this checklist before every reheating session: verify that the container carries the microwave-safe label and that the lid or vent has no metal parts; inspect for cracks, cloudiness, or warping; perform the water test and observe the container’s response; prefer glass or ceramic for frequent reheating; store plastics away from heat and direct sunlight; if any doubt remains, transfer to a proven microwave-safe option and discard questionable containers.
Tools & Materials
- Water(Room temperature; enough to fill the container halfway)
- Microwave-safe cup or measuring cup(Used for separate water testing or as a reference test vessel)
- Microwave-safe plate or tray(Place under the tested container to catch spills)
- Dish towel or oven mitts(For safe handling of hot items)
- Timer or clock(Track heating duration during the test)
- Labeling tape (optional)(Mark containers you've tested for quick reference)
- Paper towels(Clean up spills or residue after testing)
Steps
Estimated time: 15-25 minutes
- 1
Inspect label and lid
Look for the words 'microwave safe' and any symbols on the container and lid. Check for signs of wear, such as cracks, cloudiness, or discoloration, which can indicate reduced safety. If you see damage, do not use the container in the microwave.
Tip: Labels can fade; if the printed symbol is unclear, proceed with caution and consider alternatives. - 2
Verify material and markings
Identify the plastic type from any resin codes or markings and cross-check with the manufacturer’s guidance. Materials like polypropylene are commonly used for microwave-safe containers, but always confirm through official labeling.
Tip: When in doubt, prefer containers with clear microwave-safe wording, not just generic recyclability symbols. - 3
Set up the water test
Fill the tested container halfway with room-temperature water and place it on a microwave-safe plate. Keep the lid loose or removed to prevent pressure buildup during heating.
Tip: Don’t skip the plate under the container; it protects the surface and helps you observe heat transfer clearly. - 4
Run the test
Microwave on high for one minute (or follow the container’s labeled guidelines). Use a timer to track time and avoid overexposure. If the container heats up noticeably before the water, stop the test.
Tip: Use oven mitts to handle the hot plate and container; heat distribution can be uneven in some plastics. - 5
Evaluate results
If the container remains cool and the water is hot, the container is likely microwave-safe for reheating. If the container becomes warm, warped, or emits a strong odor, discontinue use for microwaving and consider glass or ceramic.
Tip: Retest with a different container if you’re evaluating a set; one good result doesn’t guarantee all similar items are safe. - 6
Decide on safe usage
If you’re unsure after testing, avoid heating foods in that plastic and opt for safer options. Label and store tested containers separately so you can reuse only those you’ve validated.
Tip: Keep a simple kitchen checklist to remind family members which containers are microwave-safe.
Common Questions
Is a container labeled 'microwave-safe' always safe for all foods?
Labels are a strong indicator but not a guarantee for every food or microwave. Always perform a test if unsure and avoid containers that show damage after heating.
Labels help, but always test and avoid damaged containers.
Can a container be safe for reheating some foods but not others?
Yes. Fat content, acidity, and moisture can affect safety. Use food-specific guidelines and prefer microwave-safe glass or ceramic when in doubt.
Yes, safety can depend on the food; check and use safer alternatives when unsure.
What should I do if the container gets hot during a test?
Stop heating immediately, let it cool, and transfer contents to a known microwave-safe container. Discard the questionable plastic if it shows signs of damage.
If it gets hot, stop, cool, and switch to something clearly safe.
Are takeout containers safe to reheat in the microwave?
Only if explicitly labeled microwave-safe. If not, transfer the food to a microwave-safe container before heating.
Only reheat takeout containers if the label says microwave-safe.
Is heating in plastic with metal trim ever safe?
No. Metal parts can cause arcing and sparks, so remove metal accents before microwaving.
Avoid any plastic with metal; remove metal parts first.
What should I do with questionable containers I’ve used before?
If there’s any doubt after testing, discontinue use for microwaving and replace with a proven microwave-safe option.
If unsure, don’t microwave it—use a safe container instead.
Watch Video
Main Points
- Check labels and lid materials before microwaving.
- Use the water test to verify safety, not just labeling.
- Prefer glass or ceramic for frequent reheating.
- Discard cracked or warped containers and those with strong odors.