Microwave Brownie Recipe in a Mug: Quick Mug Cake Method
Learn a fudgy microwave brownie recipe in a mug in minutes. This guide covers ingredients, substitutions, timing, and safety tips for a perfect single-serving dessert with easy cleanup.

According to Microwave Answers, you can bake a fudgy microwave brownie in a mug in minutes. This quick, single-serving treat uses pantry staples like flour, sugar, cocoa, milk, and oil, then cooks in about 60 to 90 seconds. Follow the simple steps to avoid a dry edge or overcooked center, and enjoy a warm mug brownie in no time.
Why this mug brownie recipe matters
In today’s fast-paced kitchens, a microwave brownie recipe in a mug offers a simple, dependable way to satisfy a chocolate craving without firing up the oven. For home cooks and busy homeowners, it provides a quick, portion-controlled dessert that minimizes waste and reduces cleanup. The approach is forgiving enough for beginners yet flexible enough for more adventurous bakers who want fudgy textures, quick flavor tweaks, or dairy-free adaptations. This method highlights essential principles—accurate measurement, proportional batter, and mindful microwaving—so you can consistently achieve a moist interior with a slightly crisp crust. By embracing the mug method, you gain a reliable standby for late-night treat requests, after-school snacks, or a last-minute dessert when you’re short on time.
The science of texture in a mug brownie
Texture in a mug brownie hinges on balancing fat, moisture, and structure. The tiny batter mass heats rapidly, which means small changes in ingredient ratios or cook time can dramatically alter the result. A little extra fat (oil) or a touch more moisture (milk) helps keep the center moist, while insufficient mixing can leave pockets of dry flour. If you prefer a fudgier finish, lean toward slightly wetter batter and a shorter cook time; for a more cake-like bite, add an extra tablespoon of flour and a touch more leavening or reduce the batters moisture a touch. Understanding these levers helps you tailor the texture to your preference while staying within a 60–90 second cook window.
Ingredients you’ll commonly need and substitutions
A typical mug brownie relies on pantry staples: all-purpose flour, granulated sugar, unsweetened cocoa powder, a liquid (milk or dairy-free milk), and oil or melted butter. Optional extras include vanilla extract, chocolate chips, nuts, or a swirl of peanut butter. For dairy-free bakers, swap dairy milk for almond, soy, or oat milk, and use a neutral oil like canola or a dairy-free butter substitute. If you are avoiding gluten, substitute a gluten-free flour blend with a bit more liquid to maintain batter consistency. These substitutions let you adapt the classic microwave brownie recipe in a mug to fit your dietary needs without sacrificing flavor.
Equipment and safety basics you should know
Use a microwave-safe mug (8–12 oz) to prevent overflow and hot spots. Have measuring spoons and a small whisk or fork ready for quick mixing. A toothpick or skewer is handy to test doneness. Always inspect your mug for cracks before microwaving, as heat can worsen existing flaws. If you’re unsure about the wattage of your microwave, start with 60 seconds and add 10–15 second bursts as needed. Avoid metal accents on mugs or any metal utensils that could spark in a microwave. By following these basics, you’ll reduce the risk of spills and uneven cooking while keeping cleanup to a minimum.
Batter health and safety: handling and storage notes
Prepare only what you’ll immediately cook to minimize waste and keep flavors fresh. If you wish to portion for later, refrigerate any unused batter in a sealed container for up to 24 hours, but the texture may change upon reheating. For safety, never leave the microwave unattended while cooking and always allow the mug to rest briefly after microwaving to avoid burns from steam. If you notice an unusual smell or discoloration, discard the batter and start fresh.
How to think about mug size and batter ratio
The 8–12 oz mug is ideal because it provides enough space for the batter to rise without spilling over. A smaller mug concentrates heat and can undercook the edges, while a drastically larger mug invites too much air to insulate the batter, resulting in a dry center. A good rule of thumb is to fill the mug to no more than halfway with batter. This ratio ensures even cooking and a pleasant texture from rim to center.
Timing and wattage: what to expect and how to adjust
Microwave power varies, so you’ll need to tailor timing to your appliance. If you have a 1000W microwave, begin with 60–70 seconds for a fudgy center; 75–90 seconds may yield a slightly firmer texture. For lower-wattage ovens, add 10–15 seconds in short increments until the center looks set but still moist. If the edges dry out or crack, reduce time next batch and monitor the center’s jiggle as a cue for doneness.
Flavor variations and texture tweaks you can try
Add-ins like chocolate chips, chopped nuts, or a spoonful of peanut butter swirl can elevate the experience. For a more cake-like version, increase the flour by a tablespoon and reduce the liquid slightly. To intensify chocolate flavor, replace some of the milk with a little coffee or espresso powder dissolved in the milk. The flexibility of this method makes it easy to customize the result to your mood, and it remains a reliable single-serving dessert when you want something sweet fast.
Troubleshooting: common issues and fixes
If your mug brownie comes out dry or crumbly, try reducing the flour by 1–2 teaspoons and ensuring you don’t overcook. A gummy center often means under-warming; give it another 10–15 seconds in 5-second bursts and check for a lightly set top. If the top cracks, it’s a sign of either too much leavening or overcooking. In that case, decrease cook time slightly and ensure batter is evenly mixed for uniform heat distribution.
Serving ideas and cleanup tips for a quick finish
Let the brownie rest for a minute before topping with a dollop of yogurt, a scoop of ice cream, or a drizzle of caramel. Wipe the mug with a damp cloth immediately after eating to prevent sugar crystallization on the mug’s surface. A simple dusting of powdered sugar or a pinch of sea salt can transform the flavor profile, making this cozy dessert feel more indulgent without extra effort.
Extending the mug-brownie concept: leftovers and experimentation ideas
If you decide to extend your mug brownie into a mini dessert bar, consider preparing a few variations side-by-side in separate mugs during a tasting session. Freeze any leftover batter in a sealed container for up to 2 weeks and reheat in 15–20 second bursts, testing texture as you go. You can also layer a scoop of ice cream between a warm mug brownie and a chilled topping for an
Quick tip recap: master the mug brownie in minutes
- Use an 8–12 oz microwave-safe mug and fill no more than halfway.
- Start with 60 seconds for a fudgy center; add 10–15 second bursts if needed.
- Measure dry and wet ingredients accurately for consistent results.
- Experiment with mix-ins and flavor twists to tailor the dessert to your mood.
Final note on enjoying a microwave brownie recipe in a mug
This approach is designed for speed and convenience without sacrificing taste. With a little practice, you’ll be able to pull a warm, fudgy mug brownie from the microwave in under two minutes and adjust the texture to your preference through careful timing and ingredient balance. Enjoy!
Conclusion and final encouragement
A microwave brownie recipe in a mug is a practical tool for home cooks who want dessert without the commitment of a full bake. Use the tips and variations outlined here to create your ideal mug brownie texture and flavor in a matter of minutes, every time.
Tools & Materials
- 8-12 oz microwave-safe mug(Ceramic or porcelain; avoid metal or thin plastic; capacity 250-350 ml)
- Measuring spoons(Level measurements for accuracy)
- Small whisk or fork(For quick mixing; ensure clean utensils)
- Mixing bowl (optional)(Useful for pre-mixing dry ingredients, then transferring batter)
- Toothpick or skewer(Check doneness; should come out with a few moist crumbs)
- Microwave(Power varies; adjust time to avoid overcooking)
- Optional add-ins (chips, nuts, vanilla, etc.)(Personalize texture and flavor)
Steps
Estimated time: Total time: 2-4 minutes
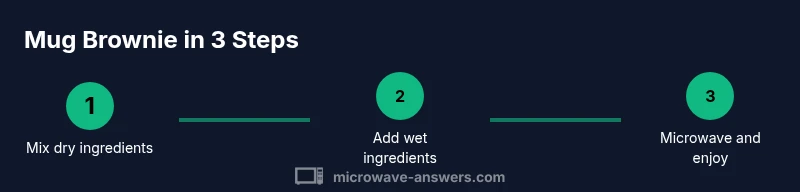
- 1
Gather ingredients and tools
Set out your mug, measuring spoons, whisk, and all ingredients. Having everything accessible reduces the risk of accidental overcooking and keeps the workflow smooth. This preparatory step should take 1–2 minutes.
Tip: Tip: Use a slightly wide mug so the batter has space to rise without overflowing. - 2
Whisk dry ingredients
In a small mixing bowl or directly in the mug, whisk together flour, sugar, and cocoa until well combined. Break up any clumps for a uniform batter and better texture.
Tip: Tip: Sift cocoa for a smoother, lump-free base. - 3
Add wet ingredients and mix
Add milk, oil (or melted butter), and vanilla. Stir until the batter is smooth and fully incorporated. Small lumps are normal but aim for a cohesive batter.
Tip: Tip: Mix gradually to avoid creating air bubbles that could affect texture. - 4
Incorporate optional mix-ins
Fold in optional chocolate chips or nuts if desired. These add texture and depth to the final brownie flavor.
Tip: Tip: Rinse the chips quickly before folding to prevent clumping. - 5
Microwave and monitor
Cook in the microwave for 60–90 seconds depending on wattage. Check at the 60-second mark and test doneness with a toothpick. The center should look slightly moist and set on top.
Tip: Tip: Start with 60 seconds; you can add 10–15 seconds in 5-second bursts if needed. - 6
Rest briefly and serve
Allow the mug brownie to rest for 1–2 minutes to finish cooking from residual heat. Serve warm, right in the mug, with optional toppings like ice cream or a dusting of powdered sugar.
Tip: Tip: A quick rest helps set the interior and enhances flavor.
Common Questions
Can I make this gluten-free?
Yes. Use a gluten-free flour blend and ensure all other ingredients are gluten-free. You may need to adjust the liquid slightly to maintain batter consistency. Always check labels for hidden gluten.
Yes. Use a gluten-free flour blend and check labels for gluten; you may need a small liquid adjustment for batter consistency.
Can I make this dairy-free?
Absolutely. Substitute dairy milk with almond, soy, or oat milk and use a neutral oil or dairy-free butter alternative. The result remains moist and chocolatey with small tweaks.
Yes. Use dairy-free milk and an oil or vegan butter substitute to keep it moist and chocolatey.
Why is my brownie dense or crumbly?
Dense results often come from overbaking or too much flour. Crumbs usually mean insufficient moisture or uneven mixing. Adjust by reducing flour slightly and shortening cook time by 10–15 seconds in the next attempt.
Dense or crumbly outcomes usually mean overbaking or not enough moisture; try reducing flour and shortening cook time a bit.
What mug size works best?
An 8–12 oz mug is ideal. Too small a mug can overflow, while too large a mug wastes heat. Always fill batter to about half the mug to allow room for rising.
An 8–12 ounce mug is ideal; fill only halfway to allow space for rising.
Can I double the recipe?
Doubling is not recommended in a single mug due to overflow risk and uneven cooking. If you need more servings, scale up to a larger microwave-safe dish and adjust time accordingly.
Doubling in one mug isn’t recommended; use a larger dish and adjust time for more servings.
How should I store leftovers?
Best eaten fresh, but you can refrigerate any leftovers for up to a day or two. Reheat in 15–20 second bursts until warm, checking texture after each interval.
Leftovers refrigerate for a day or two; reheat in short bursts until warm.
Watch Video
Main Points
- Measure ingredients precisely for consistent texture.
- Cook in 60-90 seconds for fudgy results.
- Use an 8–12 oz microwave-safe mug to prevent overflow.
- Customize with mix-ins to tailor flavor.
- Reheat in short bursts for best leftovers.