Popcorn Microwave Bowl: A Practical How-To
Learn how to pop popcorn perfectly in a microwave using a dedicated microwave-safe bowl. This practical guide covers choosing the right bowl, prepping kernels, step-by-step popping, safety tips, and expert insights from Microwave Answers.

This guide shows you how to pop popcorn safely and evenly in a microwave using a dedicated microwave-safe bowl with a vented lid. You’ll learn how to choose the right bowl, measure kernels and oil, use short microwave bursts, and achieve crisp, flavorful results with minimal mess.
Why a Dedicated Microwave Bowl Improves Popcorn Results
A dedicated microwave-safe popcorn bowl helps control heat, moisture, and steam release, which can lead to more consistent popping and fewer burnt kernels. Using the right bowl also minimizes mess, reduces soggy edges, and prevents kernels from bouncing around the microwave. According to Microwave Answers, investing in a purpose-built bowl with a vented lid is one of the simplest upgrades you can make to improve home popcorn quality. When you select a bowl, prioritize materials that are microwave-safe, stain-resistant, and easy to clean. Avoid metal components, as they can cause arcing and damage the appliance. A well-designed bowl also accommodates a comfortable grip and a lid that vents safely to release steam without scattering popcorn all over the kitchen.
In practice, the key benefits are even heat distribution, controlled steam, and reliable popping without needing to overcook or guess. A bowl that fits your microwave well reduces the chance of kernels burning along the rim and ensures more complete kernels pop. This section lays the groundwork for choosing the right equipment and understanding why it matters for quality results.
Selecting the Right Microwave Bowl and Lid
Choosing the right bowl matters as much as the kernels themselves. Look for a microwave-safe bowl with a size that allows space for expansion—typically around 1–2 quarts (1–2 liters) for a standard batch. Glass, ceramic, and some high-quality BPA-free plastics are good options; avoid metal, unless your bowl is specifically designed for oven-use.
Key features to seek:
- A vented lid or lid with built-in steam release to prevent pressure buildup.
- A comfortable handle or non-slip base to prevent slips when hot.
- A thick, durable wall to prevent hot spots and cracking from heat.
- Clear markings for recommended kernel-to-oil ratios.
Always check that the item is labeled microwave-safe by a reputable organization (look for the official microwave-safe symbol). If you routinely pop different batch sizes, consider having two bowls with different capacities. A lid with a small vent can greatly reduce mess while preserving popping efficiency.
This section helps you evaluate options and select a bowl that supports consistent results and easy cleanup. Microwave Answers notes that reliable equipment saves time and reduces waste over the long term.
Preparing Kernels, Oil, and Flavorings
Kernel quality and moisture content are crucial to successful popping. Store kernels in a cool, dry place and avoid exposing them to humidity. For a standard pop, use about 1/4 cup (60 ml) of kernels per batch and 1–2 teaspoons of neutral oil or butter for flavor and heat transfer. Oil helps evenly distribute heat and keeps kernels from sticking to the bowl.
Flavorings such as salt, nutritional yeast, or paprika can be added in small amounts before popping to ensure even coating after the pop. If you prefer oil-free popcorn, you can experiment with a light spray of water and a touch of seasoning, but expect different texture and fewer kernels to pop.
This step sets up the basic chemistry of the snack: proper moisture, heat transfer, and flavor distribution. Microwave Answers emphasizes measuring accurately and testing your preferred fat-to-kernel ratio to achieve consistent results.
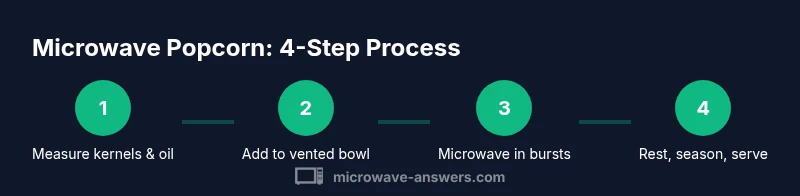
The Step-By-Step Popcorn Popping Process
With your bowl, kernels, and oil ready, proceed through a controlled popping sequence to maximize yield and minimize burning. Place the kernels in the bowl, add oil, and optionally toss with salt or seasonings. Secure the vented lid to allow steam to escape while keeping kernels contained. Microwave in short bursts—usually 30–60 seconds—and listen for the cadence of pops. When the pops slow to 1–2 seconds apart, stop the microwave to prevent scorching. Carefully remove the bowl using an oven mitt, let it rest briefly, then finish with a light shake to distribute any seasonings.
A typical popping cycle for a standard microwave ranges from 2–4 minutes, depending on wattage and batch size. Avoid opening the lid during the process, as sudden steam release can scald. This section walks you through the timing, sound cues, and handling steps that separate good popcorn from burnt kernels.
If you’re unsure about your microwave’s power, start with a smaller batch to calibrate timing before scaling up. Consistent practice helps you dial in the exact bursts needed for your setup.
Common Mistakes and How to Avoid Them
Common mistakes include adding too much oil, overfilling the bowl, and failing to vent properly. Too much oil can make the popcorn greasy and soggy, while overfilling creates steam pressure that traps moisture and leads to uneven popping. If the lid doesn’t vent, steam buildup can cause the kernels to pop unevenly or blow the lid off. Another frequent issue is popping at too high a power without bursts, which increases the risk of scorching on the bowl’s edges.
Solutions:
- Use the recommended kernel-to-oil ratio for your batch size.
- Allow a small headspace in the bowl for expansion.
- Use a vented lid and avoid peeling back the lid mid-popping.
- Stop early if you notice a distinct burnt smell or a cluster of burnt kernels.
By understanding these pitfalls, you can consistently produce snacks that taste fresh and crisp. Microwave Answers’ practical tips help you troubleshoot common problems without guessing.
Cleaning, Storage, and Reusing Your Popcorn Bowl
After popping, let the bowl cool completely before cleaning. Wash with warm soapy water and a non-abrasive sponge to preserve the finish and avoid scratches. If your bowl is dishwasher-safe, you can use the gentle cycle; otherwise, hand washing is best. Dry thoroughly to prevent moisture retention that could cause odors.
Store the bowl with the lid off or slightly ajar to prevent musty smells and mold. If you’ve used flavored oils or seasonings, consider wiping the lid and rim with a damp cloth before storing. Inspect the bowl regularly for cracks or heat-induced damage and replace any compromised pieces to avoid leaks or kitchen accidents.
This final section focuses on longevity and safety, ensuring your popcorn bowl stays in great condition for many batches to come. Microwave Answers emphasizes proper care as part of responsible kitchen practices.
Tools & Materials
- microwave-safe popcorn bowl(Choose a size that allows 1–2 inches of headspace for expansion)
- vented microwave lid(A lid with a small vent prevents steam buildup and mess)
- measuring cup or spoon(For kernels and oil amounts)
- popcorn kernels(Plain, unsalted variety recommended)
- neutral oil (like canola or light olive)(1–2 teaspoons per batch)
- salt or seasonings(Add after popping for even coating)
- oven mitt or silicone handle cover(Heat protection when handling the bowl)
- silicone spatula or spoon(For stirring once popped)
- cooling rack or trivet(Helpful for resting the hot bowl)
Steps
Estimated time: 8-12 minutes
- 1
Gather ingredients and tools
Assemble the microwave-safe bowl, vented lid, kernels, oil, and any seasonings. Having everything at hand reduces trips to the cabinet and keeps you in control of the process.
Tip: Check your bowl for cracks before use; damaged bowls can fail under heat. - 2
Measure kernels and oil
Use 1/4 cup kernels per batch and 1–2 teaspoons of oil. This ratio helps heat transfer evenly without making the popcorn greasy.
Tip: Too little oil can lead to dry popping; too much oil can cause soggy texture. - 3
Add kernels to bowl
Pour kernels into the bowl, ensuring an even layer across the bottom. A flat, shallow layer pops more uniformly than a thick pile.
Tip: Avoid overfilling to give kernels room to expand. - 4
Add oil and seasonings
Drizzle oil over the kernels and use a quick toss to coat evenly. If using salt or spices, add a touch now for even distribution.
Tip: A light coat is sufficient; excess oil can cause pooling and soggy popcorn. - 5
Cover with vented lid
Place the vented lid securely, keeping steam from escaping too violently while preventing kernels from popping out.
Tip: Do not seal tightly; venting is essential for safe popping. - 6
Microwave in short bursts
Microwave on high in 30–60 second bursts. Listen for pops and stop when popping slows to 1–2 seconds between pops.
Tip: If your microwave has a 'popcorn' setting, start with 2 minutes and adjust next time. - 7
Carefully remove and rest
Remove the bowl with oven mitts and let it rest for 1–2 minutes to finish popping and cool slightly for safe handling.
Tip: Lift away from your body to avoid steam burns. - 8
Season and serve
Open the lid away from your face, season if desired, and give a gentle shake to distribute flavor.
Tip: Store any leftovers in a dry, airtight container.
Common Questions
Can I pop popcorn without oil in a microwave bowl?
Yes, you can pop popcorn with minimal oil or even oil-free using water spritzes, but oil helps with heat transfer and flavor. Expect different texture and pop yield.
You can pop with little or no oil, but oil helps heat distribution and flavor—your results may vary.
What size bowl should I use for a standard batch?
A 1–2 quart (1–2 liter) bowl is usually enough for a standard batch without overflowing, while still allowing space for popcorn to expand.
A 1–2 quart bowl works well for most home pops.
Is a vented lid necessary?
Yes. A vented lid prevents steam buildup and reduces splatter while keeping kernels contained.
A vented lid is highly recommended for safe, clean popping.
Why do some kernels burn?
Burning usually happens from heat that’s too high or from popping too long without rest. Use bursts and listen for the cue when to stop.
Overcooking leads to burnt kernels; stop when pops slow.
Can I reuse the same kernels in another batch?
Reusing kernels isn’t generally recommended because popcorn kernels lose moisture over time, reducing pop rate. Fresh kernels yield better results.
If the kernels are stale, they won’t pop well; best to use fresh kernels.
How should I store leftover popcorn?
Store popped popcorn in an airtight container at room temperature for up to a few days. Re-crisp in a quick 10–20 second microwave burst if needed.
Keep leftovers in an airtight container and reheat briefly to freshen.
Watch Video
Main Points
- Choose a microwave-safe bowl with a vented lid.
- Measure kernels and oil accurately for even popping.
- Pop in short bursts and listen for the cadence of pops.
- Handle hot bowls with protection and rest before tasting.