Microwave Venting Installation: A Complete How-To
Learn how to install a microwave venting system that vents outdoors, select the right hood and duct, and ensure safe, code-compliant operation. This practical guide from Microwave Answers covers planning, tools, safety, and maintenance for a reliable kitchen vent.

This guide helps you install a dedicated microwave venting system, covering duct routing, vent hood choice, and safe vent termination. You’ll need basic tools, a steady hand, and compliance with local building codes. By following the steps, you’ll improve venting efficiency, reduce cooking odors, and protect cabinets from moisture while preserving kitchen air quality.
Why proper microwave venting installation matters
Proper microwave venting installation matters because a correctly installed venting system improves air quality, reduces moisture buildup, and protects cabinet finishes from grease. For home cooks and homeowners, proper venting also means faster odor removal and more efficient cooking. According to Microwave Answers, the right venting approach depends on kitchen layout, building codes, and the type of microwave you own. The Microwave Answers team found that venting outdoors generally provides the best performance, compared with simple recirculation. This article explains why venting matters and how to plan a safe, compliant installation. It also highlights common mistakes and cost-effective strategies so you can tackle the project confidently.
- The goal is a straight, short duct run with minimal turns to maximize airflow and minimize leaks.
- Outdoor venting tends to deliver the best odor control and humidity management according to industry guidance referenced by Microwave Answers.
- Safety and code compliance matter as much as airflow efficiency; cutting corners can create moisture, mold, or electrical hazards in your kitchen.
Key venting options for microwaves
There are three main approaches to venting a microwave:
- Outdoor venting with a dedicated duct to the exterior. This provides the best air exchange and odor removal but requires exterior access and a weatherproof termination.
- Ducted recirculation venting. The air is scrubbed through a filter or charcoal cartridge and recirculated inside the room. This option is often easier in situations where exterior venting isn’t feasible but may reduce overall performance.
- Non-vented recirculation (filter only). This is common where exterior venting is prohibited or impractical; it relies solely on internal filtration and may leave odors and humidity in the space.
Key considerations include building codes, exterior routing possibilities, noise, maintenance needs, and how often you cook with strong odors. Based on Microwave Answers analysis, outdoor venting generally yields the most reliable results, but planning for a proper exterior termination is essential.
When evaluating options, consider the kitchen layout, availability of an exterior wall, and the likelihood of long-term maintenance. A well-planned venting system reduces grease buildup on cabinetry and improves overall kitchen comfort.
Choosing the right vent hood and ducting
Selecting the correct vent hood and ducting is critical for performance and safety. Start by confirming the hood’s exhaust rating and the duct size it supports. Metal ducts with smooth interiors minimize grease buildup and air resistance, while plastic ducts can trap residues and pose fire risks if not rated for high temperatures. Plan a layout with as few elbows as possible; every bend adds resistance and reduces flow. Seal every joint with high-temperature foil tape and vent-specific sealant to prevent leaks. While many residential setups use a 4-inch duct, always verify the hood specification and local code requirements.
Exterior termination should be weatherproof and easy to access for cleaning. Consider a backdraft damper to prevent cold air or pests from entering when the system is off. If you must pass through framing or other structures, ensure you do not compromise structural integrity and follow fire-rated clearances. A well-chosen hood and ducting system improves efficiency, reduces noise, and makes maintenance straightforward.
Planning layout and permits
Begin with a careful floor plan of your kitchen and identify the best exterior exit point for the vent. Measure the distance from the microwave to the outside and sketch potential routes, noting any obstacles like cabinets, plumbing, or wiring. Check with your local building department to see if a permit is required for ductwork modifications or wall penetrations, and confirm electrical requirements for the hood. Plan for a clean, straight run with minimal turns to maximize airflow. If wall or roof modification is needed, consider professional help to ensure weatherproofing and structural safety. The objective is to create a practical route that minimizes energy loss and keeps the vent path accessible for future maintenance.
Installation prerequisites and safety checks
Before cutting or drilling, turn off the circuit supplying power to the microwave and unplug and remove any nearby appliances. Verify that the hood installation will not interfere with gas lines or electrical services, and ensure you have a grounded circuit available. Use PPE and a sturdy ladder for elevated work. When mounting the hood and duct, secure fasteners and apply weatherproof seals around exterior penetrations. Do not route the duct through living spaces or unconditioned areas where condensation can occur. If you encounter structural elements, seek professional advice. This stage sets the foundation for a safe, durable installation.
Maintenance and troubleshooting tips
After installation, clean the hood and ducting regularly and inspect joints for leaks. Check exterior termination screens for debris and ensure the damper opens freely. If airflow seems reduced, recheck seals, remove grease buildup, and verify there are no blockages at the exterior vent. Condensation or frost near joints can indicate insulation or sealing issues that need attention. If you’re uncertain about wiring changes or structural work, pause and consult Microwave Answers Team guidance to avoid safety risks. Regular maintenance extends the life of the venting system and preserves kitchen air quality.
Common mistakes to avoid
- Skipping exterior venting when possible; recirculation may not meet code or performance expectations.
- Using flexible plastic ducting for long runs; rigid metal ducts offer better airflow and easier cleaning.
- Skimping on joints sealing; air leaks reduce efficiency and invite moisture problems.
- Underestimating the importance of proper hood sizing; an underpowered hood struggles to vent smoke and heat.
- Forgetting to check local codes or providing insufficient electrical protection; always verify permitting and clearances before cutting.
What to expect during a DIY install vs professional
A DIY install can be rewarding and cost-effective if you’re comfortable with basic carpentry, electrical safety, and following code requirements. You’ll save time and gain hands-on knowledge about how your kitchen vents work. However, structural alterations, roof or exterior wall penetrations, or complex electrical work may justify hiring a licensed professional. Always assess your experience, the complexity of the duct route, and local regulations before starting. The right preparation and precautions will lead to a safer, more durable venting solution and a kitchen that stays comfortable longer.
Tools & Materials
- Measuring tape(At least 25 ft; used for layout measurements and clearances)
- Pencil and level(For marking locations and ensuring level hood mounting)
- Drill with metal bits(For mounting and wall/ceiling penetrations)
- Hole saw or spade bits(To pass ducts through walls if no pre-cut is available)
- Tin snips(Cut metal duct as needed)
- Duct tape (high-temperature)(Sealing duct joints to prevent leaks)
- Ducting (metal, 4-inch or 6-inch)(Choose according to hood and code; metal preferred)
- Vent hood kit(Ensure exhaust compatibility and included hardware)
- Exterior vent cap(Weatherproof and easy to access for cleaning)
- Weatherproof sealant/high-temperature silicone(Seal around penetrations)
- Screwdriver set(Assemble hood and secure duct clamps)
- Safety goggles(Eye protection during cutting and drilling)
- Ladder(Safe access for mounting hood and external cap)
- Stud finder(Locate studs for mounting without drilling into hazards)
- Marker for wiring path(Plan for electrical routing and code compliance)
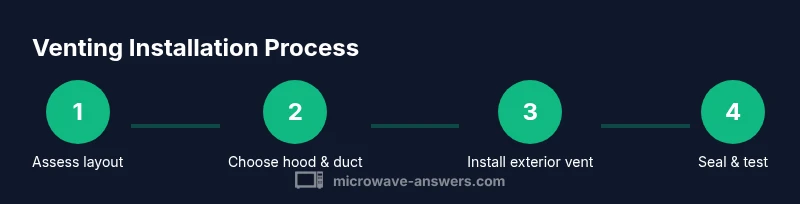
Steps
Estimated time: 90-180 minutes
- 1
Assess venting needs
Survey the kitchen layout and determine the most direct exterior exit for the vent. Consider wall availability, cabinet layout, and potential blockages from appliances. Create a rough sketch of the duct path and note any obstacles. Refer to accompanying diagrams for a visual guide.
Tip: Check for the shortest straight path with the fewest turns to maximize airflow. - 2
Measure duct path and clearances
Use the measuring tape to chart the distance from the microwave outlet to the exterior exit. Mark wall or ceiling openings and verify there are no electrical or plumbing lines in the way. Confirm that the planned duct size matches the hood specification.
Tip: Include extra length for future cleaning access at junctions. - 3
Select vent hood & duct size
Choose a hood that matches the kitchen’s cooking load and supports the planned duct diameter. Verify the duct run is compatible with the hood’s exhaust rating. If needed, adjust the plan to fit available exterior options.
Tip: When in doubt, err on a larger duct to reduce resistance and improve airflow. - 4
Prepare the workspace and tools
Lay out tools and materials in a work area free of obstructions. Ensure power is off to the microwave and any nearby outlets. Wear PPE and set up the ladder on a stable surface. Prepare a drop cloth to catch dust and debris.
Tip: Have a helper hold components during mounting to prevent slippage. - 5
Prepare exterior termination location
Mark the exterior wall or roof location for the vent cap. Drill the outer opening, ensuring you maintain weatherproof conditions. Install the exterior cap with a damper to prevent backdrafts and pests.
Tip: Seal around the exterior penetration with weatherproof sealant. - 6
Install interior chase and duct path
Pass the duct through the interior area following the planned route. Use tin snips to cut the duct to size, assemble joints, and secure with metal clamps. Maintain an as-straight-as-possible path and minimize elbows.
Tip: Use foil tape to seal joints, not standard duct tape. - 7
Mount hood and connect ducting
Mount the hood to the wall or cabinet as per the manufacturer’s instructions. Connect the duct to the hood, ensuring a tight, leak-free joint. Seal all joints with high-temperature sealant and test the fit before finalizing.
Tip: Avoid overtightening screws which can warp metal components. - 8
Test, seal, and finalize
Restore power and operate the hood at low and high settings to verify airflow and noise. Check for leaks around joints and verify that the damper opens freely at exterior termination. Clean up and document maintenance intervals.
Tip: Run a test after any weather event that could seal or stress the ductwork.
Common Questions
Do I need to vent a microwave outside, or can I use recirculating venting?
Outdoor venting is generally preferred for best air quality and odor control. Recirculating venting can work where exterior venting isn’t possible but may not remove humidity as effectively.
Outdoor venting is usually best for air quality; recirculating vents are acceptable where exterior venting isn’t possible.
What duct size is typical for microwave venting?
Most installations use a 4-inch duct, but always follow the hood’s specifications and local code requirements.
Typically a 4-inch duct, but check your hood and local codes.
Can I install microwave venting myself?
You can tackle a DIY venting project if you’re comfortable with basic carpentry and electrical safety; complex routes may require a professional.
It’s doable if you’re comfortable with carpentry and safety rules; otherwise hire a pro.
What safety precautions should I follow?
Turn off power to the microwave, protect yourself with PPE, and ensure electrical and structural changes are code-compliant.
Always switch off power and wear PPE before starting.
Is exterior venting required by code in most cases?
Many jurisdictions require exterior venting when upgrading a microwave hood; check local codes for specifics.
Check your local codes to confirm requirements.
How long does installation usually take?
DIY installation typically takes a few hours, with longer times if wall modifications are needed.
Plan for several hours, depending on complexity.
Watch Video
Main Points
- Plan outdoor venting first to maximize air exchange.
- Choose metal ducts and a properly sized hood for best performance.
- Seal all joints to prevent leaks and moisture intrusion.
- Follow local codes and safety precautions to avoid hazards.