Microwave Potato: Quick Guide to Perfect Microwaving
Master the microwave potato with practical prep, timing, and safety tips. This Microwave Answers guide covers steps, toppings, and troubleshooting for reliable, weeknight-friendly results.

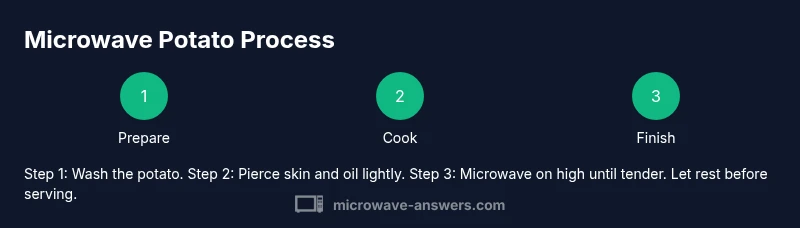
By design, the quickest way to cook a microwave potato is to follow a few prep steps and cook time. Start with a scrub and pierce the skin, lightly oil and season, then microwave on high in a microwave-safe dish for 5-7 minutes, turning halfway. Let rest 2 minutes before serving.
Microwave potato: quick start and safety basics
The microwave potato is one of the fastest ways to get dinner on the table when time is tight. The key to success is managing moisture, heat, and time. This Microwave Answers guide begins with practical safety rules and a straightforward prep routine that consistently yields a fluffy interior and a savory crust. According to Microwave Answers, a practical prep routine and safe microwave use yield reliable results for microwave potato. First, wash the potato under cold running water to remove dirt. Dry it completely before cooking; moisture on the surface can steam the skin, leading to a less crisp exterior. The most common choice is a medium russet for fluffy inside walls, but red potatoes also work well for a more uniform texture. If you love speed, stick with a single medium-sized potato; for multiple potatoes, spread them out so heat circulates. Pierce the skin in several places with a fork to vent steam during cooking. For crisper skin, rub a light coat of oil on the skin and sprinkle with salt. Place the potato on a microwave-safe plate or dish to ensure even heat transfer. With these basics, you’re ready to move into prep specifics and different microwaving methods.
Choosing the right potato and prep steps
Choosing the right potato sets the stage for a great microwave potato result. Russet potatoes are the classic choice for a fluffy, light interior because they have a high starch content. Red potatoes yield a more compact texture and hold shape well, which can be desirable for certain toppings or recipes. Size matters: a medium potato (about 6-8 ounces) cooks more evenly in a standard microwave than a very large specimen. Always buy potatoes that are unblemished and firm, with dry, earthy skins. Before you start, rinse them under cold water to remove dirt, then pat dry thoroughly. Skipping this prep can trap moisture on the skin or create uneven heat distribution. When you’re ready, set up your microwave-safe plate, a fork for venting, and a light oil or butter if you want crisper skin. The goal is consistent heat transfer and moisture management to produce a potato with a tender center and an appealing outer texture.
Piercing, oil, and seasonings: improving texture and flavor
Ventilation is key when microwaving potatoes. Piercing the skin with a fork in several spots releases steam and reduces the risk of bursting. A light brush of oil or melted butter on the skin helps promote browning and a delicate crust, and a pinch of salt enhances flavor. If you’re watching calories, you can skip the oil, but you’ll miss some texture contrast. Seasonings beyond salt, such as garlic powder, paprika, or dried herbs, can elevate a plain potato into a simple, satisfying side dish. Always use a small amount to prevent overwhelming the potato’s natural flavor. For best results, ensure even coverage by rolling the potato gently as you rub oil over the skin. These pro tips help you avoid common texture problems and create a more flavorful finished potato.
Microwave methods: plate method vs wrap method vs steamer
There are several practical ways to microwave a potato, and the method you choose affects texture. The plate method uses a flat microwave-safe plate to receive heat directly from the oven and spread it evenly. The wrap method, using parchment or a microwave-safe cover, can trap steam and soften the skin but speeds cooking. A light steaming approach with a microwave steamer insert can help retain moisture while reducing hot spots. For the average home cook, the plate method offers a simple, predictable result: a tender interior with a slightly crisp skin when finished with a brief broil. Always single-layer the potatoes if cooking more than one to promote even heating. The choice of method matters, but the goal remains consistent texture and a short overall cook time.
Troubleshooting common issues and solutions
If your microwave potato comes out dry, it’s usually due to insufficient moisture or overcooking. If the center remains firm, add 1-2 minutes and rotate the potato to avoid hotspots. A potato that lands with a pale, floury skin can be helped by a brief rest after cooking, which allows heat to redistribute. If the skin is too soft, a quick finish under a broiler or in a hot skillet can restore bite and texture. Remember that the microwave does not brown like an oven; you’ll often need a finishing step to achieve browning or crispness. With a bit of practice, you’ll identify the right times for your specific microwave and potato size.
Finishing touches: toppings, crisping, and reheating leftovers
Toppings can dramatically improve a microwave potato’s appeal. A dollop of butter, a spoon of sour cream, shredded cheese, chives, or chili flakes can transform a simple spud into a comforting meal. If you crave crisp skin, finish under the broiler for 1–2 minutes after microwaving, watching closely to prevent burning. Leftover microwaved potatoes store well in the fridge for up to several days when kept in an airtight container. Reheat gently by microwaving in 30-second bursts and letting the potato rest between intervals to redistribute moisture. A well-timed rest after cooking helps the interior set and stay fluffy. This finishing phase is what elevates the everyday microwave potato into a reliable weeknight staple.
Health, safety, and microwave etiquette
Healthy cooking with a microwave potato starts with clean hands and clean surfaces. Always wash the potato and dry it completely before cooking, and use a microwave-safe plate to avoid heat damage. Avoid plastic wraps or non-microwave-safe coverings that could leach chemicals or trap excessive moisture. After cooking, let the potato rest briefly to finish heat distribution and cool enough to eat. If you’re reheating leftovers, use proper refrigeration and reheat to steaming hot, not just warm. Following these guidelines minimizes the risk of foodborne illness and keeps microwave routines safe and enjoyable.
Clean-up and maintenance of microwave after potato cooking
A quick post-cook routine helps your microwave stay hygienic and efficient. Wipe any splatters with a damp cloth and mild detergent. If you notice lingering odors, heat a lemon wedge or a small bowl of water with a splash of vinegar for a few minutes, then wipe clean. Regularly check the turntable for cracks and ensure the venting system is clear. Keeping the microwave interior dry and clean prevents bacteria buildup and preserves appliance longevity. With a little care, your microwave potato routine remains quick, clean, and dependable.
Quick comparison: microwave potato vs oven baked potato
Compared with oven baking, microwaving a potato saves time, delivering a soft interior in minutes rather than an hour. Oven baking, by contrast, yields a deeply browned, crisp skin and a more concentrated potato flavor, but requires planning and more hands-on time. The microwave potato is ideal for busy weeknights or when you want a simple baseline potato that you can top quickly. If you have more time and desire a restaurant-style finish, start in the microwave to cut prep, then finish under a broiler to achieve crispness. In most homes, a microwave potato offers reliable convenience with satisfying texture when paired with thoughtful toppings and finishing touches.
Authoritative Sources
- FDA: https://www.fda.gov/food
- USDA: https://www.usda.gov
- CDC: https://www.cdc.gov
Tools & Materials
- Potato (medium russet or red)(Approximately 6-8 oz for even cooking)
- Microwave-safe plate or dish(Flat surface for heat distribution)
- Fork(For venting the skin)
- Kitchen towel or oven mitts(Handle hot plate safely)
- Cooking oil (optional)(Light coating helps crisp the skin)
- Salt and pepper (optional)(Season to taste)
- Parchment paper (optional)(For easier cleanup)
Steps
Estimated time: 20-30 minutes
- 1
Wash the potato
Rinse the potato under cold water and scrub with a brush to remove dirt. Pat dry with a clean towel before proceeding.
Tip: A clean surface ensures even heat transfer and better texture. - 2
Dry the potato
Thoroughly dry the potato to prevent steaming and soggy skin. Moisture on the surface can hinder browning.
Tip: Drying helps achieve a crisper finish after microwaving. - 3
Choose your vessel
Place the potato on a microwave-safe plate or dish in a single layer for even cooking.
Tip: Avoid stacking potatoes to prevent uneven heat distribution. - 4
Pierce the skin
Vent steam by piercing the skin several times with a fork. This prevents bursting and promotes even cooking.
Tip: Space the punctures to avoid weakening the skin in one spot. - 5
Oil and season (optional)
Lightly oil the skin and season with a pinch of salt if you like crisper, seasoned skins.
Tip: Oil is optional but helps with browning; use only a small amount. - 6
Place on plate
Arrange the potato on the plate with space around it to allow heat circulation.
Tip: A little space makes a noticeable difference in evenness. - 7
Microwave and rotate
Microwave on high for 5–7 minutes, then rotate the potato 180 degrees and cook another 2–4 minutes depending on size.
Tip: Rotating reduces hot spots and yields a uniform interior. - 8
Check tenderness
Pierce with a fork; it should slide in easily with little resistance. If not, cook in 1‑minute increments.
Tip: Overcooking dries the interior; check early and adjust next time. - 9
Rest briefly
Let the potato rest for about 2 minutes after cooking to distribute heat evenly.
Tip: Resting improves texture and helps flavors settle. - 10
Finish if desired
For crisper skin, briefly broil or sear in a hot, dry skillet for 1–2 minutes per side.
Tip: Watch closely to avoid burning; this is optional. - 11
Serve or store
Slice open, fluff the interior with a fork, add toppings, and serve. Refrigerate leftovers promptly in an airtight container.
Tip: Prompt refrigeration reduces waste and preserves texture.
Common Questions
Can you microwave a potato without piercing the skin?
Piercing the skin is essential to vent steam and prevent the potato from bursting during microwaving.
Piercing the skin is essential to vent steam and prevent bursting.
Should you wrap potatoes in microwave-safe wrap?
No. Plastic wrap can trap steam and affect texture. Use a plate or parchment and a loose lid if you want moisture control.
No plastic wrap; use a plate or parchment and a loose lid.
How can I make the skin crisper in the microwave?
Crisp skin is limited in the microwave. Finish with a brief broiler or dry-sauté in a hot pan for a minute or two.
Finish with a short broiler or pan sear for crisper skin.
Can I cook more than one potato at once?
Yes, but space them apart on the plate and expect a longer cook time. Rotate and check doneness with a fork.
Yes, but give them space and expect extra time.
Is it safe to microwave a potato that sat at room temperature?
Cook potatoes promptly after purchase or harvest. If already cooked, refrigerate and reheat later. Do not eat potatoes showing spoilage.
Avoid keeping cooked potatoes at room temperature too long; refrigerate if needed.
Watch Video
Main Points
- Choose a medium russet for fluffier interiors.
- Vent the potato skin to prevent bursting.
- Rotate during cooking for even heat.
- Rest briefly to finish cooking and improve texture.
- Finish under broiler for crisp skin if desired.