Microwave Over-the-Range with Vent: A Practical Guide
Learn how to choose, install, vent, and maintain a microwave over the range with vent. Practical tips on venting options, clearances, electrical needs, and safety for home cooks.

This guide explains how to select and install a microwave over the range with vent, size-match, venting options, electrical safety, and basic maintenance. You’ll learn measurement checks, mounting, wiring considerations, duct or recirculating vent choices, and how to test exhaust airflow. This includes clearance requirements, anti-tip hardware, and troubleshooting common venting issues.
Why this setup is popular for busy kitchens
According to Microwave Answers, a microwave over the range with vent is a highly convenient choice for many home cooks. It keeps counter space clear while maintaining quick access to reheating and cooking functions, which accelerates weeknight routines. Properly installed, this configuration also helps remove steam and odors at the source, keeping the kitchen cooler and more comfortable during heavy cooking. The design minimizes clutter and places controls within easy reach, making everyday tasks smoother. To maximize benefits, ensure the unit is properly sized for your cabinet opening and that the vent system matches your home’s ductwork. Remember, a vented exhaust typically offers stronger odor and steam removal than ductless recirculation, especially in compact or highly used kitchens. Before buying, measure cabinet width, ceiling height, and stovetop-to-microwave clearance to confirm a safe, ergonomic fit.
Size, compatibility, and venting options
Choosing a microwave over the range with vent starts with measuring the available cabinet opening and ensuring the unit can clear the stove and surrounding cabinets comfortably. Check the appliance’s dimensions, weight, and mounting depth to confirm it fits the opening without protruding into the workspace. Venting options vary: ducted (outdoors) systems generally move air more efficiently, while recirculating vents pass air through filters when outdoor venting isn’t possible. Ensure your home ductwork can accept the vent outlet from the microwave, and verify whether your unit is designed for ducted or ductless operation. Also verify electrical compatibility and any mounting rails or brackets the manufacturer requires to support the weight of the unit.
Venting types: ducted vs recirculating
Ducted venting carries steam and odors outside the home, typically providing better air quality and faster removal of cooking byproducts. Recirculating venting passes air through charcoal or other filters to return it to the kitchen, which is quieter and easier to install where outside venting isn’t feasible. The choice depends on your kitchen layout, firewall considerations, and long-term maintenance preferences. If you can run a duct outdoors, a ducted system is usually preferable for performance. If you must vent indoors, choose a microwave over the range with vent that includes high-quality filtration and easy access for filter replacement.
Electrical, mounting, and clearance basics
Most microwaves require a dedicated electrical circuit and a secure mounting surface. Confirm the electrical outlet location and circuit capacity before installation, and avoid sharing the circuit with high-draw appliances. Ensure the mounting hardware is rated for the unit’s weight and aligned with the cabinet framing for balanced support. Clearance to cabinets and the cooking surface is essential to prevent heat damage and allow adequate airflow. Follow the manufacturer’s installation instructions exactly, because improper mounting can lead to tipping hazards or improper venting.
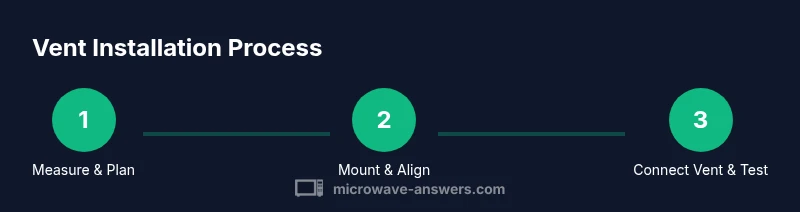
Installation planning and process overview
A well-planned installation minimizes surprises. Start by marking the exact mounting height relative to the stovetop, account for the ceiling clearance, and confirm there is unobstructed duct line routing. Prepare the tools and materials, then perform a dry-fit of the cabinet rail and microwave before final assembly. It’s important to validate vent connections, seal joints to prevent air leaks, and test the exhaust flow once the unit is mounted. Throughout the process, refer to the manufacturer’s manual for any unit-specific steps, screws, or wiring diagrams to ensure safety and compliance.
Maintenance, safety, and troubleshooting
Regular maintenance extends the life of your microwave over the range with vent. Clean grease filters and vent louvers frequently, inspect seals for wear, and check the vent duct for obstructions. Ensure proper clearance and stable mounting to prevent vibration or misalignment. If you notice reduced airflow, recheck the duct path and filters, and consider professional inspection for any duct blockages or mounting issues. Always unplug the unit before performing maintenance and follow local electrical codes when servicing.
Authority sources
For safety and installation best practices, consult official resources from recognized authorities. Links below offer in-depth guidance on general electrical safety, kitchen ventilation standards, and appliance safety considerations. They can help you assess risk, verify compliance, and plan a compliant installation for a microwave over the range with vent.
Tools & Materials
- Measuring tape(Measure cabinet width, height, and clearance to stove)
- Level(Ensure mounting rail is perfectly horizontal)
- Screwdriver set(Phillips and flat-head for brackets and screws)
- Drill with bits(For pilot holes in cabinetry and mounting surface)
- Stud finder(Locate studs for secure mounting)
- Electrical outlet tester(Check circuit condition if uncertain)
- Vent duct kit(Appropriate diameter and type for ducted venting)
- Duct tape and foil tape(Seal joints to prevent leaks)
- Mounting rails/brackets(As specified by microwave manufacturer)
- Safety goggles(Eye protection during mounting)
Steps
Estimated time: 2-4 hours
- 1
Assess space and plan layout
Measure the cabinet opening, assess ceiling height, and mark the intended centerline for mounting. Verifying alignment before drilling saves time and reduces risk of misfit. Confirm that vent routing is feasible and that there is a clear path for ductwork if you’re using a ducted vent.
Tip: Measure twice, drill once to avoid misalignment. - 2
Prepare mounting area
Locate studs, mark screw locations, and align mounting rails according to the microwave’s specifications. Ensure there’s level support and that screws are long enough to engage studs securely. Remove any obstructions from inside the cabinet to allow cable routing.
Tip: Use a stud finder and level to prevent sagging later. - 3
Install mounting brackets
Attach brackets to the wall or cabinet frame per the manufacturer’s instructions. Check for level and tighten securely. If mounting on studs, verify the distance between brackets matches the unit’s footprint.
Tip: Pre-thread screws to speed insertion during mounting. - 4
Rough-in electrical and vent connections
Position the microwave so you can access the power outlet or junction box. If venting, connect the duct to the microwave vent outlet and ensure seals are airtight. Do not crimp ducts or block airflow.
Tip: Turn off power at the breaker before handling electrical connections. - 5
Mount the microwave
Lift the unit into place and secure it to the mounting rails. Check that it sits flush against cabinets and that there is ample clearance for door operation. Recheck level after mounting.
Tip: Have a second person assist with lifting for safety. - 6
Test vent and electrical
Power up the unit and run a brief vent test to confirm airflow. Check for any unusual noises or vibrations. If ducted, ensure there are no air leaks at joints.
Tip: Run the exhaust for a few minutes to verify performance. - 7
Final safety checks and clean-up
Replace any filters, secure all wiring, and wipe down surfaces. Confirm there is no debris in the vent path and that the exterior panels are sealed. Record maintenance steps for future reference.
Tip: Keep the manual and installation notes in a safe place.
Common Questions
Do I need a separate vent for a microwave over the range?
Many microwaves include built-in venting, but you’ll need either an external vent duct or a recirculating vent if outdoor venting isn’t possible. Always follow the manufacturer’s venting guidance for your model.
Most microwaves have built-in venting, with options for outdoor venting or recirculation. Check your model’s manual for the recommended setup.
What electrical requirements should I expect?
A dedicated circuit is commonly recommended for microwaves to avoid overloading other outlets. Verify outlet type and voltage in the manual, and have a professional confirm wiring if you’re unsure.
Typically a dedicated circuit is best; always follow the manual and consult a professional if you're unsure about wiring.
Can I install this in a cabinet above the range?
Yes, many installations place the microwave above the range, but you must maintain safe clearance from the stovetop and ensure there’s a sturdy mounting surface. Follow the manufacturer’s height and ventilation guidelines.
Yes, but ensure proper clearance and a solid mounting surface per the manual.
Which is better: ducted vent or recirculating vent?
Ducted venting generally provides superior removal of steam and odors by venting air outside. Recirculating venting is easier to install where outdoor venting isn’t possible but may be less effective.
Ducted is usually more effective, but recirculating works when exterior venting isn’t an option.
How do I convert from vented to ductless (ductless kit)?
Ductless kits are available for many models and typically involve installing filters and a recirculating fan module. Check compatibility with your specific microwave and follow the included instructions.
Look for a model-specific ductless kit and follow the manual for safe installation.
Is installation a DIY job or should I hire a pro?
If you have basic carpentry and electrical skills and access to the right tools, a careful DIY installation is possible. Heavy lifting, wiring, or uncertain vent routing may require a licensed professional.
DIY is possible for skilled DIYers; for complex venting or electrical work, hire a pro.
Watch Video
Main Points
- Choose vent options that match your kitchen layout
- Follow manufacturer mounting instructions for safety
- Prefer ducted venting for better airflow
- Plan electrical needs before mounting
- Regularly clean filters and inspect seals