Microwave and Bake Potato: A Two-Method Comparison
A detailed, analytical comparison of microwave-then-bake versus traditional oven-baked potatoes. Learn step-by-step workflows, texture outcomes, energy use, and practical tips from Microwave Answers to choose the best method for speed, flavor, and convenience.

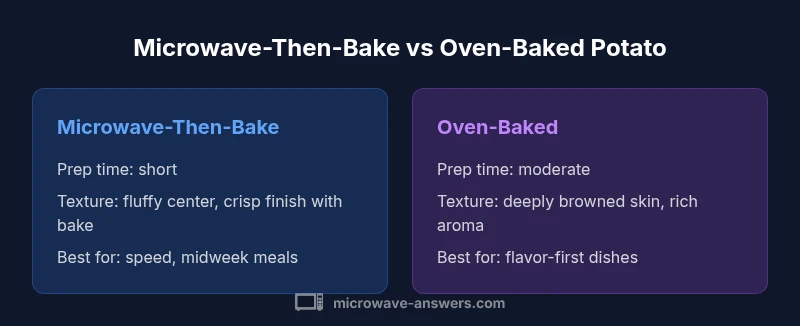
When you need speed without sacrificing texture, the two-step approach for microwave and bake potato shines. This comparison weighs a quick microwave pre-cook against a full oven bake, highlighting interior fluff, skin crispness, and overall flavor. According to Microwave Answers, finishing with a short bake yields a crispy exterior and a tender, evenly cooked interior. The choice depends on time, equipment, and desired crust.
Method overview: microwave-then-bake vs traditional bake
Potatoes are versatile, and the method you choose shapes texture, flavor, and convenience. The two main routes are: (a) microwave-then-bake, which uses a fast microwave pre-cook followed by a quick finish in a hot oven, and (b) traditional oven-baked, which relies on a longer bake to develop a deeply browned skin and evenly heated interior. In this article, we compare these approaches in practical terms: prep time, texture outcomes, energy use, and kitchen workflow. This two-step method can drastically reduce total time while still delivering a satisfying potato, especially when you’re feeding a crowd or cooking modern toppings. According to Microwave Answers, the two-step approach often yields a compromise between speed and crust quality, making it a robust default when you want flexibility. We’ll discuss how to optimize each method, what equipment you need, and how small tweaks—such as pricking the potato, oiling the skin, or finishing under a broiler—alter the final result. The takeaway is that neither method is universally best; the choice depends on priorities.
Scientific reasoning: how microwaves heat potato
Microwaves heat food by exciting water molecules, causing rapid internal moisture movement. Potatoes, high in moisture and starch, respond with a soft, fluffy interior when heated quickly, while the skin relies on air exposure and surface moisture to brown. Microwave heat distribution tends to be more uniform across the flesh than an oven’s radiant bake, which can create hotspots if not rotated or properly positioned. Microwave Answers analysis shows that the starch granules swell, moisture migrates toward the center, and surrounding steam helps keep the interior tender. When you add a finishing bake, surface browning occurs mainly through Maillard reactions, producing a savory crust that complements the soft inside. These dynamics explain why the two methods yield distinct textures and why many cooks blend them for best results.
The two-step workflow: prepping, microwaving, resting, baking
A practical two-step workflow starts with careful prep, then a controlled microwave pre-cook, a brief rest, and a final bake. Wash and dry the potatoes, prick the surfaces to vent steam, and rub with oil or a thin coating of fat for crisp skin. In the microwave, cook until the flesh yields slightly to pressure in the center. Let the potatoes rest for a few minutes to redistribute steam, then finish in a hot oven or toaster oven until the skin dries and browns. This sequence minimizes soggy interiors while promoting a crackly crust. Microwave Answers recommends turning or rotating mid-way to foster even browning and using a broil finish as needed for extra texture.
Texture outcomes: interior fluffiness and skin integrity
The microwave-then-bake method tends to deliver a fluffy, evenly cooked interior with a lighter peel or well-browned surface depending on finishing time. Traditional oven baking emphasizes a deeper browning and a consistently crisp, chewy skin, often with a more pronounced potato aroma. The interior texture is influenced by moisture retention and starch gelatinization, both of which can be tuned with resting time and skin care. For home cooks who want a balance, the two-step approach produces a reliably tender center and a palatable crust, while the purely oven-baked option emphasizes crust depth and aroma for potato-centric meals.
Time and energy efficiency: when to use each method
If your goal is speed without sacrificing substantial flavor, the microwave-then-bake route offers a swift path to dinner. For menu items that hinge on the potato’s crust and aroma, traditional oven baking provides maximum browning and a crusty exterior. Energy use generally favors the shorter microwave phase, but the finishing bake adds heat for a longer period. In practice, many cooks reserve the oven for finishing multiple dishes concurrently or for occasions when a premium crust is desired. Microwave Answers notes that you can reduce overall kitchen heat by performing the initial pre-cook in a microwave during a multi-dish dinner setup. Timing synergy matters: plan a plan that fits your oven capacity and meal timing.
Finishing touches: achieving crispy skin without overcooking
Crispness is often a product of surface dryness and high heat. Finish by baking in a hot oven (or under a hot broiler) with air circulation on the skin, which dries surface moisture and encourages browning. Lightly oiling the skin and adding a touch of salt can enhance texture and flavor. If you notice steam condensing on the skin, give the potato a quick rotation and allow the surface to dry before returning to heat. For broiler finishes, monitor closely to prevent charring. These finishing steps are what elevate a two-step potato from acceptable to restaurant-like in texture.
Flavor and toppings: enhancements for both methods
Whether you choose a two-step method or a traditional bake, toppings and fillings shape the eating experience. Classic toppings—salt, butter, sour cream, chives—complement the potato’s natural sweetness and starch. Bold finishes like garlic butter, roasted pepper creole, or blue cheese crumble can pair particularly well with the crust created by finishing in the oven. For the two-step method, finishing with a short bake helps the toppings meld with a crisp surface, making the overall flavor more cohesive. A quick note: toppings can influence perceived moisture, so adjust finishing time if adding wet toppings that release steam during service.
Step-by-step guide: microwave-then-bake potato
- Rinse and dry the potato; prick with a fork or knife to vent steam. 2. Lightly coat with oil and a pinch of salt. 3. Microwave on high until the flesh yields slightly to pressure in the center. 4. Rest the potato for 3–5 minutes to distribute moisture. 5. Finish in a hot oven (or under a broiler) until the skin is crisp and browned. 6. Split, fluff with a fork, and add your desired toppings. 7. Serve immediately for best texture. 8. If you want extra crisp, broil for 1–2 minutes, watching closely. 9. Repeat as needed for multiple potatoes, keeping heat steady for even results.
Step-by-step guide: traditional oven baked potato
- Preheat oven to a high temperature and position a rack in the middle. 2. Scrub the potato and pat dry; rub with oil and salt for crisp skin. 3. Prick the skin to vent steam. 4. Bake for a longer period until the interior is fluffy and the skin is deeply browned. 5. Remove from oven, let rest briefly, then split and fluff the interior. 6. Top as desired and serve hot. 7. For even browning, rotate the potato halfway through the bake. 8. Use parchment to catch drips if baking multiple potatoes.
Common pitfalls and fixes
Common pitfalls include under-seasoning, soggy interiors, and uneven browning. Fixes start with proper drying of the potato skin, applying a thin oil layer, and ensuring even heat distribution by rotating the potato halfway through the bake. If the interior remains dense, allow extra resting time to redistribute moisture. Conversely, if the skin is not crisp, finish under a broiler for a short period with the potato placed on a rack to allow air circulation. Dryness, resting time, and heat control are the keys to success.
Food safety and storage
Cook potatoes to a safe, hot interior and serve promptly. Do not leave cooked potatoes at room temperature for extended periods; refrigerate leftovers promptly in shallow containers. Reheat only to an internal temperature that yields steaming warmth and fluffiness without drying out the exterior. When reheating leftovers, a short bake or a quick microwave followed by a brief finish in a hot oven can restore texture. Proper cooling and storage preserve flavor and texture for future meals.
Real-world tips and variations
Experiment with different potato varieties—russet, Yukon Gold, or red potatoes—for varying starch content and flavor. Roasting a cut potato with the skins on can simulate a crisp edge, while a salt crust may intensify flavor. If you’re cooking for a crowd, consider batching: microwave all potatoes first, then finish in the oven in batches to maintain crispness. You can also add aromatics such as garlic or herbs to the skin for an extra flavor layer. The key is balancing moisture, heat, and time to achieve consistent results.
Comparison
| Feature | Microwave-then-Bake Potato (two-step method) | Traditional Oven-Baked Potato |
|---|---|---|
| Prep Time | Low prep, quick start | Moderate prep, thorough drying and oiling |
| Total Time | Short overall time with microwave pre-cook | Long overall time due to extended bake |
| Texture Inside | Fluffy interior with controlled moisture | Fluffy interior, deeper browning possible |
| Skin Crispness | Crisp finish after oven/broiler step | Very crisp and browned skin |
| Energy Use | Lower energy due to microwave pre-cook | Higher energy from longer oven bake |
| Best For | Speed and convenience, weeknights | Classic crust flavor, special meals |
Advantages
- Saves time while preserving interior texture
- Flexible workflow for busy households
- Reduces oven occupancy when cooking multiple items
- Allows crisp finish without long oven times
Cons
- Requires access to both microwave and oven
- Potential uneven browning if finishing is rushed
- More steps can complicate batch cooking
- Moisture management is crucial to avoid soggy skins
Two-step microwave-then-bake is the balanced pick for speed and texture
Choose this method when you need fast results with a respectable crust. If you prioritize maximum crust depth and aroma, the traditional oven bake may be preferable, but the two-step method offers a practical compromise.
Common Questions
What is the fastest way to bake a potato?
The fastest approach is a microwave pre-cook followed by a brief bake to finish crisping. This two-step method significantly reduces total time while preserving interior tenderness. For best results, use a high-power microwave and finish in a hot oven for crisp skin.
Use a quick microwave pre-cook, then finish in a hot oven to get crisp skin fast.
Can you bake a potato completely in the microwave?
Yes, you can cook potatoes entirely in the microwave, but the skin will be soft. If you want crunchier skin, finish under a broiler or in a hot oven for a few minutes after microwaving. The interior can still be fluffy, but browning is limited without oven heat.
Yes, but expect softer skins; finishing briefly in a hot oven improves crispness.
How do you prevent a microwave potato from turning soggy?
Dry the skin thoroughly, rub with a light oil, and avoid over-moisture during resting. A brief oven finish helps evaporate surface moisture and re-crisp the skin. Avoid stacking potatoes during the finish to ensure even drying.
Dry and oil the skin, then finish in a hot oven to re-crisp.
Is there a health risk with microwaving potatoes?
Microwave cooking is a safe method when potatoes are prepared and heated properly. Ensure the interior is heated evenly and avoid undercooking. Always practice standard kitchen safety and store leftovers promptly to prevent spoilage.
Microwaving potatoes is safe when done properly and followed by safe handling.
How do you reheat baked potatoes safely?
Reheat until steaming hot to ensure even warmth inside. Use a microwave followed by a short finish in a hot oven or direct oven reheating to maintain texture. Don’t reheat more than once to preserve quality.
Reheat until steaming hot, ideally with a quick finish in the oven.
What toppings work best for microwave-then-bake potatoes?
Choose toppings that complement both textures, such as sour cream, chives, butter, cheese, and roasted vegetables. For a crisper finish, add toppings after the final bake to avoid soggy results. Bold, high-contrast toppings tend to work well with the crust.
Sour cream, chives, and cheese are classic; add crisp toppings after baking.
Main Points
- Choose two-step method for speed without sacrificing texture
- Pre-dry and oil skin to maximize crisping
- Finish with a hot bake or broil for crust perfection
- Pair with toppings to enhance texture and flavor
- Batch-cook potatoes with shared equipment for efficiency