How to Tell If Your Microwave Vents Outside: A Practical Guide
Discover clear, practical steps to determine whether your microwave vents outside or recirculates air. Learn safe testing methods, common configurations, and upgrade options for better kitchen ventilation.

To tell if your microwave vents outside, identify the exterior vent cover and trace the exhaust duct back to the unit, then observe airflow when the microwave runs. If air exits through the outside opening and you see or feel it on the interior side, the unit vents outside. If not, it may be recirculating air through an interior filter.
Understanding Microwave Venting: Venting Outside vs Recirculation
Ventilation in home microwaves falls into two broad categories: venting to the outdoors through a dedicated duct, or recirculating air back into the kitchen via filters. Over-the-range models often connect to a dedicated vent through a roof or wall, while some under-cabinet units vent through a ceiling cavity or side wall. Knowing which path your unit uses affects moisture control, odor management, and maintenance needs. According to Microwave Answers, a reliable starting point is to trace the exhaust from the microwave to its exterior outlet and inspect any dampers or blockages in the duct. If you can feel a steady flow of air at the exterior vent while the microwave runs, you likely have outdoor venting. If air is not exiting outdoors and a filtration system is obvious inside, you’re probably dealing with recirculation. This knowledge guides safe usage and any potential upgrades for better kitchen air quality.
How to Tell If Yours Vents Outside
Determining the venting path begins with two simple checks: the exterior vent and the interior hood. Start by locating the exterior vent cover, usually on an outside wall or soffit near the kitchen. If air pushes out when the microwave is in use, that’s a strong indicator of outdoor venting. Next, inspect the interior hood and cabinet area for ductwork. A visible duct connected to the microwave that leads to the outside, along with a damper or flapper, confirms outdoor venting. If you find a filter in the hood and no outdoor air movement, your appliance is likely recirculating. Always consult the model’s manual or manufacturer website when in doubt, as some installations use hybrid or non-standard paths.
Inspect Exterior Vent Cover and Duct Access
Exterior vent covers can hide dampers or flapper valves that control exhaust flow. Remove the cover carefully, using a flashlight to inspect for lint buildup, corrosion, or a stuck damper. Look for a clear airflow path—any obstruction here reduces venting efficiency and can cause backpressure. If you notice damage, replace the cover or dampers as needed. In some cases, a blocked exterior vent is a safety concern, especially in tight weather conditions when backdrafts could affect indoor air quality.
Checking Interior Cabinet and Duct Connections
Behind the microwave, accessible ductwork should be straight and properly connected to minimize leaks. Inspect joints for loose clamps or gaps that could allow air to escape indoors. If you see significant lint buildup or moisture around duct joints, clean and reseal as appropriate. Ensure there is a continuous path from the microwave’s exhaust outlet to the exterior, without oversized bends that could impede airflow. If you’re unsure, consult a professional to assess duct integrity and ensure a proper seal.
Simple Airflow Tests You Can Safely Perform
A practical test involves observing airflow at the exterior vent while the microwave runs at a moderate exhaust setting. If you have a smoke pencil or incense, hold it near the interior exhaust opening and watch for steady airflow toward the exterior. A weak or erratic flow may indicate a blockage, a leak, or an improper damper position. Do not perform tests near open flames; use safe testing methods and monitor for unusual heat or sparking. Always unplug the unit before removing covers to inspect duct connections.
Common Configurations and What They Mean for Performance
Many homes use a ducted exhaust that exits through a wall or roof, especially with over-the-range microwaves. Some configurations are “through-the-wall” ducts that require proper slope and minimal bends to prevent condensation. Others are non-ducted, recirculating models that rely on filters to remove odors and moisture before recirculating air. Understanding your setup helps explain why certain smells linger after cooking and whether a retrofit to outdoor venting is feasible. If you live in an apartment or you’re unsure about building codes, consult the property manager or a licensed HVAC technician.
Upgrading from Recirculating to Outdoor Venting: What to Consider
Upgrading often involves adding or extending ductwork to reach an exterior opening, plus a vent hood or wall cap that accommodates proper damper operation. Before starting, verify local code requirements and whether a permit is needed. Plan for potential ceiling or wall modifications, adequate clearances, and minimal changes to cabinet structure. A professional can help design a compliant path that minimizes long, sharp bends and ensures a tight seal to prevent leaks.
Maintenance Tips for Efficient Venting
Regular maintenance keeps venting effective. Clean exterior vent covers and dampers to prevent blockages from lint and debris. Inspect interior duct connections for loose clamps and seal gaps with appropriate tape or mastic. Periodic inspection of the hood filters and replacing them when necessary helps maintain airflow. Consider scheduling a yearly check, especially in high-use kitchens, to maintain optimal venting performance and reduce kitchen odors.
Safety Considerations and When to Call a Professional
Ventilation work involves electrical components and ductwork that run through walls and ceilings. If you notice persistent smoke, unusual heat, or unusual noises when the microwave runs, stop using the unit and seek a licensed HVAC technician or electrician. Do not attempt to seal or modify ductwork beyond your comfort level. A professional can ensure code-compliant venting, proper damper operation, and a safe, airtight connection to the exterior.
Quick-Start Checklist You Can Use Today
- Locate exterior vent cover and verify airflow when the microwave runs
- Inspect interior duct connections for secure seals
- Check for visible lint or debris on ducts and covers
- Confirm the hood filter is clean and properly installed
- Review the model manual for venting configuration and recommendations
Tools & Materials
- Flashlight(Shine into cabinets to inspect duct paths)
- Tape measure(Assess duct length and clearance)
- Screwdriver set(Open vent covers or access panels safely)
- Small mirror or smartphone camera(Inspect tight interior spaces)
- Incense stick or smoke pencil(For airflow visualization)
- Notepad and pen(Document findings and next steps)
- Safety gloves(Protect hands during inspection)
- Masking tape or duct sealant(Seal minor gaps after inspection)
Steps
Estimated time: 60-120 minutes
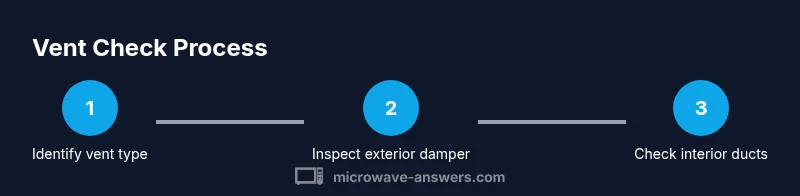
- 1
Identify vent type
Check if the microwave exhaust leads to an exterior opening or only to a filter inside. Confirm with the manual or model online for the venting configuration. This establishes whether you should expect outdoor airflow during operation.
Tip: Label the exterior vent path with tape to avoid confusion later. - 2
Locate exterior vent cover
Find the outdoor vent cover on the exterior wall. Remove the cover carefully and inspect for a damper, screen, or evidence of airflow. This step helps verify outdoor ventilation capability.
Tip: Take a photo of the exterior cover for reference when discussing upgrades. - 3
Inspect exterior damper
Look for a movable damper or flapper inside the exterior duct. Ensure it opens freely when air is exhausted and closes when not in use to prevent backdrafts.
Tip: If the damper is stuck, do not force it—consult a professional. - 4
Check interior duct connections
Access the cabinet area behind the microwave and inspect duct joints. Tighten clamps and reseal gaps to improve airtightness and reduce leaks into the kitchen.
Tip: Turn off power before touching electrical components. - 5
Look for obstructions
Search for lint, dust, or moisture buildup along the duct run that could restrict airflow. Clean as needed to restore efficient exhaust.
Tip: Only use approved duct cleaners and avoid harsh solvents near electrical parts. - 6
Perform exterior airflow test
Run the microwave at a moderate exhaust setting and observe the exterior vent. Air should flow visibly or feel like a breeze at the opening.
Tip: If you don’t detect airflow, reconsider duct integrity and damper operation. - 7
Confirm interior airflow
If you have a smoke pencil or incense, position it near the interior exhaust and look for a steady draw toward the exterior. A weak draw may indicate leaks or poor path design.
Tip: Avoid using open flames—smoke pencils are safer for visualization. - 8
Assess vent path length and bends
Long runs with many elbows reduce efficiency and can cause condensation. If the run is excessive, plan improvements with a professional.
Tip: Aim for the shortest practical path with gentle angles. - 9
Document results and plan next steps
Record findings, including exterior airflow status and any recommended upgrades. Decide whether a retrofit to outdoor venting is feasible within your space and budget.
Tip: Keep a simple drawing or photo log to share with a technician.
Common Questions
How can I tell if my microwave vents outside?
Look for an exterior vent cover and visible ducting that leads outside. If air exits the exterior vent while the microwave runs, your unit vents outside. If no outdoor airflow is seen, it may be recirculating.
Check the exterior vent and listen for airflow when the microwave operates.
Can I convert a recirculating vent to vent outside?
Yes, conversion typically involves adding or extending ductwork to an exterior opening and installing a proper vent hood or wall cap with a damper. Codes and permits may apply, so consult a professional.
A professional can assess feasibility and code requirements for outdoor venting.
Is venting outside better for odors and moisture?
Venting outside generally reduces kitchen odors and moisture buildup compared to recirculating air, which relies on filters. However, proper installation and maintenance are essential for safety and effectiveness.
Yes, outdoor venting typically provides better odor and moisture control when correctly installed.
Do all microwaves vent outside by default?
No. Some microwaves are designed to recirculate air through interior filters. Check your model's manual to confirm whether it is ducted or non-ducted.
Check the manual to confirm if your model vents outside or recirculates.
What should I do if there’s no exterior vent and odors linger?
If there is no exterior vent, odors may linger due to recirculation or leakage. Clean or replace filters and ensure the hood is sealing properly. Consider a professional evaluation for potential retrofit.
Clean filters and seal the hood; a pro can help with retrofitting if needed.
Watch Video
Main Points
- Identify whether venting is outdoors or recirculating.
- Check exterior vent and interior duct connections for blockages or leaks.
- Consider upgrades only if local codes allow and a proper path exists.
- Regular maintenance improves venting efficiency and kitchen air quality.