How to Make a Potato in the Microwave: A Practical Guide
Learn to make a fluffy microwave potato with crisp skin in minutes. Step-by-step, safety tips, and tasty topping ideas for home cooks and busy households.

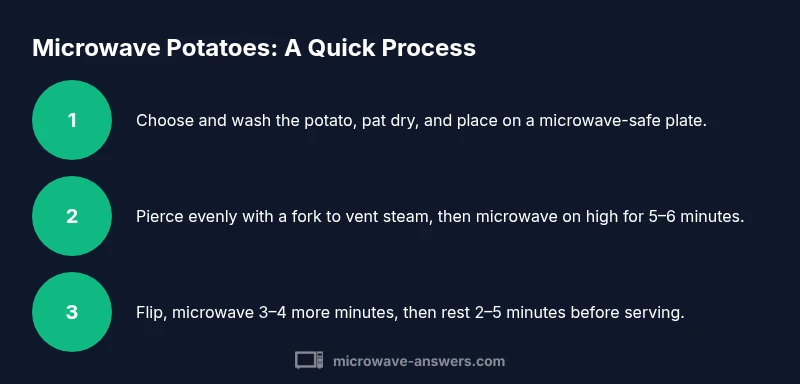
You will learn how to make a potato in the microwave quickly and safely. Start with a medium russet, scrub it clean, and pat dry. Pierce with a fork, microwave on high for 5–6 minutes, flip, then finish 3–4 minutes more. Let it rest briefly, then cut open and fluff the inside.
How to Make a Potato in the Microwave: A Practical Start
According to Microwave Answers, microwaving a potato is a swift and reliable method for a satisfying side dish or a quick meal base. The primary keyword for this guide is the exact phrase how to make a potato in the microwave, and it appears in this opening section as part of the topic framing. With the right approach, you can achieve a fluffy interior and a lightly crisped skin in under ten minutes, making it a favorite technique for busy home cooks. This method aligns with real-world kitchen workflows and avoids the common pitfalls of overcooking or underseasoning. The Microwave Answers team emphasizes safety, consistent results, and practical toppings that elevate a simple potato into a complete dish.
Choosing the Right Potato for the Microwave
Most home microwaves work well with standard baking potatoes, especially russet varieties, which have a starchy interior and sturdy skins. Yukon Golds can also cook nicely, offering a creamier texture if you prefer. When selecting potatoes, look for firm potatoes with unblemished skin and a reasonable size (roughly equal to the width of your palm). Larger potatoes may require additional time, while smaller ones cook faster. Microwave-ready potatoes are a convenient staple for quick meals, and choosing the right variety helps maximize texture and flavor.
Prep and Safety Basics for Microwave Potatoes
Before any cooking, wash the potato thoroughly under cold running water to remove dirt and any surface residues. Pat dry with a clean towel to promote even cooking and minimize moisture buildup on the skin. Do not use foil or metal cookware in the microwave, as metal can arc and cause damage or fire. If you’re using a plate or dish, choose microwave-safe options and ensure they are within your appliance’s safe size. By starting with clean, dry produce and safe cookware, you reduce the chance of off-flavors or safety issues during cooking.
Piercing, Wrapping, and Positioning in the Oven and Microwave
Pierce the potato all over with a fork or a skewer to allow steam to escape; this prevents bursting and creates a fluffy interior. Place the potato directly on a microwave-safe plate or on a lined paper towel to wick away excess moisture. If you want extra protection against moisture, you can wrap the potato loosely in a damp paper towel, but avoid tight wrapping or plastic wrap that traps steam unevenly. Position the potato so it cooks evenly—rotating halfway through helps ensure a uniform texture.
Timing and Power: A Quick Cheat Sheet for Different Sizes
For a standard medium russet, start with 5–6 minutes on high, then flip and cook another 3–4 minutes. If the potato is very large, add 1–2 minutes; if small, reduce by a minute. The goal is a soft center with skin that yields gently under pressure. Resting for 2–5 minutes after microwaving allows steam to finish the cooking process and helps the potato fluff up when you cut into it. If you’re unsure, test with a fork—the potato should slide in easily with little resistance.
Resting, Fluffing, and Serving Your Microwave Potato
Let the potato rest after firing the microwave so the interior finishes cooking through steam. Slice it open, puff the fluffy interior with a fork, and add a pat of butter or a splash of olive oil to enrich flavor. Common toppings include sour cream, shredded cheese, chives, or a pinch of salt and pepper. If you want extra crispness, you can place the cut surface under a hot broiler for 1–2 minutes, but this step is optional and not required for a perfect microwave potato.
Common Mistakes and How to Fix Them
One frequent mistake is undercooking the center. If your fork doesn’t slide in easily after the initial cook time, nudge the potato back into the microwave for 1–2 more minutes. Another error is an overly dry exterior; you can brush with a little oil or butter before finishing to improve texture. Finally, avoid using metal utensils or aluminum foil in the microwave, which can reflect microwaves and cause uneven cooking or arcing.
Variations, Toppings, and Quick Combos
A microwave potato is a flexible base for many toppings. Try a scoop of seasoned yogurt, a sprinkle of chili powder, or a dollop of garlic butter for a lighter twist. For heartier meals, top with shredded chicken, steamed broccoli, or sautéed mushrooms. If you’re counting calories, keep toppings light and opt for herbs, lemon zest, or a sprinkle of paprika to brighten the flavor without adding heavy sauces.
Troubleshooting and Alternative Methods for Challenging Potatoes
If your potato seems stubborn, check size and evenness of the cooking surface. Unevenly sized potatoes may need an extra minute or two, with a brief rotation between checks. If you don’t have a microwave, you can use a conventional oven for a crisper skin, or even an air fryer for a faster, textured finish. The goal is to achieve a tender interior with a skin that’s pleasant to bite, which is easily accomplished with these precise steps.
Tools & Materials
- Medium Russet Potato (or similar baking potato)(Choose a potato roughly the size of your palm for even cooking.)
- Microwave-safe plate(Ensure it fits your microwave's turntable.)
- Fork or skewer(Pierce evenly to vent steam.)
- Paper towel or kitchen towel(Use to wick moisture if desired; optional.)
- Butter, oil, or toppings of choice(For flavor and optional crispness.)
- Sharp knife or kitchen shears(For serving and optional toppings prep.)
Steps
Estimated time: 8-12 minutes active cook time plus 2-5 minutes resting
- 1
Select and Prep
Choose a moderate-sized russet potato and rinse under cold water to remove dirt. Pat dry with a clean cloth and place on a microwave-safe plate. This ensures a clean, safe starting point and predictable cooking results.
Tip: A clean surface helps prevent off-flavors and uneven heating. - 2
Pierce for Venting
Use a fork to pierce the potato all over, creating multiple vents. This prevents steam buildup from causing an explosion and helps the interior cook evenly.
Tip: Aim for 6–8 small holes across the potato. - 3
Initial Microwave Time
Place the potato on the plate and microwave on high for 5–6 minutes. This initial time starts the interior cooking without overdoing the skin.
Tip: If your potato is larger, add 1–2 minutes in 30–60 second increments. - 4
Flip and Finish Cooking
Carefully flip the potato to promote even heating and microwave for another 3–4 minutes. Check tenderness with a fork; it should slide in with minimal resistance.
Tip: Use oven mitts—the plate will be hot after microwaving. - 5
Rest Briefly
Let the potato rest for 2–5 minutes. Resting allows steam to distribute and finish the interior cooking for a fluffy texture.
Tip: Cover loosely with a clean towel to keep warmth without trapping extra moisture. - 6
Serve with Toppings
Slice open, fluff with a fork, and add butter, salt, and your favorite toppings such as sour cream, chives, or cheese.
Tip: For a quick crispy edge, a light brush of oil on the cut surface helps texture. - 7
Adjust for Variations
If you’re using a different potato type, monitor texture and extend cooking time as needed in small increments.
Tip: Sweet potatoes require different times; start with 6–8 minutes and test for softness. - 8
Safety and Cleanup
Wipe the plate and microwave interior after cooking to prevent starch buildup. Store leftovers safely and reheat to an internal temperature of at least 165°F if saving for later.
Tip: Always let cookware cool before cleaning to avoid burns.
Common Questions
Can I microwave any potato for this method?
Most baking potatoes work well in the microwave, with russets being the most common choice due to their starchy interior. Adjust times for smaller or larger varieties and test for tenderness with a fork.
Yes, russet potatoes are ideal for this method, but you can use other baking varieties and adjust cooking times as needed.
How can I get crisper skin from a microwave potato?
Pat the potato dry, lightly brush with oil, and finish with a quick broil or direct hot heat for 1–2 minutes after microwaving if you want crisper skin.
Pat dry, oil lightly, and optional 1–2 minute broil after microwaving for crisper skin.
What if the inside is still hard after the initial cook?
Return the potato to the microwave and cook in 1-minute increments until a fork slides in easily. Resting afterward helps even out the texture.
If the center is hard, cook a little longer in 1-minute bursts and rest before serving.
Is reheating a microwaved potato safe?
Yes, reheat gently until steaming hot, and store leftovers promptly in the refrigerator. Reheat to piping hot and enjoy within a few days.
Yes, you can reheat, just make sure it’s hot all the way through.
Can I microwave a sweet potato the same way?
Sweet potatoes require a bit more time and a slightly different texture; start with 6–8 minutes, test for tenderness, and adjust as needed.
Sweet potatoes take a bit longer—start with 6–8 minutes and test for tenderness.
What about scented toppings or cheese mixed in?
Toppings can add flavor and moisture; butter, yogurt, cheese, or herbs pair well without adding heavy fats. Keep portions reasonable for best texture.
Cheese and butter add flavor—use in moderation for the best texture.
Watch Video
Main Points
- Wash and dry the potato before microwaving.
- Pierce holes for venting to avoid bursting.
- Cook in stages with a flip to ensure even texture.
- Rest and fluff for a pleasantly light interior.