How Long to Microwave Milk for Hot Chocolate: A Practical Guide
Learn exactly how long to microwave milk for hot chocolate, with safe timing, temperature cues, and a step-by-step method for creamy, consistent results every time.

If you want a smooth, creamy hot chocolate base, know that timing matters. Start with short heat bursts and stir often, aiming for steaming milk that’s warm but not boiling. This quick guide explains safe timing, power considerations, and how to blend in cocoa so your drink stays silky. Use the step-by-step approach for reliable results.
Why timing matters for microwave milk in hot chocolate
Timing matters when you want hot chocolate with a smooth, velvety milk base. If you’re asking how long to microwave milk for hot chocolate, you’re not alone. According to Microwave Answers, microwave heating is inherently uneven, so you must use short heating intervals and frequent stirring to avoid hot spots and scorching. The goal is a warm, creamy milk that carries the cocoa evenly without boiling. Start with a modest amount of milk in a microwave-safe mug, leaving headspace for expansion, and choose a container with a wide mouth to promote even heating. These small decisions influence flavor as much as the duration of heating. By understanding microwave behavior and applying practical tips from the Microwave Answers Team, you can dial in a safe, repeatable timing approach. The result is a smooth base that dissolves cocoa thoroughly, producing a café-quality hot chocolate at home.
Practical timing ranges by situation
Power and vessel shape strongly influence heating time. In practice, think in cycles rather than a single long zap. For a standard 8- to 12-ounce mug (roughly 240–350 ml) in a typical 1000-watt microwave, start with 60 seconds on medium power, then stir and check. If the milk is still cool, repeat in 30–45-second bursts until you reach steaming warmth. If your microwave runs on lower wattage (700 W), you may need an extra cycle or two. If you’re using dairy-free milks, the heating profile remains similar, but watch for surface separation or a film. The key indicators are rising steam and tiny bubbles along the edges, not a full boil. Stirring after each interval helps distribute heat and prevents scorching or skin formation. Finally, remove the mug promptly when steaming begins, so you can whisk in cocoa while the milk stays warm and fluids mix smoothly.
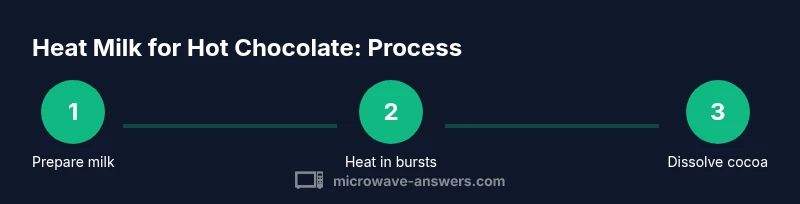
A repeatable 3-step heating method
Step 1 — Pour: Pour 1 cup (240 ml) of milk into a microwave-safe mug, leaving about 1/2 inch (1 cm) headspace. Step 2 — Heat in bursts: Microwave on medium power in 30–60 second bursts, stirring between bursts until the milk is evenly warm and steaming. Step 3 — Test and proceed: Use a thermometer (preferably) to check around 140–160°F (60–71°C) or simply rely on steam, then dissolve the cocoa. Tip: If you want a frothier finish, whisk vigorously after heating and before adding chocolate. For best flavor, add cocoa powder (or melted chocolate) after heating, not while heating.
Common mistakes and how to avoid them
Common mistakes can derail your hot chocolate before you even taste it. Overheating is the most frequent issue; do not let the milk boil, and stop heating as soon as you see large bubbles forming around the rim. Skimming the surface leads to a skin; keep stirring and consider finishing with a quick whisk. Uneven heating happens when using a small or irregular container or when you skip stirring; choose a wide-mouthed mug and stir between cycles. Finally, using metal or foil should be avoided in a microwave at all times; always use microwave-safe materials to prevent arcing and damage. Following these checks ensures your hot chocolate stays silky and inviting.
Quick tips for café-quality hot chocolate at home
- Pro tip: Use a whisk or frother after heating to create a creamy texture.
- Pro tip: If using cocoa powder, make a paste with a small amount of milk before mixing to avoid clumps.
- Warning: Do not allow milk to boil; overheating may scorch flavor and ruin texture.
- Note: For dairy-free milks, heat a bit more slowly to avoid separation.
- Pro tip: A warm mug helps keep the milk from cooling during cocoa addition.
- Note: Always stir between heating bursts for even warmth and to prevent skin formation.
Tools & Materials
- Microwave-safe mug (8–12 oz capacity)(Choose a wide-mouth mug for even heating)
- Milk (dairy or dairy-free)(Whole or 2% recommended for creaminess; dairy-free alternatives work too)
- Digital thermometer (optional)(Helpful to target ~140–160°F (60–71°C))
- Spoon or whisk(For stirring between bursts and dissolving cocoa)
- Oven mitt or dish towel(Protect hands when removing hot mug)
Steps
Estimated time: 3-6 minutes
- 1
Pour milk into microwave-safe mug
Pour 1 cup (240 ml) of milk into the mug, leaving about 1/2 inch (1 cm) of headspace to accommodate expansion.
Tip: Always leave room at the top to avoid overflow during heating. - 2
Heat in short bursts
Micro wave on medium power in 30–60 second bursts. Between each interval, bring the mug out (carefully) and stir to distribute heat.
Tip: Stirring between bursts prevents hot spots and ensures even warmth. - 3
Check warmth and steam
Look for rising steam and small bubbles around the edges. If you don’t see steam, continue heating in short bursts and stirring.
Tip: If you use a thermometer, target about 140–160°F (60–71°C). - 4
Dissolve cocoa after heating
Once the milk reaches the desired warmth, whisk in cocoa powder or melted chocolate until fully dissolved.
Tip: Dissolving cocoa first avoids grainy texture; a paste helps prevent clumps. - 5
Adjust sweetness and texture
Add sugar or sweetener to taste and whisk again for a creamy finish. If you want extra froth, whisk vigorously for 15–20 seconds.
Tip: Taste and adjust in small increments to avoid oversweetening. - 6
Serve promptly
Pour into a cup or enjoy directly from the mug while warm. Stir once more before drinking to ensure comfort in every sip.
Tip: Serve immediately to preserve warmth and texture.
Common Questions
How long should I microwave milk for hot chocolate?
Start with 1 minute on medium power, then 30-second bursts, stirring between each. Repeat until steaming, never boiling, and then add cocoa.
Start with one minute, then half-minute bursts while stirring, until steaming. Add cocoa after heating.
Can I microwave chocolate with the milk at the same time?
It's better to heat milk first, then whisk in cocoa or melted chocolate after heating to ensure smooth dissolution.
Heat the milk first, then add chocolate and stir until smooth.
Is it safe to heat milk in a glass mug?
Yes, as long as the mug is microwave-safe and free of any metal trim or decorations.
Yes. Use a microwave-safe glass mug without metal.
What if the milk starts to boil?
Stop heating immediately, stir, and let it cool slightly before resuming at a lower setting.
If it boils, stop heating, stir, and try again at a lower power.
How can I prevent a skin from forming on top?
Stir frequently and consider reducing the time between bursts; finishing with a quick whisk helps.
Stir often and whisk at the end to keep it smooth.
Can I use dairy-free milk for hot chocolate?
Yes, most dairy-free milks work; flavor and texture vary, so adjust heating to taste and texture.
Dairy-free works; adjust heating for texture and flavor.
Main Points
- Heat in short bursts for safety and control
- Stir between intervals to prevent hot spots
- Aim for steaming warmth, not a boil
- Dissolve cocoa after heating for best texture
- Adjust wattage and cup size for consistency