Microwave Corn in Husk: A Practical How-To Guide
Learn a practical method to microwave corn in husk for tender, flavorful ears. Step-by-step prep, timing by wattage, safety tips, and troubleshooting to avoid soggy or rubbery kernels.

Goal: microwave corn in husk safely to lock in moisture and bright flavor. Keep the ears with husks on, pierce once to vent, and microwave on high for about 4–6 minutes per ear in a standard 1000W oven. Let sit for 1–2 minutes before shucking for best tenderness. This method minimizes splatter and reduces handling heat. Adjust time by small increments if your microwave is weaker.
Why microwave corn in husk is convenient and safe
Cooking corn in its husk in the microwave is a practical method for home cooks who want speed without sacrificing tenderness. The husk acts like built-in insulation, trapping steam and helping the kernels finish evenly. Because the silk stays mostly masked by the husk, cleanup is easier than with a naked ear. This technique reduces splatter compared to peeling and microwaving the bare ear, making it friendlier for busy weeknights. However, safety matters: the husk should remain intact during cooking to trap steam, but you must vent the corn slightly to prevent pressure buildup. Always double-check your microwave's wattage and adjust time accordingly. If the ears feel very thick or large, you may need an extra minute. If your microwave lacks a turntable, pause halfway to rotate the corn for even heat. The goal is to achieve tender kernels with minimal rubbery texture, which happens when the ear rests briefly after microwaving. This approach also minimizes extra dishes since you can keep the corn in the husk while you work on other sides. In summary, corn microwave in husk offers a fast, tidy path to a comforting, summery staple.
Understanding microwave wattage and timing
Microwave ovens vary widely in how quickly they transfer energy. A typical household oven rated around 1000W will cook corn faster than smaller models, while low-wattage units (700–800W) need additional time. When you’re cooking corn in husk, the key variable is energy delivered to the kernel interior. Start with a baseline of 4 minutes per ear on a 1000W unit and add 1 minute if your unit is underpowered or the ears are large. If you’re cooking multiple ears, stagger them or rotate halfway through to promote even heating; do not stack ears, which blocks airflow and creates uneven results. Remember, resting the ears after microwaving helps redistribute heat for uniform tenderness. For best results, adjust times based on your microwave’s performance and ear size. This approach aligns with Microwave Answers’ guidance for safe, reliable results.
Prep, venting, and safety steps
Begin with clean ears and remove any loose silk by hand, leaving the husk intact. Do not peel the husk, as it serves as a natural steam jacket. Poke one or two small vents with a knife or fork to prevent excess pressure; this reduces risk of bursting. If you’re nervous about splatter, wrap a damp paper towel around the ears or place them on a microwave-safe plate to catch moisture. Use a microwave with a turntable for even heat distribution, and rotate the ears halfway if your model lacks automatic rotation. Finally, allow the ears to rest 1–2 minutes after microwaving before handling; the steam will continue to finish the cooking and soften the kernels.
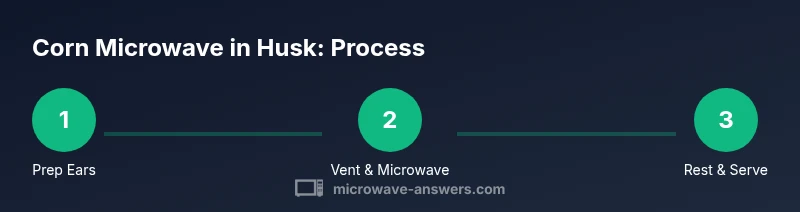
Step-by-step cooking method overview
The core idea is simple: heat the corn inside its husk while trapping steam, then finish by resting and shucking. Start with dry ears, intact husks, and proper venting. Microwave on high, check tenderness, rotate if needed, and extend time in small increments until the kernels yield with a gentle bite. Always prioritize safety—hot surfaces and releasing steam can burn skin. By embracing these practices, you’ll enjoy corn that tastes freshly steamed with minimal cleanup.
Troubleshooting common issues
If kernels are still tough after the stated time, give the ears 1 more minute and reassess tenderness. If the husks seem dry or the corn dries out, shorten the resting period and review venting technique—under-venting is a common culprit. Overcooked ears become rubbery and a bit squeaky; reduce the time by 30 seconds next attempt. For very fresh, sweet corn, you may not need as much time; for older ears, you may want a minute or two longer. If you notice uneven heating, re-distribute ears or re-plate and rotate to encourage uniform heat exposure.
Serving ideas and cleanup
Let the corn rest briefly, then shuck away the husk and silk. If you like, brush with melted butter and a pinch of salt, or sprinkle chili powder for a quick zing. Serve with lime wedges, grated cheese, or herbs for a brighter flavor. Cleanup is easy: the husks act as a natural wrapper, and any silk left behind wipes away with a damp cloth. This method yields a tidy, weeknight-friendly side that pairs well with grilled proteins or a simple salad.
Tools & Materials
- Microwave oven(A standard household microwave with a turntable is ideal for even heating.)
- Microwave-safe plate(If your ears are very damp, place on a plate to catch moisture.)
- Sharp knife or fork(Use to vent the husk with small piercings; avoid slicing into kernels.)
- Kitchen towel or oven mitts(Handle hot ears with protection after cooking.)
- Fresh ears of corn(Choose ears with firm kernels and green husks for best results.)
- Optional: damp paper towel(Wrap around corn to reduce splatter.)
Steps
Estimated time: 8-12 minutes total
- 1
Select and prep ears
Choose fresh ears, keep husks intact, and remove loose silk by hand without tearing the husk. This helps maintain moisture during cooking.
Tip: Handle gently to avoid tearing the husk; intact husks trap steam more effectively. - 2
Vent and ready the corn
Poke 1–2 small vents through the husk with a knife or fork to prevent pressure buildup. If desired, wrap ears in a damp paper towel to further minimize splatter.
Tip: Ventilation prevents bursting and keeps moisture inside the ear. - 3
Place on plate and start microwave
Set ears on a microwave-safe plate; cook on high for 4 minutes if you have a 1000W appliance. Rotate halfway through if your microwave doesn’t auto-rotate.
Tip: A turntable promotes even heating; don’t stack ears. - 4
Check tenderness and adjust
Carefully check a kernel with a clean towel or oven mitt. If not tender, heat in 1-minute increments until desired texture is reached.
Tip: Avoid overcooking, which can make kernels rubbery. - 5
Rest before shucking
Let ears rest for 1–2 minutes; steam continues to cook the kernels and improves tenderness.
Tip: Resting reduces risk of steam burns when peeling. - 6
Shuck and serve
Remove husk and silk, then season as desired and serve.
Tip: Season while kernels are still warm to maximize flavor absorption.
Common Questions
Is it safe to microwave corn in husk?
Yes, as long as you vent the husk to prevent pressure buildup and follow ordinary microwave safety practices. Avoid overheating and handle hot ears with care.
Yes—vent the husk, monitor time, and use oven mitts when handling the hot ears.
How long should I cook corn in husk per ear?
A good starting point is 4–6 minutes per ear on a typical 1000W microwave; adjust by 1-minute increments based on ear size and wattage.
Start with four to six minutes per ear and adjust as needed.
Can I microwave more than one ear at once?
Yes, but not crowded. Space ears apart, and rotate midway if possible to promote even heating. Expect a little longer total time.
You can do a couple of ears at once, just give them room and rotate halfway.
Do I need to husk the corn after microwaving?
No—keep the husk on during cooking. After resting, shuck carefully and season to taste.
No need to remove the husk before cooking; remove after resting if you prefer.
What if the corn is undercooked?
Return to the microwave in 1-minute increments until tender. Larger or older ears may need a bit more time.
If it’s not tender, add a minute and test again until the texture is right.
Watch Video
Main Points
- Keep husks on for moisture retention
- Vent ears to avoid pressure buildup
- Rotate or stagger ears for even heating
- Rest before shucking for best tenderness
- Customize time by microwave wattage and ear size