How to Make Chocolate Chip Cookies in the Microwave
Learn to bake soft, chewy chocolate chip cookies in the microwave with simple ingredients, precise timing, and safety tips from Microwave Answers. A fast, reliable method for tasty results without turning on the oven.

By using the microwave, you can produce soft, chewy chocolate chip cookies in minutes. This quick method requires basic ingredients, a microwave-safe plate, and careful timing to avoid hard centers. You’ll learn a simple dough, how to portion for even browning, and how to rest the cookies briefly after baking for best texture. Expect a total workflow of roughly 15–25 minutes.
Why the Microwave Method for Chocolate Chip Cookies?
The chocolate chip cookies microwave approach is a practical option for busy homes. It leverages the microwave's rapid heat to melt butter and sugars quickly, creating a dough that firms up as it cools. This method is especially appealing to home cooks seeking a warm treat without turning on the oven. According to Microwave Answers, microwaving cookies can be a time-efficient alternative with fewer dishes to wash, making weeknights easier. However, texture and thickness will differ from baked cookies, so understanding timing and dough moisture is key. In this block, we’ll explore how microwaving affects texture, how to optimize for softness, and how to prevent rubbery edges. You’ll also see how ingredient choices influence outcomes and how to tailor the process for single-serving portions or small batches. By the end, you’ll feel confident testing small tweaks to match your preferred chewiness and flavor balance.
The approach is not a direct oven replacement, but a deliberate trade-off: speed for some changes in texture. With careful handling, you can achieve warm, delicious cookies in minutes, suitable for a quick dessert, a study break, or a spontaneous treat. The Microwave Answers team emphasizes that the method shines when you want one or two cookies fast, rather than a full batch for a crowd. Understanding your microwave’s wattage and the dough’s moisture balance helps you dial in consistent results over time.
In practice, start with small test batches to map your wattage, plate, and dough formulation. Keep notes on how long you bake, how the center feels, and how the final texture holds after cooling. Over several trials, you’ll discover a dependable rhythm that fits your kitchen workflow and flavor preferences.
Key benefits of the Microwave Method
- Speed: A small batch can be ready in minutes, with minimal setup.
- Convenience: Fewer dishes and no oven preheat.
- Portion control: Perfect for single servings or small households.
- Flavor development: Butter and vanilla release aroma quickly for a satisfying bite.
- Safety and simplicity: No hot oven to manage, making it accessible for kitchens of all sizes.
For many home cooks, these advantages make the chocolate chip cookies microwave method a practical option for weeknights, after-school snacking, or last-minute dessert needs. Still, texture will differ from traditional oven-baked cookies, which informs how you adjust ingredients and timing to achieve your preferred chewiness.
Essential ingredients and substitutions
A compact dough relies on pantry staples. Common ingredients include all-purpose flour, granulated sugar, brown sugar, butter, eggs or egg yolk, vanilla, salt, and chocolate chips. Substitutions:
- Butter: You can use coconut oil for a dairy-free version, understanding the flavor difference.
- Flour: A small amount of almond or oat flour can be explored, but expect texture changes; test in a small batch first.
- Sugar: Balancing white and brown sugar influences chewiness; adjust to taste.
- Chips: Dark, milk, or white chips work; nuts can be added for crunch.
- Egg: If you skip the egg, add a tablespoon of milk or yogurt to help moisten the dough. This section helps you tailor the dough to dietary needs while keeping the recipe microwave-friendly.
Equipment and safety considerations
Use microwave-safe dishes only. A small, flat, microwave-safe plate or silicone baking mat works best for even heating. Avoid metal objects and foil, which can spark. Have mitts ready for hot plates and keep a close eye on times since microwaves vary in power. Keep kitchen safety top of mind when handling hot dough and plates. Finally, monitor moisture in the dough; too-dry dough yields rubbery cookies, while too-wet dough can spread excessively.
Pre-bake prep and dough behavior
Before you begin, set up a clean workspace and measure ingredients precisely. Because microwaves heat unevenly, dough resting for a minute or two after mixing can help hydrate flour and distribute moisture. The dough should be soft but cohesive; if it’s crumbly, add a touch more moisture (a few drops of milk) until it holds together. Resting also helps chips distribute more evenly and prevents clumping during microwaving.
Make-ahead and batch planning
If you want multiple cookies, portion the dough into evenly sized balls and chill briefly or freeze them on a tray before transferring to a bag. When ready, place each ball on a plate with space between them. Since microwaving dries out faster than oven baking, cooking in small batches ensures consistent texture across cookies and reduces overcooking risk.
Troubleshooting common issues
If cookies turn out flat or dry, evaluate moisture, flour amount, and microwave time. Rubber centers usually result from overcooking; short bursts in short intervals can prevent this. If edges burn or become hard, lower power or shorten time, and consider light diffusion by layering plates to diffuse heat. For a paler color, add a touch more sugar or adjust bake duration slightly.
Flavor and texture variations
Experiment with textures by adjusting fat and sugar balance or adding spices like cinnamon. Swapping a portion of butter for peanut butter or adding oats can yield chewy, hearty cookies. Finishing with a sprinkle of sea salt adds brightness, while a drizzle of melted chocolate can enhance sweetness. For a crisper bite, extend the bake time by small increments and test texture between intervals.
Storing and reheating leftovers
Microwave cookies are best enjoyed fresh, but they can be stored briefly in an airtight container. Reheat gently in short bursts (10–15 seconds) to re-soften without making them tough. If storing longer, freeze cookies and reheat one at a time to preserve texture and moisture.
Tools & Materials
- Mixing bowl(Medium size, 2-3 cups capacity for comfortable mixing.)
- Measuring cups and spoons(Include 1/4 cup and 1/8 tsp measurements for accuracy.)
- Whisk or silicone spatula(For mixing dry ingredients and scraping bowls.)
- Microwave-safe plate or silicone baking mat(Flat surface to prevent uneven cooking.)
- Parchment paper (optional)(Useful for easy cleanup or layering cookies.)
- Oven mitts or heat-resistant gloves(Hot plates will emerge; protect hands.)
- Timer(Crucial for tracking short bake bursts.)
Steps
Estimated time: 20-25 minutes
- 1
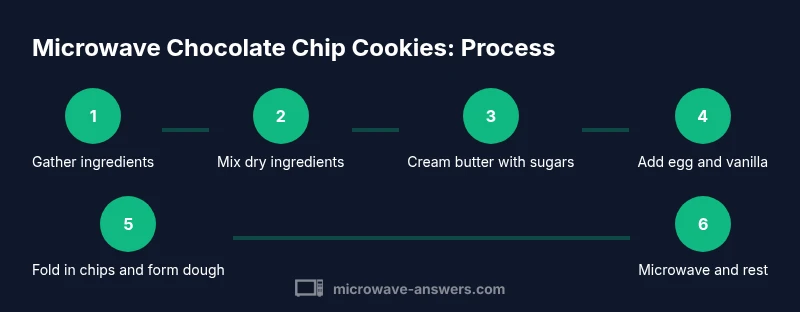
Gather ingredients and equipment
Set up your workspace with all ingredients measured and ready. Ensure you have a microwave-safe plate, a mixing bowl, measuring tools, and a spatula. Having everything at hand reduces mis-timing and makes the process smoother.
Tip: Group related items on a tray to speed up the workflow. - 2
Whisk dry ingredients
In a small bowl, whisk flour, salt, baking powder, and a pinch of sugar if using salted butter. This distributes leavening and salt evenly for consistent texture. Take a moment to sift if you have time to ensure lightness.
Tip: Sifting flour helps avoid dense cookies. - 3
Cream sugars with melted butter
Combine melted butter with both sugars until the mixture looks smooth and glossy. This helps trap moisture for a chewy interior. Do not overmix, which can incorporate too much air and affect density.
Tip: Use room-temperature butter when possible for better emulsification. - 4
Add wet ingredients
Beat in egg yolk (or whole egg) and vanilla until just combined. The dough should be cohesive but not overworked. If using an egg, ensure it’s well incorporated to prevent pockets of rawness.
Tip: Room-temperature egg improves blending and texture. - 5
Fold in chips and portion dough
Fold chocolate chips into the dough and portion into evenly sized balls on the plate. Leaving space between will prevent sticking and promote even heating.
Tip: Use a small scoop or two spoons for uniform portions. - 6
Microwave bake and rest
Microwave each portion in short bursts (about 20–40 seconds depending on wattage) until edges set but centers remain soft. Let cookies rest on the plate for a minute to finish cooking from residual heat.
Tip: If edges spread too much, chill briefly before baking in the next batch.
Common Questions
Can I use this method with any microwave?
Most microwaves can bake small cookies if you use correct time and a flat plate. Results vary by wattage and plate material, but a few test batches will map your sweet spot.
Yes—adjust timing for your wattage and plate.
Should I use butter or margarine?
Butter is preferred for flavor and texture. Margarine can be used for dairy-free needs but may alter mouthfeel and moisture.
Butter tastes best, but margarine works if needed.
Why are my cookies soft at first but hard after cooling?
Microwaves set fast; centers stay softer until they cool. Cooling firm up slightly, so aim for just-soft centers when hot and allow to rest.
They may feel soft right away but firm up as they cool.
Can I bake multiple cookies at once in a microwave?
Yes, but avoid crowding. Space cookies apart and bake in small batches to ensure even heating.
Bake in small batches for best results.
How long can I store microwaved cookies?
Best eaten fresh, but they can be stored briefly in an airtight container and reheated gently.
Store briefly and reheat in short bursts.
Are there safety concerns with microwaving cookies?
Always use microwave-safe dishes, avoid metal, and monitor times to prevent burns or splattering.
Stick to microwave-safe containers and watch the timer.
Watch Video
Main Points
- Start with a test batch to dial timing.
- Use microwave-safe dishes and watch power levels.
- Portion dough evenly for uniform results.
- Let cookies rest briefly after microwaving for best texture.