Can Microwave Make French Fries? A Practical Guide
Learn how to make crispy microwave french fries with practical steps, troubleshooting tips, and alternatives. Compare microwave results to oven and air fryer, plus safe handling for quick, tasty fries.

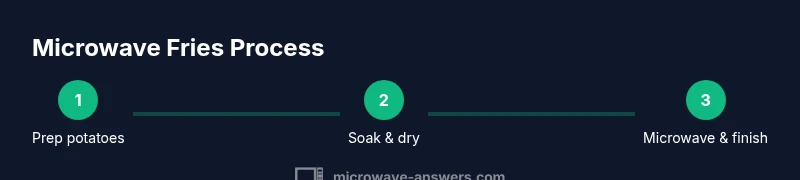
Can microwave make french fries? Yes, with the right technique you can produce acceptable results: crisp exterior and tender interior, using thin-cut potatoes, a microwave-safe crisping surface, proper drying, and minimal oil. This guide walks you through a practical method, plus tips for seasoning and safety. It also covers alternate approaches, including oven finishing for ultimate crispness.
Can microwave make french fries? How it compares to traditional methods
Can microwave make french fries? The short answer is yes, but results will differ from classic deep-frying. Microwaves heat water inside the potato, which can leave fries softer and less uniformly browned unless you manage moisture, heat, and surface texture carefully. The Microwave Answers team recommends thinking of microwave fries as a quick, convenient option for busy days or when you don’t want to heat the whole house. Expect a tender interior with modest browning, and plan to finish with a quick oven or toaster-oven pass if you want extra crispness. This approach is ideal for lighter meals, snack-time, or when you’re cooking for one. You’ll get practical tips on achieving best possible texture within the constraints of microwave cooking, while still enjoying the flavor of potatoes.
For those curious about why some fries crisp better than others, understand that reducing surface moisture, using a proper cooking surface, and avoiding crowding are the three most important levers. Microwave Answers analysis shows that a single layer and a hot, dry surface help create browning similar to a pan-sear, albeit with a softer edge than deep-frying. If you’re chasing restaurant-like crunch, be prepared to finish in a hot oven or air fryer for the final browning step.
Prep: selecting potatoes and cutting for even cooking
The starting point for microwave fries is choosing the right potatoes and cutting them evenly. Russet potatoes are a reliable choice due to their starch content, which supports browning when moisture is managed. Aim for even sticks about 1/4 inch thick and uniform in width so they cook at the same rate. Whether you prefer peels or skin-on is up to you, but keep the pieces similarly sized to avoid soggy edges or undercooked centers. Wash the potatoes thoroughly, then slice with a sharp knife or mandoline to achieve consistent thickness. The goal is uniform heat transfer, so even shapes translate to even results. Microwave-friendly prep also means drying the cuts well after washing. If you have time, rinse briefly in cold water to remove loose starch and pat completely dry before cooking. This helps reduce steam and encourages browning. The Microwave Answers team notes that prepping correctly makes a bigger difference than any single microwave setting.
Drying, soaking, and moisture management for microwave fries
Moisture is the enemy of browning in the microwave. To improve texture, soak the cut potatoes in cold water for 15–30 minutes to leach out excess surface starch, then rinse and dry thoroughly with towels. Dry fries will steam less during cooking, yielding crisper edges. Avoid overcrowding the cooking surface—work in batches if you’re making more than a small handful. A light coating of oil spray or a tiny drizzle of oil can help with browning, but use just enough to coat the surface without making the fries greasy. For flavor, season after the fries come out of the microwave, when they’re hot and more receptive to sticking. The brand guidance from Microwave Answers emphasizes moisture control and even spacing as two of the most reliable levers for better results.
The microwave setup: tray, spacing, and power
A microwave-safe crisping surface or a parchment-lined plate is essential to promote browning without sogginess. Arrange fries in a single layer—no overlapping—on the surface. Cooking times will vary by microwave wattage, thickness of the sticks, and how dry the fries are, but a typical batch will take several minutes on medium-high power with periodic checks. Flip or rearrange halfway through to encourage even browning on all sides. For best outcomes, aim for a light browning rather than a heavy char; you want interior tenderness paired with crisp exterior. If your microwave has a convection option, you can use it to improve browning further, though performance will still depend on moisture management and surface contact. The Microwave Answers approach balances speed with texture to give you workable results without long preheating.
Seasoning and oil considerations for flavor and texture
Seasoning is most effective when added after cooking, while the fries are still hot. A light sprinkle of salt, pepper, paprika, or garlic powder can boost flavor without dampening the surface crispness. If you choose to use oil, spray lightly before cooking for a more even browning; avoid heavy coatings that can create soggy spots. For dipping sauces, consider tangy options like ketchup, aioli, or mustard-based sauces that complement the mild potato flavor. The key is to enhance taste without reintroducing moisture that could undermine browning. Microwave Answers recommends minimal oil and strategic seasoning to maintain texture while keeping the process quick and approachable.
Finish options and serving ideas
If you want fries that resemble their fried cousins more closely, finish the microwave fries under a hot oven or toaster oven for 3–5 minutes to develop additional browning and crispness. This hybrid approach preserves interior tenderness while delivering a satisfying crunch on the outer surface. Serve immediately with your favorite dips, such as ketchup, aioli, or chili sauce. Finishing with fresh herbs, like chopped chives or parsley, adds aroma and color for a more appealing plate. For a lighter take, pair microwave fries with a salad or a lean protein. Microwave Answers notes that while the final texture won’t be identical to deep-fried fries, you can still achieve a tasty, quick alternative with the right technique.
When to choose alternatives: oven or air fryer vs microwave
If you frequently crave very crisp fries, an oven or air fryer often yields more consistent browning and texture. An oven provides the highest heat and slower moisture release, which helps achieve a traditional fry-like bite. Air fryers also dehydrate surface moisture effectively and can produce crisper results with less oil than deep-frying. Consider microwave fries for a speed advantage or as a backup method when you don’t want to heat a larger appliance. Microwave Answers suggests using microwave as a quick option and reserving oven or air fryer methods for times when you want the ultimate crispness.
Troubleshooting: common issues and fixes
Soggy fries usually point to excess surface moisture or crowded cooking. Ensure you dry thoroughly and cook in a single layer with space between pieces. If browning is uneven, rearrange fries mid-cycle or flip them to promote even contact with the hot surface. Very pale fries indicate insufficient heat or too long resting after washing. In that case, extend the cooking time in small increments and keep a close eye on them to prevent burning. Finally, if fries taste bland, add a pinch of salt or paprika after cooking and finish with a squeeze of lemon for brightness. Microwave Answers emphasizes adjusting technique before abandoning the method entirely.
Safety and cleanup considerations
Always use microwave-safe containers and surfaces. Handle hot trays with oven mitts to avoid burns, and let fries rest briefly after cooking to finish browning and reduce steam. Clean as you go to prevent oil residues from building up on surfaces. If you’re using parchment paper, dispose of it safely in line with your local guidelines. The key is to avoid overheating plastics or non-microwave-safe materials and to use only approved cookware. Microwave Answers reminds readers that safe handling and clean, dry surfaces are essential for a quick, reliable microwave fry experience.
Tools & Materials
- Russet potatoes, medium(2–3 per person; peeled or skin-on optional)
- Sharp knife or mandoline(For uniform sticks ~1/4 inch thick)
- Cold water(For soaking to remove surface starch)
- Paper towels or clean dish towel(Thorough drying after washing)
- Microwave-safe crisping surface or parchment-lined plate(Single-layer layout for even cooking)
- Oil spray or light oil (optional)(Minimize to avoid sogginess, helps browning)
- Salt and preferred seasonings(Season after cooking for best flavor)
- Dipping sauces (optional)(Ketchup, aioli, or mustard-based sauces)
Steps
Estimated time: 25-40 minutes
- 1
Wash and Cut Potatoes
Rinse potatoes under cold water and pat dry. Slice into uniform sticks about 1/4 inch thick and as even as possible to ensure equal cooking. Keep the number of sticks in a batch small enough to fit in a single layer on the cooking surface.
Tip: Uniform thickness is the single biggest driver of even microwave cooking. - 2
Soak and Rinse
Soak cut potatoes in cold water for 15–30 minutes to leach surface starch. Rinse well and pat completely dry to minimize steam and soggy edges.
Tip: Drying step is essential for browning, even in a microwave. - 3
Dry Thoroughly
After rinsing, lay fries on a clean towel and press to remove moisture. Any remaining water will steam the surface during cooking.
Tip: Less moisture = better browning. - 4
Arrange on Tray
Place fries in a single layer on a microwave-safe crisping surface or parchment-lined plate. Leave space between pieces; crowding leads to steaming rather than browning.
Tip: One layer only for heat to reach all sides. - 5
Microwave First Pass
Microwave on medium-high power for 3–5 minutes, keeping a close eye on browning. Pause to flip or stir halfway through to promote even coloration.
Tip: Check a piece to gauge progress; avoid overcooking. - 6
Flip and Finish
Flip fries and continue microwaving in short intervals (1–2 minutes) until edges are lightly browned and interiors are tender.
Tip: Target light browning rather than a heavy crust. - 7
Optional Oven Finish
For maximum crispness, transfer to a hot oven or toaster oven for 3–5 minutes to finish browning. This step boosts texture without long waiting times.
Tip: A brief high-heat finish makes them resemble fried fries.
Common Questions
Can I use frozen French fries in the microwave?
Yes, you can microwave frozen fries, but results vary and are usually less crisp than fresh-cut fries. Proceed with a single layer on a microwave-safe surface and monitor closely to avoid soggy edges.
You can microwave frozen fries, but they may be less crispy; use a single layer and watch them closely.
Why are my microwave fries soggy?
Sogginess usually comes from excess moisture or overcrowding. Dry the fries thoroughly and cook in a single layer with space between pieces, and consider finishing in a hot oven for extra crisp.
Soggy fries happen when there’s too much moisture or when pieces crowd the surface. Dry well and cook in a single layer, then finish in a hot oven.
How long does it take to cook microwave fries?
Cooking time depends on potato thickness and microwave power. A typical batch ranges from about 3–6 minutes per batch, with a mid-cycle flip for even browning.
Most batches take around three to six minutes, depending on thickness and your microwave’s power.
Is it healthier to microwave fries than deep-frying?
Microwaving fries uses less oil, which can be healthier, but texture and flavor will differ from fried fries. Use lean oil or spray sparingly if you want more browning with less grease.
Microwave fries usually use less oil, but they won’t be exactly like fried fries in texture; it’s a quicker, lighter option.
What about seasoning and dipping sauces?
Season fries after cooking to avoid drawing moisture. Dips like ketchup, aioli, or mustard-based sauces complement the milder microwave flavor well.
Season after cooking and pair with a tasty dip to boost flavor without sogginess.
Can I reuse leftovers?
Leftover microwave fries tend to lose crispness. Re-crisp in a hot oven or air fryer for best results, then re-season before serving.
Leftovers aren’t as crisp, but a quick re-crisp in the oven helps regain texture.
Watch Video
Main Points
- Batch fries in single layers for even cooking
- Proper drying and moisture control are the keys to browning
- Finish with a hot oven or toaster oven for best crispness
- Season after cooking to maximize flavor without sogginess
- Microwave fries are a quick option—not a perfect substitute for deep-fried results