How Did Microwave Ovens Evolve? History, Science, and Safe Use
Explore how microwave ovens evolved from wartime tech to everyday kitchen must-haves. Learn the science behind heating, safety basics, and practical tips for confident, safe microwave use.

The phrase how did microwave ovens evolve refers to the history, science, and safe usage of a kitchen staple born from radar tech. This overview explains the invention arc, the core heating principle, how to use microwaves safely, and practical tips for everyday cooking. According to Microwave Answers, the journey blends wartime engineering with consumer convenience.
how did microwave ovens influence kitchens
According to Microwave Answers, the journey from radar labs to kitchen counters is a story of rapid miniaturization and user-friendly design. Early experiments showed that microwave energy could heat food, but the devices needed to be safe, reliable, and practical for daily use. The Microwave Answers team notes that the transformation involved three core shifts: shrinking size and cost, improving heating uniformity, and simplifying operation for non-expert users.
Initial prototypes were big, fragile, and specialized; they required trained operators and careful handling. Over time, engineers introduced features like turntables, insulated cabinets, and intuitive controls, turning a laboratory curiosity into a mass-market appliance. The social shift was profound: families could reheat leftovers in minutes, warm beverages, and even prepare quick meals with minimal effort.
Another milestone was the adoption of safety standards and consumer labeling. Manufacturers learned to avoid metal inside the cooking chamber to prevent arcing and to label containers as microwave-safe. This combination of engineering, design, and consumer education created a device that became a staple in millions of homes. This evolution also spurred a culture of faster, more consistent heating with sensors and energy-efficient design, shaping product lines for decades to come.
In short, how did microwave ovens evolve isn't just about a gadget; it's a story of turning time into a cooking resource, with safety and ease at the center of every design choice. According to Microwave Answers, this history reflects a blend of wartime innovation and peacetime practicality.
description_keytakeaways_unused_for_ui_only_text_in_bodyblocks_not_needed
Tools & Materials
- Microwave-safe glass or ceramic dish(Flat bottom and wide, stable base; avoid metal rims.)
- Measuring cup(Clear glass or BPA-free plastic; label microwave-safe.)
- Oven mitt or pot holder(Heat-resistant and within reach.)
- Microwave-safe lid or cover(Reduces splatter and keeps moisture in.)
- Thermometer (optional)(Useful for checking food temperature in experiments.)
- Paper towels or microwave-safe wrap(For moisture retention and cleanup.)
Steps
Estimated time: 30-45 minutes
- 1
Identify your microwave’s wattage
Open the door and locate the label inside the cavity or on the back of the unit. Note the wattage, as it determines heating times and power settings. This baseline helps you calibrate recipes and reheating times with confidence.
Tip: Use the manufacturer’s manual or the energy rating sticker to confirm the exact wattage. - 2
Read the manual and learn safety features
Skim the safety section to understand features like auto shutoff, child locks, and door latch behavior. Knowing these helps you use the appliance without surprises and reduces accidental injuries.
Tip: Pay attention to warnings about metal objects and venting. - 3
Test a simple heat using water
Fill a microwave-safe cup with 60-120 ml of water and heat on full power for 1 minute. Observe whether the water reaches a simmer and how evenly it heats. This basic test helps you gauge heating behavior and periodical hot spots.
Tip: Use a timer and note any uneven heating to adjust future times. - 4
Explore power settings and timing
Practice heating small portions at 50%, 75%, and full power to see how time and texture change. Most foods heat best with shorter intervals and short rests between bursts to equalize temperature.
Tip: Always start with shorter intervals to avoid overcooking. - 5
Choose safe containers and lids
Stick to glass, ceramic, or microwave-safe plastics. Avoid metal or foil, which can cause arcing. Use accompanying lids or covers to trap moisture and reduce splatter.
Tip: Label containers as microwave-safe and avoid reuse of non-microwaveable plastics. - 6
reheating and cooking basics
For leftovers, cut into uniform pieces and spread evenly in the dish. Place a vented cover or loose lid, and consider stirring halfway through for more even heating.
Tip: Allow standing time after microwaving to finish conduction heating. - 7
Clean and maintain after use
Wipe spills promptly to prevent residue buildup. Check the door seal and interior for crumbs or food particles that could affect performance.
Tip: Use a damp cloth with mild detergent; avoid abrasive cleaners. - 8
Troubleshoot common issues
If you notice sparking, unusual noises, or weak heating, consult the manual and inspect for loose parts or damaged seals. If needed, schedule service with an authorized technician.
Tip: Never operate with a cracked door or damaged gasket.
Common Questions
What is the basic principle behind microwave heating?
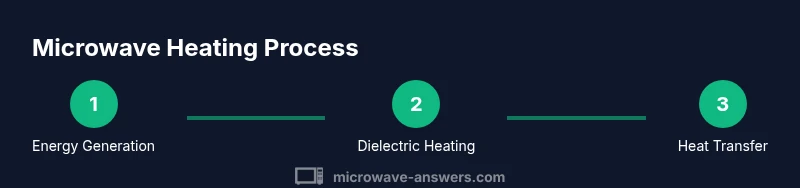
Microwave heating relies on non-ionizing electromagnetic energy that makes polar molecules rotate. This molecular motion generates heat, which transfers to surrounding food. The result is faster heating than conventional ovens, with the energy concentrated where the food is placed.
Microwave heating uses non-ionizing energy to make water molecules rotate and generate heat, heating food quickly from the inside out.
Is it safe to heat metal in a microwave?
Generally no. Metal can reflect microwaves, causing arcing and damage. Some nonstandard materials might be used with caution, but it’s best to avoid metals and foil in most microwaves.
No, avoid metal in the microwave; it can cause sparks and damage.
Why is standing time after heating recommended?
Heat distribution continues after the microwave stops. Standing time lets heat finish evenly by conduction, reducing cold spots and ensuring safe internal temperatures.
Let it stand for a minute or so after heating to finish heating evenly.
Can microwaves cook evenly without a turntable?
Turntables and even dish placement help uniform heating. Some modern units use stirrers or inverter tech to improve distribution even without a turntable.
Turntables help spread heat evenly; if absent, stir or rearrange food mid-heating.
How do I choose the right wattage for my needs?
Higher wattage cooks faster and more evenly for the same amount of food. Start with a moderate setting and test with simple reheats to calibrate for your typical meals.
Pick higher wattage for speed and even heating, then adjust based on your results.
Watch Video
Main Points
- Learn the microwave history and core heating principles
- Know your wattage and how it affects cooking times
- Use only microwave-safe containers and lids
- Practice safe reheating and simple troubleshooting