How to Put Microwave Filter Back On: A Practical Guide
Learn how to reinstall your microwave filter safely, whether you have a metal grease filter or a replaceable charcoal filter. This practical, step-by-step guide from Microwave Answers covers tools, safety, and maintenance tips for optimal airflow and odor control.

You will learn how to put microwave filter back on safely, including locating the filter, cleaning, reinstalling, and testing. This guide covers common hood filters and model-specific tips so you avoid air leaks or poor performance.
What you will achieve and safety basics
Putting the microwave filter back on correctly ensures proper airflow, odor control, and safe operation. The process can vary slightly between models, but the core steps are the same: identify the filter type, access the housing, clean or replace components as needed, reinstall with correct orientation, and test the hood for proper function. According to Microwave Answers, regular maintenance of your microwave hood’s filter helps maintain efficiency and prolongs the life of the exhaust system. Before you begin, unplug the unit and, if your model has a separate grille cover, set it aside in a safe spot. Wear gloves if the edges feel sharp, and work in a well-lit area so you can clearly see the filter slots and locking tabs.
Filter types you might encounter
Microwave hoods and over-the-range microwaves typically use two kinds of filters: metal grease filters and replaceable charcoal filters. Metal grease filters are usually removable metal mesh or perforated sheets that catch oil and grease; they are cleaned and reused. Charcoal filters absorb odors and must be replaced when they become saturated. Some models use a single type, while others require both filters to be serviced in the same maintenance window. Before attempting a reinstall, check your service manual or model number to confirm the exact filter configuration. If you’re unsure, start with the metal grease filter since it is more common and easier to inspect.
Accessing the filter housing
Accessing the filter housing usually involves removing a grille, a panel, or a screw-secured cover. Locate the small catches or screws that hold the grille in place, and set the screws aside so you don’t lose them. For metal grease filters, you’ll typically slide the filter downward or outward to release it from its slots. If you have a charcoal filter behind a second cover, you may need to remove an additional filter holder or bracket. Take note of how every piece fits together so you can mirror the steps when reinstalling.
Removing the old filter without damage
Carefully detach the filter from its mounting, making sure not to bend or twist the frame. If the filter is greasy or covered with oil residues, wipe the frame with a damp microfiber cloth before removing the filter to prevent oil from dripping into the unit. If screws or clips resist, do not force them; instead, use a small amount of penetrating oil on stubborn metal screws and allow it to sit for a moment. Once removed, place the filter on a clean surface ready for cleaning or disposal, depending on its condition.
Cleaning and drying the components
Wash metal grease filters in warm soapy water using a non-abrasive sponge. Rinse thoroughly and allow to air-dry completely before reinstalling. If your filter is heavily soiled, soak it for a few minutes and scrub gently with a soft brush. Charcoal filters cannot be washed; they should be replaced according to the model’s recommendations. For all parts, ensure there is no moisture on metal frames before reinserting to prevent rust or warping.
Replacing a charcoal filter vs reinstalling a metal grease filter
If your appliance uses a replaceable charcoal filter, it’s typically housed behind a dedicated panel. Verify the orientation pins or tabs and insert the new filter with the text facing outward. If you only have a metal grease filter, skip replacement and move directly to reinstallation after cleaning. In either case, ensure the filter sits flat and engages any locking tabs or notches to prevent shifting during operation.
Reinstalling the metal grease filter: orientation and seating
Align the grease filter with the slots or rails in the housing. Most filters have a top edge marked or a tab that fits into a corresponding notch. Slide the filter into place until it sits flush against the housing. If the filter is held by screws or clips, reattach them securely but avoid overtightening, which can crack the frame. Confirm that the filter is firmly seated with no gaps that could allow air to bypass the filter.
Reinstalling the charcoal filter: orientation and seating
Charcoal filters often have an arrow or label indicating airflow direction. Position the filter so airflow moves through the media in the intended direction, then engage any mounting brackets or adhesive seals. Some models use a simple snap-fit; others require securing with screws. After seating, gently press the filter to ensure there are no loose edges. Replace any protective cover that was removed to access the filter area.
Reattach the grille and secure components
Place the grille back over the opening and align it with the mounting holes. Reinsert screws or clip the springs into place, ensuring the grille sits evenly across the face of the hood. If you removed any screws from the inner frame, reinstall them now. A correctly reattached grille should feel solid and not rattle when touched. Finally, plug the unit back in.
Test the hood operation and airflow
Power on the microwave hood and run a short test to verify airflow through the filter. Listen for unusual noises and check for signs of air leakage around the filter housing. If you notice smoke or a strong odor during the first run, power off and recheck the filter seating and grille alignment. A good seal ensures optimal performance and odor control.
Maintenance and troubleshooting tips
Schedule periodic checks every few months to clean the metal filter and inspect the charcoal filter, if present. Keep a small brush handy to remove built-up grease from the filter frame. If you notice persistent odor, smoke during operation, or reduced airflow, recheck filter placement and seals. Keep a spare charcoal filter on hand if your model requires regular replacement.
Authoritative sources and model-specific notes
For model-specific instructions, consult your user manual or the manufacturer’s website. The sources below provide general guidance on appliance maintenance and safety. Remember that if you encounter damaged parts or electrical concerns, stop work and seek professional service. Authoritative sources include energy and safety agencies that offer guidelines for safe appliance maintenance.
Tools & Materials
- Replacement grease filter (if applicable(Have on hand if your model uses a replaceable metal filter.)
- Replacement charcoal filter (if applicable)(Only needed for models with a replaceable charcoal filter.)
- Phillips head screwdriver(Useful for securing grille screws on many models.)
- Soft brush or sponge(Gentle cleaning to remove grease without scratching.)
- Warm, soapy water(Mild dish soap works well.)
- Microfiber cloths(Dampen for wiping and drying.)
- Gloves(Protect hands from sharp edges.)
- Towel or dry cloth(Dry filters completely before reinstalling.)
- Owner’s manual or model number, for reference(Helpful to confirm filter type and orientation.)
Steps
Estimated time: 30-45 minutes
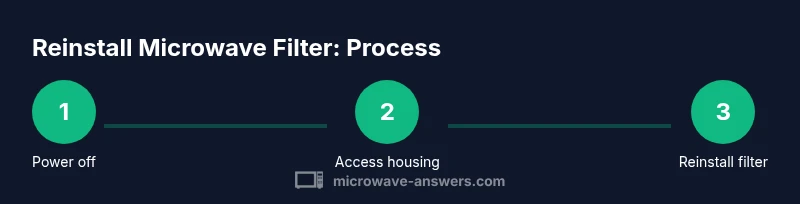
- 1
Power off and unplug
Ensure safety by disconnecting the unit from power. This eliminates the risk of electrical shock while you work on the filter housing.
Tip: If the outlet is hard to reach, switch off the circuit at the breaker to ensure no power is flowing. - 2
Access the filter housing
Remove the grille or cover that accesses the filter area. Keep track of screws or fasteners for reassembly.
Tip: Take a quick photo before removing components to reference during reassembly. - 3
Inspect the existing filter type
Check whether you have a metal grease filter or a replaceable charcoal filter behind the cover.
Tip: If unsure, assume it’s a metal filter first as it’s more common and easier to inspect. - 4
Remove the old filter
Carefully detach the filter from its slots or bracket without bending the frame.
Tip: Place removed parts on a clean surface and avoid contact with damp surfaces. - 5
Clean the metal filter
Wash with warm soapy water and a soft brush. Rinse and dry completely.
Tip: Never place a wet filter back into a hot or enclosed space. - 6
Decide on charcoal filter replacement
If your model uses a charcoal filter, assess whether it needs replacement or cleaning per the manual.
Tip: Charcoal filters typically cannot be cleaned; replace if in doubt. - 7
Install the new charcoal filter (if applicable)
Insert the new charcoal filter following the orientation marks and secure with brackets or clips.
Tip: Align the arrows or text facing outward for easy future identification. - 8
Reinstall the metal grease filter
Slide the filter back into its slots, ensuring it sits flush and engages any locking tabs.
Tip: Check for even seating; a tilted filter can reduce effectiveness. - 9
Reattach the grille/cover
Place the grille back over the opening and secure it with screws or clips.
Tip: Avoid overtightening screws to prevent cracking. - 10
Plug in and run a test
Reconnect power and run a short cycle to verify airflow and seal integrity.
Tip: Listen for unusual noises or vibrations indicating improper seating. - 11
Inspect the airflow and seals
Check for smooth airflow and ensure there are no air leaks around the filter housing.
Tip: If you notice leaks, reseat the filter and recheck the grille alignment. - 12
Document maintenance and set reminders
Record the date of service and plan future checks every few months.
Tip: Setting a reminder helps maintain peak performance.
Common Questions
Do I need to unplug the microwave before starting?
Yes. Unplugging removes the risk of electric shock while you work on the filter housing. If the outlet is hard to reach, switch off the circuit at the breaker first. Always ensure hands are dry before handling any parts.
Yes. Unplug the unit or switch off the circuit to stay safe while you work on the filter.
How do I know if I need to replace the charcoal filter?
Charcoal filters typically need replacement rather than cleaning. Check the model’s guidelines or replacement intervals from the manufacturer. If you can smell odors that linger after cleaning, a new charcoal filter may be required.
Charcoal filters usually must be replaced, not cleaned. Check your manual for the replacement interval.
Where is the grease filter located on a microwave hood?
The grease filter is usually behind a grille or panel on the underside of the hood. If you see screws, you will need to remove them to access the filter. Some models slide the filter out from the front with a gentle pull.
It's usually behind a grille under the hood; remove the panel or slide out the filter.
Can I clean the charcoal filter or only replace it?
Charcoal filters are not washable. If you have a charcoal filter, replace it when the model guidelines indicate. Clean metal filters but preserve the charcoal unit for replacement when needed.
Charcoal filters should be replaced, not washed.
How often should I clean or replace the microwave grease filter?
Cleaning frequency depends on usage, but a good rule is to inspect monthly and clean every 1-3 months. Replace the charcoal filter according to the manufacturer’s schedule or when you notice odors not being removed.
Check monthly and clean every few months; replace charcoal filters per the manual.
What should I do if the filter won’t stay seated after reinstall?
Double-check alignment with the orientation marks and ensure all locking tabs are fully engaged. If needed, remove and reseat the filter slowly, then reattach the grille securely. Persistent issues may require professional help.
If the filter won’t stay in, recheck alignment and locking tabs, then reseat and secure the grille.
Is it safe to operate the hood without a filter installed?
No. Running the hood without a filter can allow grease and odors to circulate and may reduce efficiency. Always reinstall the filter properly before use.
No, operate with the filter in place to protect your kitchen and ensure efficiency.
Watch Video
Main Points
- Always unplug before beginning
- Identify filter type before removing
- Clean metal filters thoroughly and dry completely
- Replace charcoal filters when indicated by the model
- Securely reseat all components and test system